
503 specifications
The MTD 503 is a versatile and innovative piece of machinery designed for a variety of agricultural and gardening applications. Known for its durability and efficiency, the MTD 503 has become a favorite among both professional landscapers and home users. This powerful equipment boasts numerous features and technologies that enhance its performance and user experience.One of the standout characteristics of the MTD 503 is its robust engine, which typically comes in a 4-stroke configuration. This design not only ensures superior power output but also contributes to lower emissions and reduced fuel consumption. The engine is paired with an ergonomic design that allows for easy handling and maneuverability, making it suitable for different types of terrain.
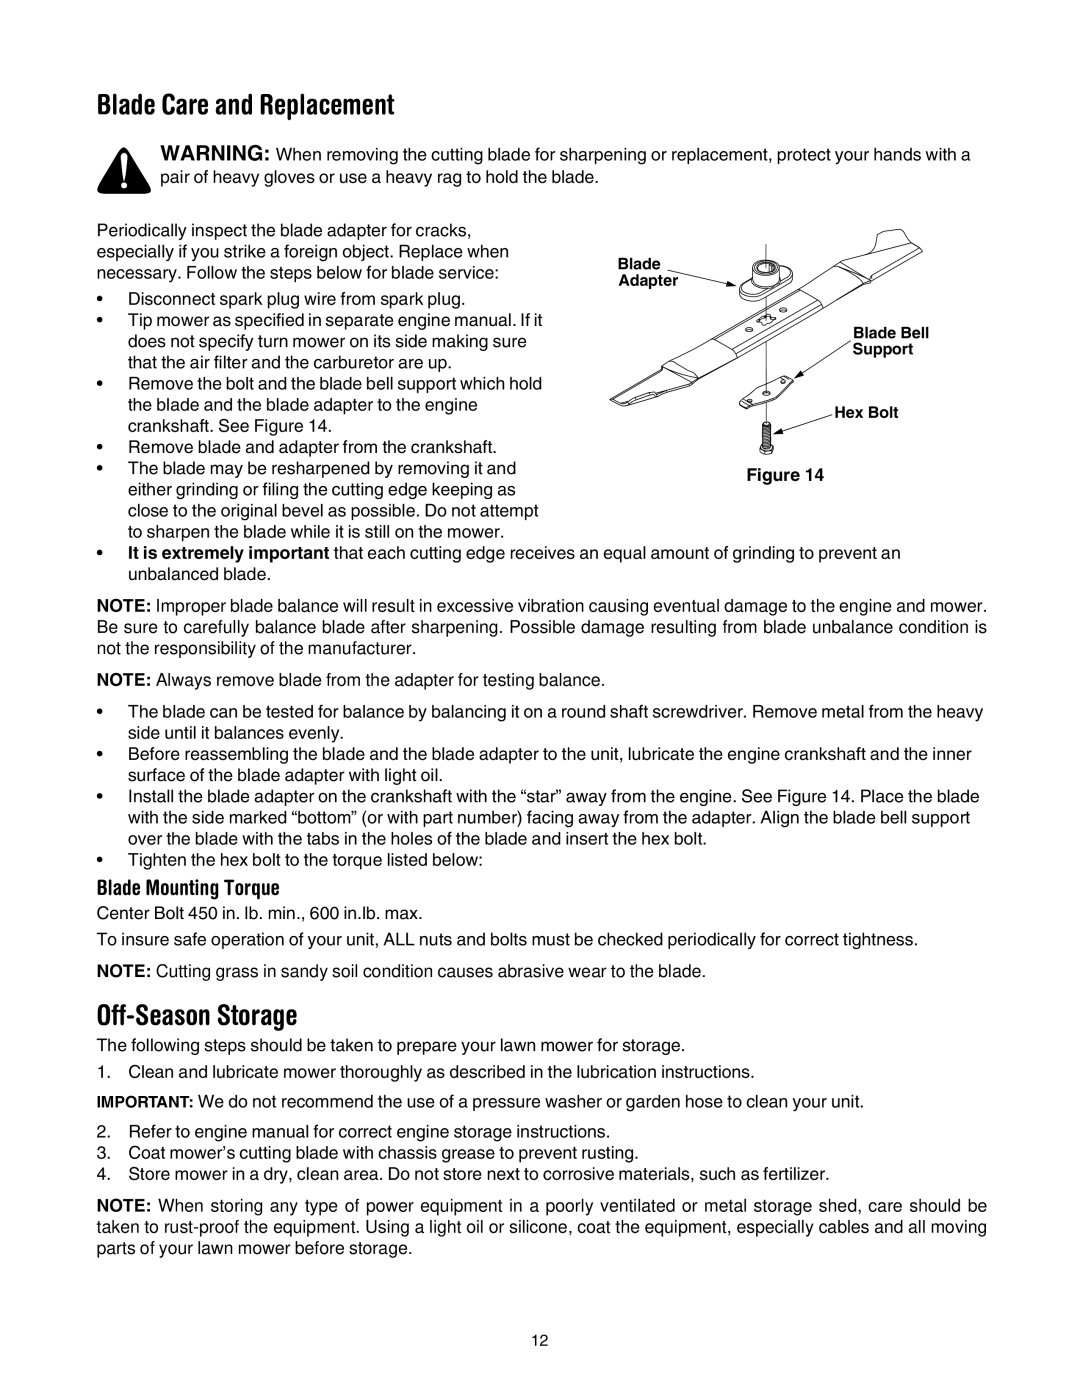
The MTD 503 is equipped with a wide cutting deck that allows for efficient grass cutting, while its adjustable height settings cater to various lawn types and preferences. Users can effortlessly switch between different cutting heights, ensuring precision and an aesthetically pleasing lawn finish. Additionally, the model often features a mulching function, enabling the user to recycle grass clippings back into the lawn, promoting a healthier green space.
In terms of technology, the MTD 503 is designed with user-friendly controls that enhance the operational experience. The intuitive dashboard provides easy access to all essential functions, allowing users to operate the machine with minimal complexity. Safety features, such as automatic shut-off systems and easy-to-reach emergency stops, are integrated into the design, ensuring that user safety is prioritized at all times.
Durability is another key characteristic of the MTD 503. Built with high-quality materials, it withstands harsh conditions and requires minimal maintenance, offering long-term reliability. The wheels are constructed for superior traction and stability, making it well-suited for various landscaping tasks, from mowing to hauling equipment.
In conclusion, the MTD 503 stands out in the realm of gardening and landscaping equipment due to its powerful engine, thoughtful design, and advanced technology. Its multiple features make it a practical choice for users seeking efficiency and ease of use in their gardening endeavors. Whether tending to residential lawns or managing larger landscapes, the MTD 503 is equipped to deliver exceptional results time and again.