
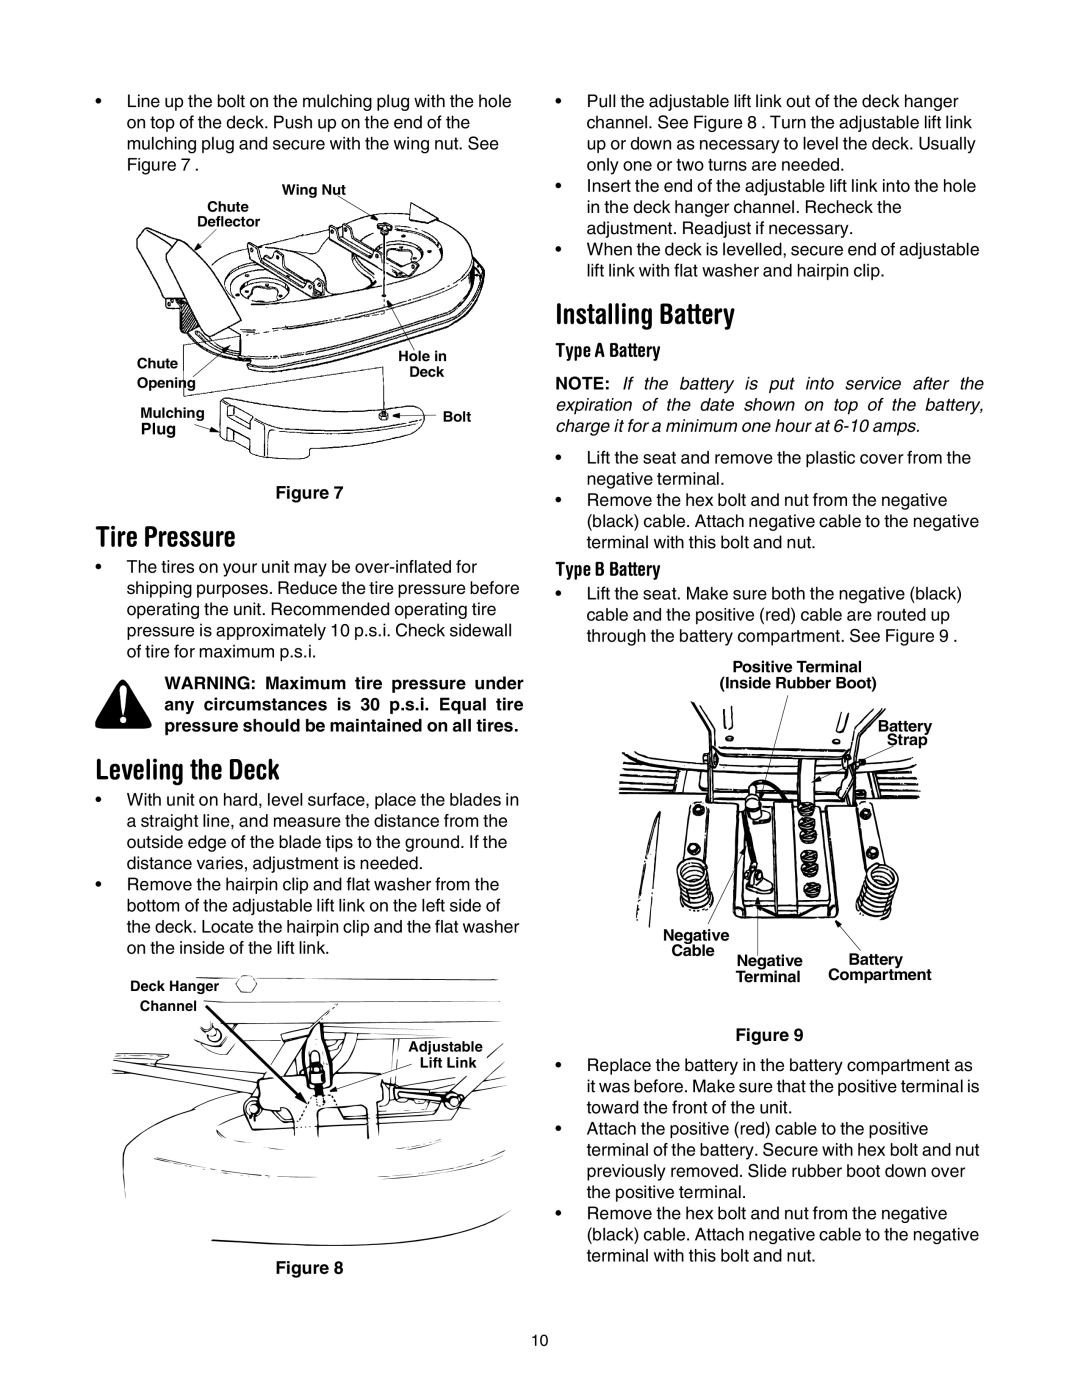
690 through 699 specifications
MTD (Motor Technology Division) has developed a remarkable series of compact tractors under the model numbers 690 through 699, which have gained popularity among agricultural professionals and hobby farmers alike. These models are designed to provide powerful, efficient, and versatile performance for a variety of farming tasks.One of the standout features of the MTD 690 to 699 series is their ergonomic design, which emphasizes operator comfort and ease of use. The tractors are equipped with adjustable seats, intuitive controls, and clear visibility from the operator’s station, ensuring that users can work for extended periods without fatigue. This focus on comfort makes these tractors suitable for both full-time farmers and those who engage in part-time farming or landscaping.
In terms of technology, this series is fitted with advanced engine options that deliver impressive horsepower. The engines are designed for optimal fuel efficiency, reducing operational costs and environmental impact. Additionally, features like electronic fuel injection enhance performance, ensuring reliable startup and smooth operation under varying load conditions.
The transmission systems found in the MTD 690 to 699 models are engineered for versatility. Many models are equipped with hydrostatic transmissions, allowing for seamless speed and directional changes without the need for clutch engagement. This capability is particularly useful when maneuvering in tight spaces or performing tasks that require precision.
Another defining characteristic of this series is their hydraulic systems, which provide powerful lifting capabilities. This makes it easier to attach and operate a wide range of implements and attachments, from loaders to mowers, enhancing productivity on the farm. The hydraulic systems are designed with user-friendliness in mind, allowing for quick attachment changes that reduce downtime during chores.
Durability is also a hallmark of MTD's 690 through 699 tractors. Constructed with robust materials and designed to withstand harsh working conditions, they feature reinforced frames and components that provide longevity and reliability. This durability ensures that the tractors can handle demanding tasks day in and day out, making them a dependable asset for any agricultural operation.
In summary, the MTD 690 through 699 series offers a blend of comfort, efficiency, and technology, making them an attractive option for anyone looking to enhance their farming capabilities. With powerful engines, user-friendly controls, advanced hydraulic systems, and exceptional durability, these compact tractors are poised to meet the needs of today’s diverse agricultural landscape.