3
Setup and
Adjustment
Your mower is
shipped with the
handle in the higher
height position.
Each end of the
lower handle must
be placed in the
same position on the mounting brackets.
IMPORTANT: This unit is shipped without gasoline or oil in the engine. Fill up gasoline and oil as instructed in the accompanying en- gine manual BEFORE operating your mower.
NOTE: This Operator’s Manual covers several models. Lawn Mower features vary by model. Not all features discussed (or engines pictured) in this manual are applicable to all Lawn Mower models.
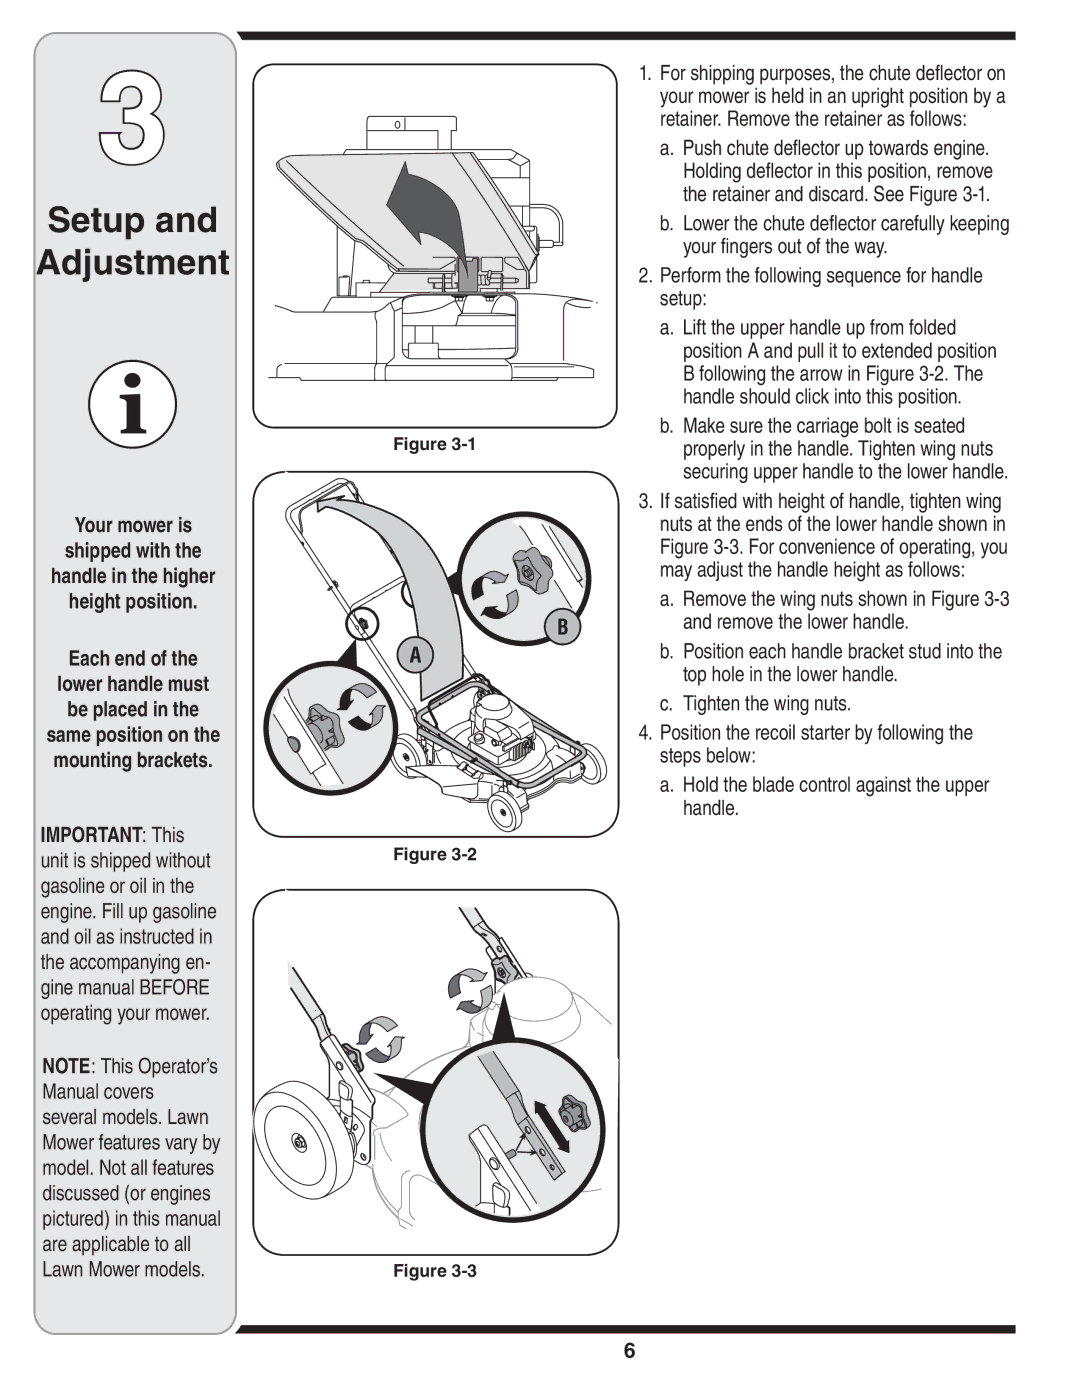
1. | For shipping purposes, the chute deflector on |
| your mower is held in an upright position by a |
| retainer. Remove the retainer as follows: |
| a. Push chute deflector up towards engine. |
| Holding deflector in this position, remove |
| the retainer and discard. See Figure |
| b. Lower the chute deflector carefully keeping |
| your fingers out of the way. |
2. | Perform the following sequence for handle |
| setup: |
| a. Lift the upper handle up from folded |
| position A and pull it to extended position |
| B following the arrow in Figure |
| handle should click into this position. |
Figure | b. Make sure the carriage bolt is seated |
properly in the handle. Tighten wing nuts | |
| securing upper handle to the lower handle. |
3. | If satisfied with height of handle, tighten wing |
| nuts at the ends of the lower handle shown in |
| Figure |
| may adjust the handle height as follows: |
| a. Remove the wing nuts shown in Figure |
B | and remove the lower handle. |
A | b. Position each handle bracket stud into the |
| top hole in the lower handle. |
c. Tighten the wing nuts.
4. Position the recoil starter by following the steps below:
a. Hold the blade control against the upper handle.
Figure
Figure
