
i1046, i1050 specifications
The MTD i1046 and i1050 are notable additions to the MTD lineup, designed specifically for efficiency and ease of use in various landscaping tasks. These versatile machines are engineered to handle a range of applications, making them ideal for both residential and commercial users.The MTD i1046 is equipped with a robust 18 HP engine, providing ample power for tackling tough mowing jobs. Its 46-inch cutting deck is designed for enhanced maneuverability, allowing users to navigate tight spots and corners with ease. The deck also features a mulching capability, which helps to naturally fertilize lawns while reducing the need for bagging clippings. Additionally, the i1046 boasts an automatic transmission that adjusts speed seamlessly, providing an intuitive driving experience for operators of all skill levels.
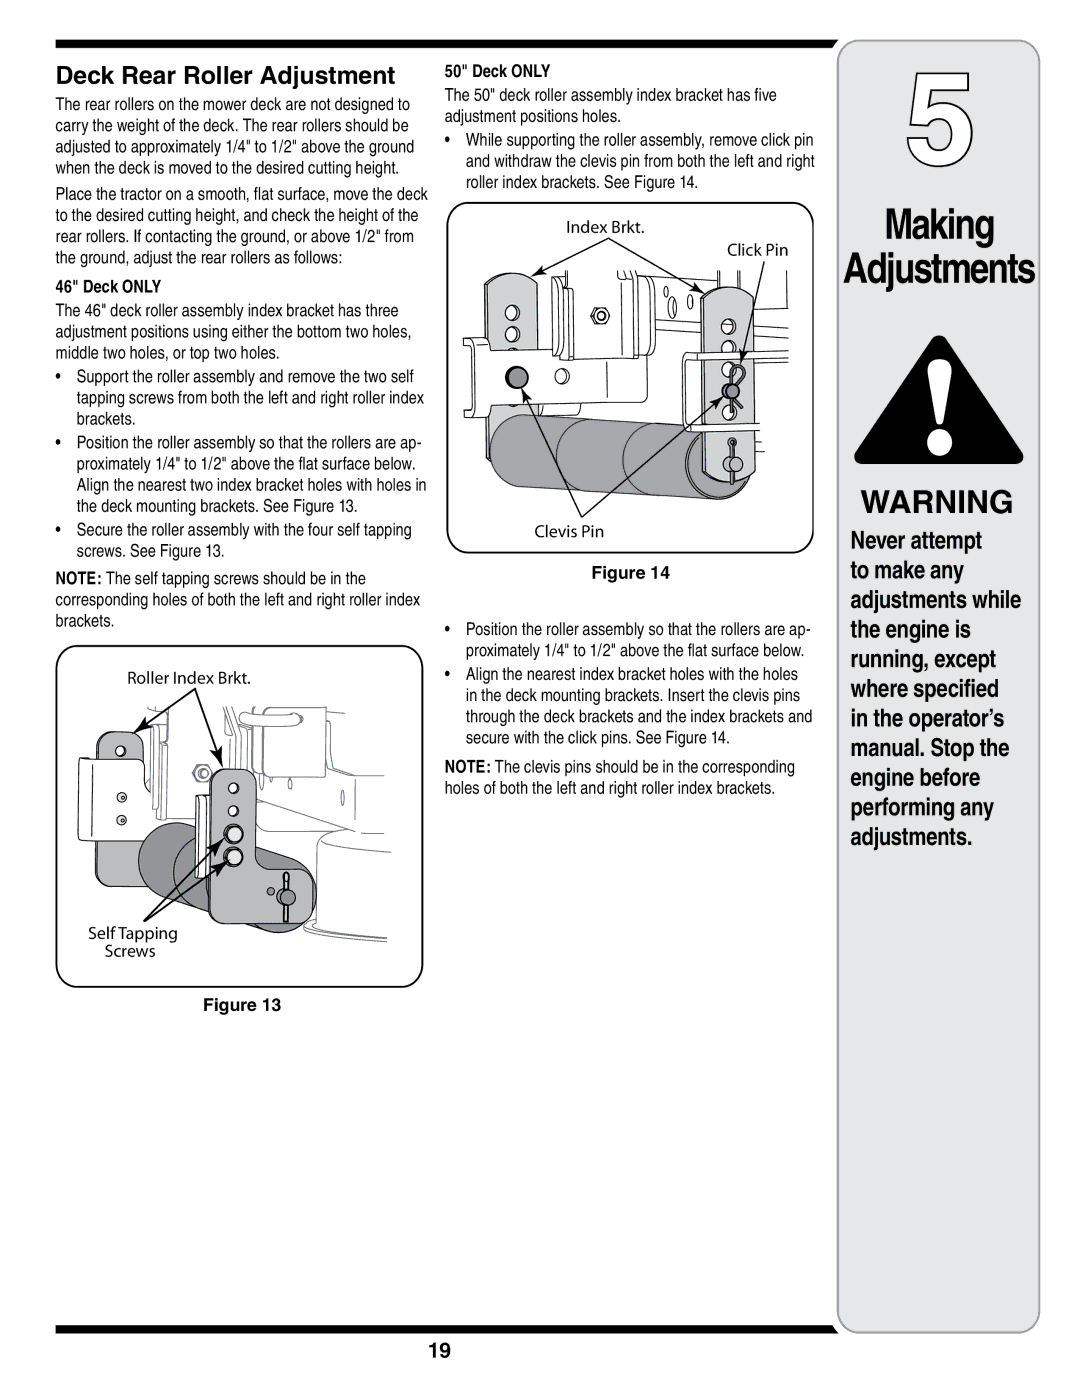
On the other hand, the MTD i1050 takes things a step further with a more powerful 22 HP engine. Its expansive 50-inch cutting deck allows for greater acreage coverage, making it an excellent choice for larger lawns. The i1050 also incorporates a high-back seat, enhancing comfort during extended mowing sessions. This model is designed with a heavy-duty frame and durable chassis, ensuring long-lasting performance even in challenging conditions.
Both models feature advanced technologies that enhance their usability. The Easy Select Deck Height Adjustment system allows users to customize cutting heights with simple adjustments, ensuring optimal grass length for diverse lawn types. The ergonomic steering wheel design provides an improved grip and reduces operator fatigue, enhancing overall comfort during operation.
In terms of safety, MTD has integrated a range of features across both models. The Rollover Protection Structure (ROPS) keeps operators safe in the event of uneven terrain, while the automatic blade stop ensures that the blades cease operation whenever the rider leaves the seat, preventing accidental injuries.
Furthermore, the i1046 and i1050 are designed with easy maintenance in mind. The accessible engine compartment allows straightforward engine checks, and the deck design enables hassle-free cleaning, which is essential for maintaining optimal performance.
In summary, the MTD i1046 and i1050 deliver a powerful and efficient solution for landscaping needs. With their strong engines, user-friendly features, and safety technologies, these models are poised to satisfy both professional landscapers and homeowners alike. Their sturdy design ensures reliability and performance, making them valuable assets for keeping lawns looking pristine.