Series 140 through E173 specifications
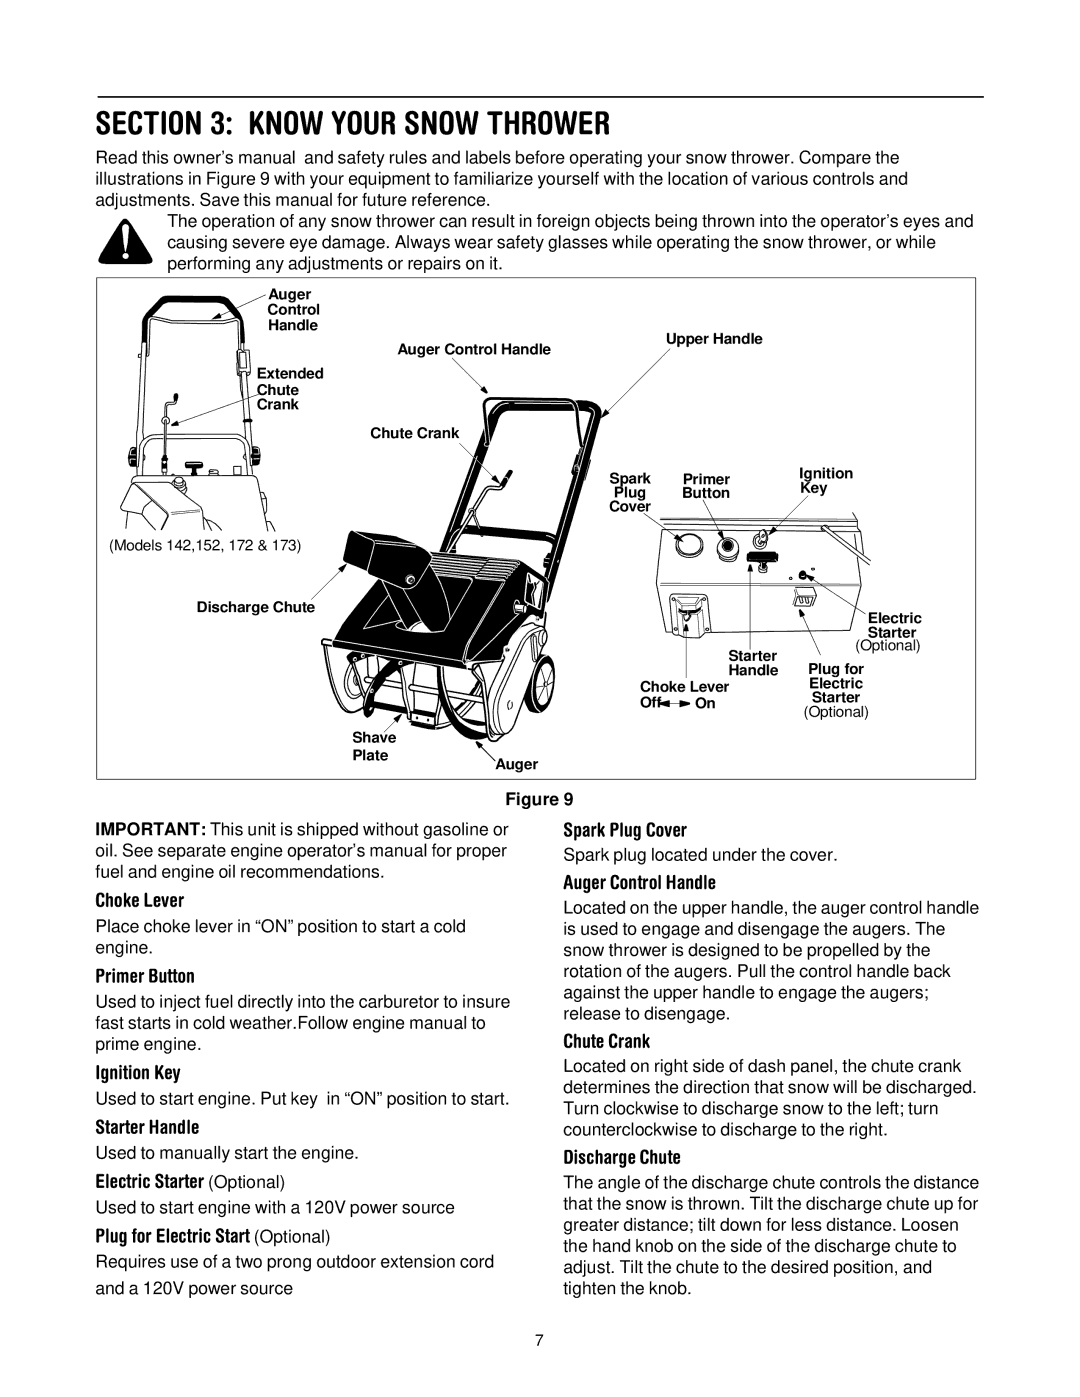
The MTD Series 140 through E173 represents a significant advancement in the landscape of modern machinery and equipment. Designed for exceptional performance, energy efficiency, and user-friendliness, these models cater to the needs of both commercial and residential users.One of the standout features of the MTD Series is its powerful engine options, which range from reliable gas engines to advanced electric motors. These engines are designed to deliver steady and powerful performance while ensuring reduced emissions and lower fuel consumption. This balance of power and efficiency makes the MTD Series ideal for various applications, from heavy-duty tasks to everyday yard maintenance.
An integral part of the design philosophy of the MTD Series is ergonomics. The machines are fitted with user-friendly controls and adjustable components, allowing for a more comfortable experience during operation. Features such as easy-grip handles, adjustable cutting heights, and intuitive dashboards ensure that users can operate the equipment with minimal effort and maximum precision.
Incorporating innovative technology, the MTD Series is equipped with smart features that enhance usability. Self-propelling mechanisms provide added convenience, allowing users to navigate challenging terrain with ease. Moreover, many models come with advanced cutting systems that improve grass handling, resulting in cleaner cuts and healthier lawns.
Durability is another hallmark of the MTD Series. Designed with robust materials, the equipment is built to withstand harsh conditions and daily wear and tear. This commitment to quality ensures that even under rigorous use, the machines maintain performance and reliability over time.
Maintenance is made easy with the MTD Series. Easy access to engine parts and user-friendly maintenance schedules help owners keep their machinery in prime condition without requiring extensive technical knowledge. With a focus on longevity, viewers can expect both reliable performance and upkeep ease.
In summary, the MTD Series 140 through E173 is a blend of power, efficiency, ergonomics, and durability. Ideal for a variety of applications, these models not only aim to meet but exceed user expectations through smart technology and innovative features, making them a top choice for anyone in need of reliable outdoor machinery. Whether for professional landscaping or home gardening, the MTD Series is a trustworthy partner in achieving optimal results.

