ASSEMBLY
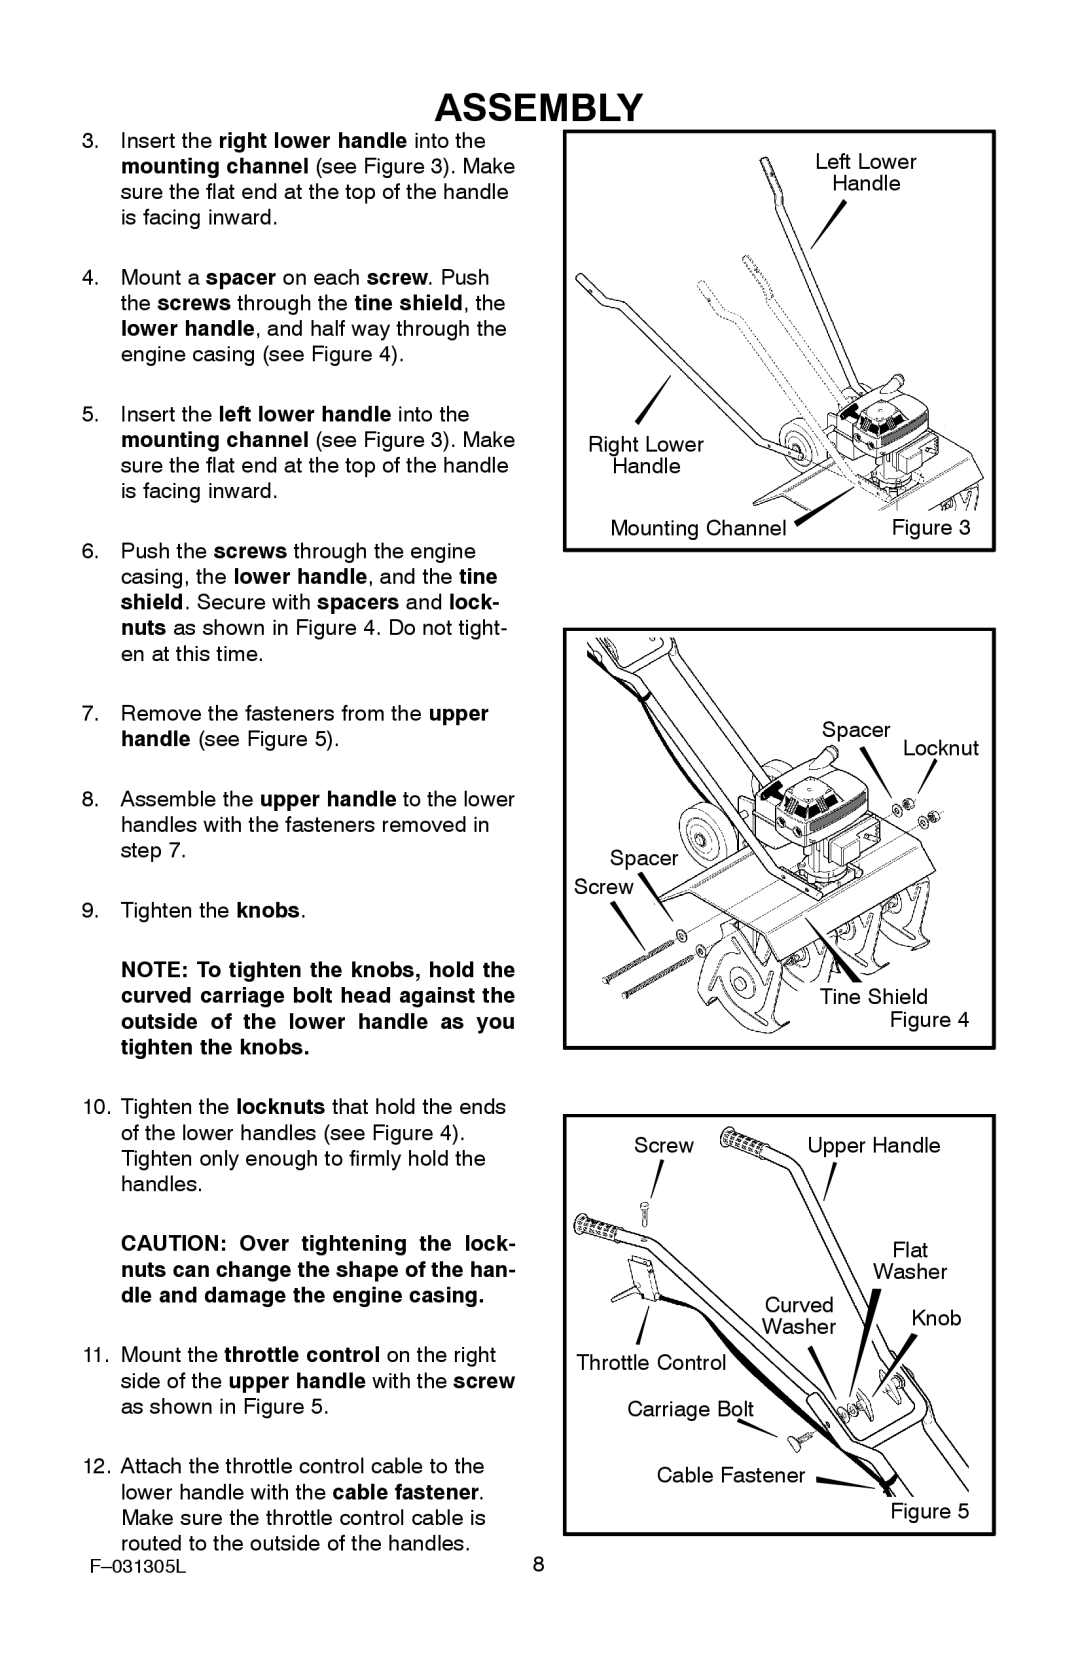
3. | Insert the right lower handle into the |
| mounting channel (see Figure 3). Make |
| sure the flat end at the top of the handle |
| is facing inward. |
4. | Mount a spacer on each screw. Push |
| the screws through the tine shield, the |
| lower handle, and half way through the |
| engine casing (see Figure 4). |
5. | Insert the left lower handle into the |
| mounting channel (see Figure 3). Make |
| sure the flat end at the top of the handle |
| is facing inward. |
6. | Push the screws through the engine |
| casing, the lower handle, and the tine |
| shield. Secure with spacers and lock- |
| nuts as shown in Figure 4. Do not tight- |
| en at this time. |
7. | Remove the fasteners from the upper |
Left Lower
Handle
Right Lower
Handle
Mounting Channel | Figure 3 |
| handle (see Figure 5). |
8. | Assemble the upper handle to the lower |
| handles with the fasteners removed in |
| step 7. |
9. | Tighten the knobs. |
| NOTE: To tighten the knobs, hold the |
Spacer
Spacer
Screw![]()
Locknut
| curved carriage bolt head against the |
| outside of the lower handle as you |
| tighten the knobs. |
10. | Tighten the locknuts that hold the ends |
| of the lower handles (see Figure 4). |
| Tighten only enough to firmly hold the |
| handles. |
| CAUTION: Over tightening the lock- |
| nuts can change the shape of the han- |
| dle and damage the engine casing. |
11. | Mount the throttle control on the right |
| side of the upper handle with the screw |
| as shown in Figure 5. |
12. | Attach the throttle control cable to the |
| lower handle with the cable fastener. |
| Make sure the throttle control cable is |
routed to the outside of the handles. | 8 |
Tine Shield
Figure 4
Screw | Upper Handle |
Flat
Washer
Curved Knob
Washer
Throttle Control
Carriage Bolt
Cable Fastener ![]()
Figure 5