Step 7: Install clear cap by screwing clockwise until it meets the housing shoulder.
Note: No gap.
Step 8: Place the green indicator clip over the red lever by aligning the arms on the clip with the slots in the inflator (see Fig 15). Push firmly in the middle of the clip to snap in place.
Step 9: Install an unused cylinder by rotating clockwise into inflator until cylinder is secured firmly in inflator.
Step 10: Check to be sure service indicator is green and green indicator clip is firmly attached.
YOUR PFD IS NOW READY FOR MANUAL USE WITH AUTOMATIC BACKUP
Deflating the Inflatable PFD
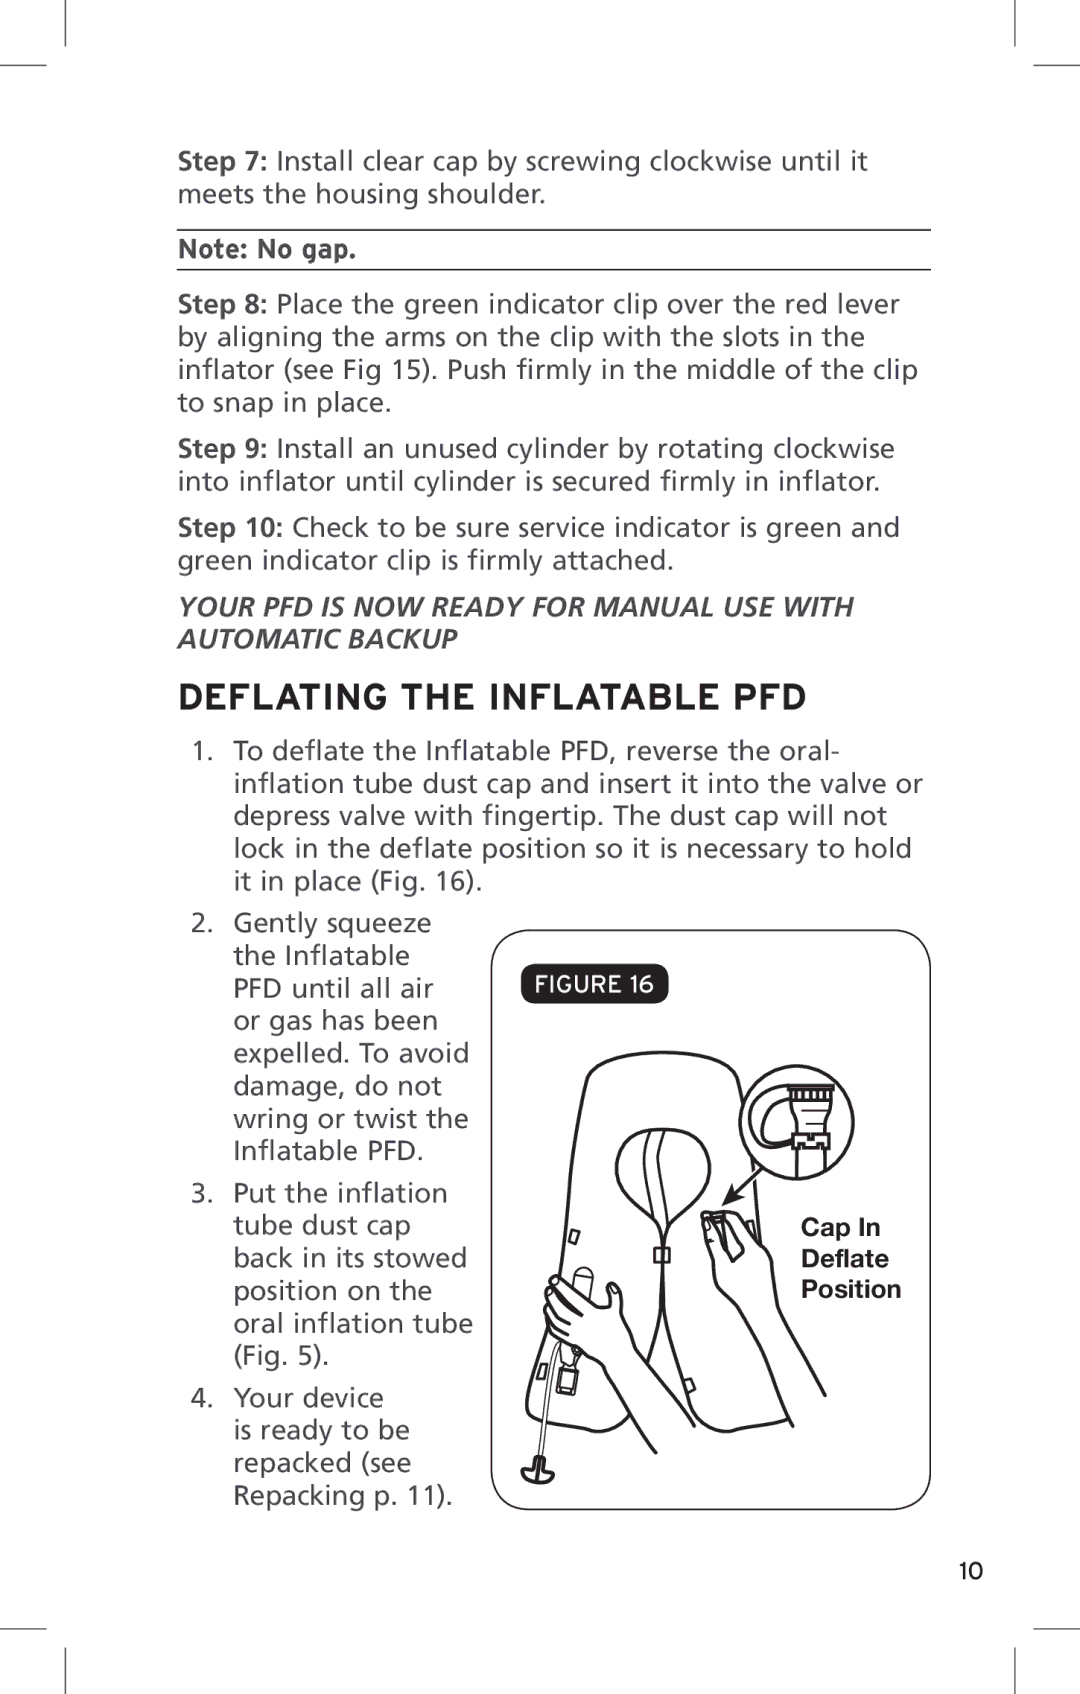
1.To deflate the Inflatable PFD, reverse the oral- inflation tube dust cap and insert it into the valve or depress valve with fingertip. The dust cap will not lock in the deflate position so it is necessary to hold it in place (Fig. 16).
2.Gently squeeze the Inflatable
PFD until all air | Figure 16 |
or gas has been |
|
expelled. To avoid |
|
damage, do not |
|
wring or twist the |
|
Inflatable PFD. |
|
3. Put the inflation |
|
tube dust cap | Cap In |
back in its stowed | Deflate |
position on the | Position |
oral inflation tube |
|
(Fig. 5). |
|
4. Your device is ready to be repacked (see Repacking p. 11).
10
