CONNECTIONS
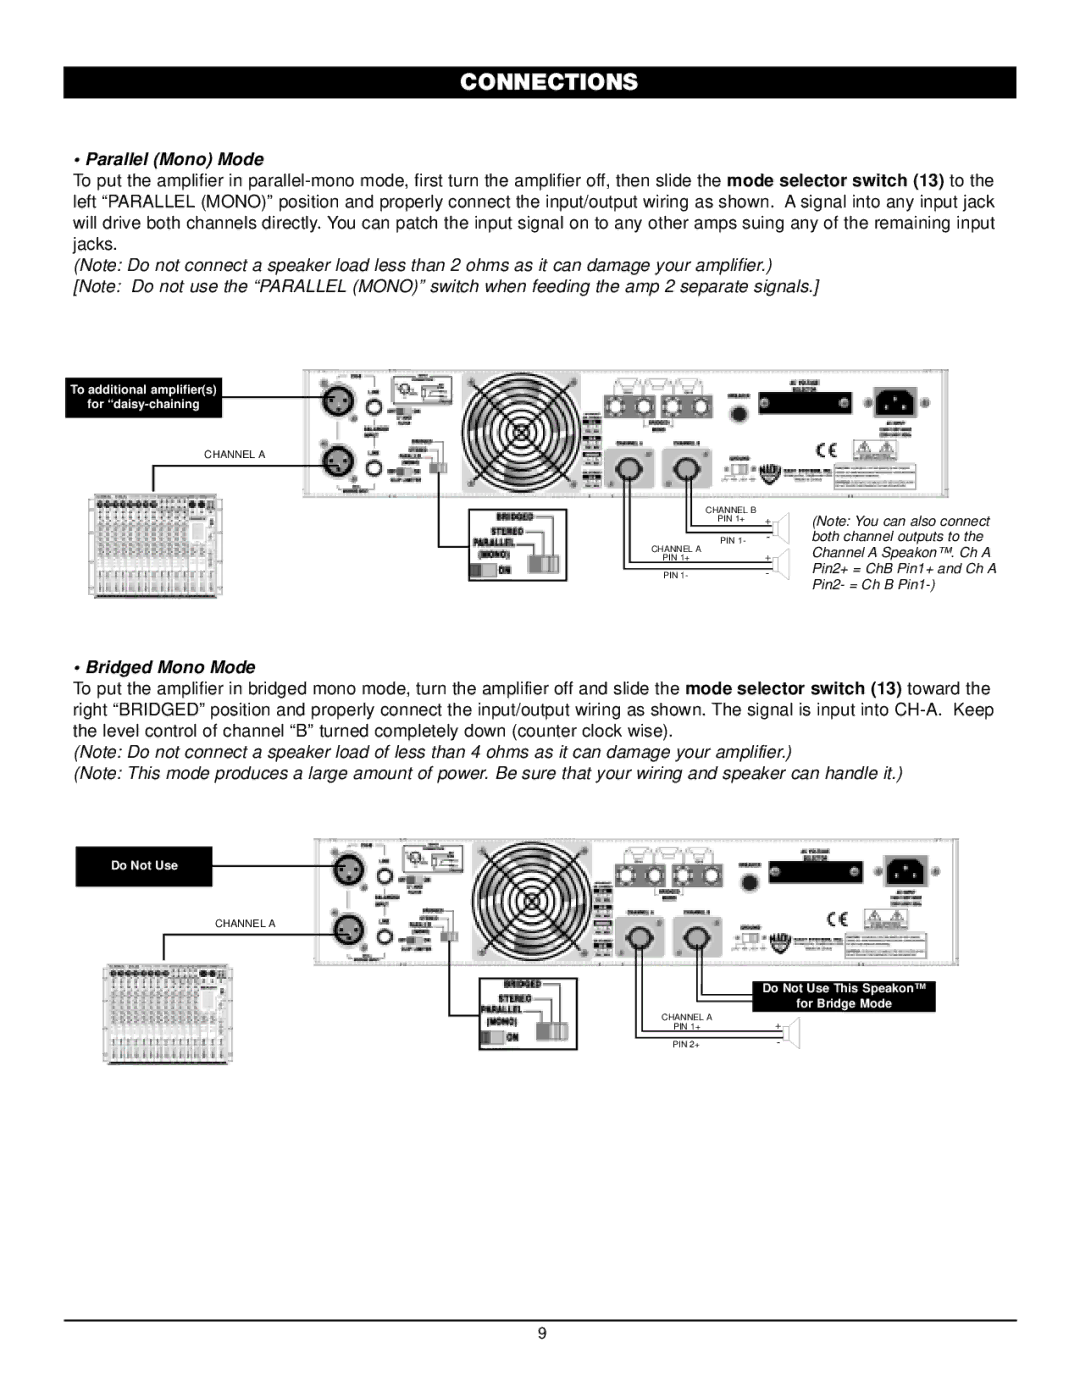
• Parallel (Mono) Mode
To put the amplifier in
(Note: Do not connect a speaker load less than 2 ohms as it can damage your amplifier.)
[Note: Do not use the “PARALLEL (MONO)” switch when feeding the amp 2 separate signals.]
To additional amplifier(s)
for
CHANNEL A
|
|
| CHANNEL B |
|
|
|
| PIN 1+ | + |
|
|
|
|
|
|
|
| PIN 1- | - |
| CHANNEL A | + | ||
| PIN 1+ | |||
|
|
| ||
| PIN 1- | - | ||
(Note: You can also connect both channel outputs to the Channel A Speakon™. Ch A Pin2+ = ChB Pin1+ and Ch A Pin2- = Ch B
• Bridged Mono Mode
To put the amplifier in bridged mono mode, turn the amplifier off and slide the mode selector switch (13) toward the right “BRIDGED” position and properly connect the input/output wiring as shown. The signal is input into
(Note: Do not connect a speaker load of less than 4 ohms as it can damage your amplifier.)
(Note: This mode produces a large amount of power. Be sure that your wiring and speaker can handle it.)
Do Not Use
CHANNEL A
CHANNEL A
PIN 1+
PIN 2+
Do Not Use This Speakon™ for Bridge Mode
+
-
9