TMP-2 specifications
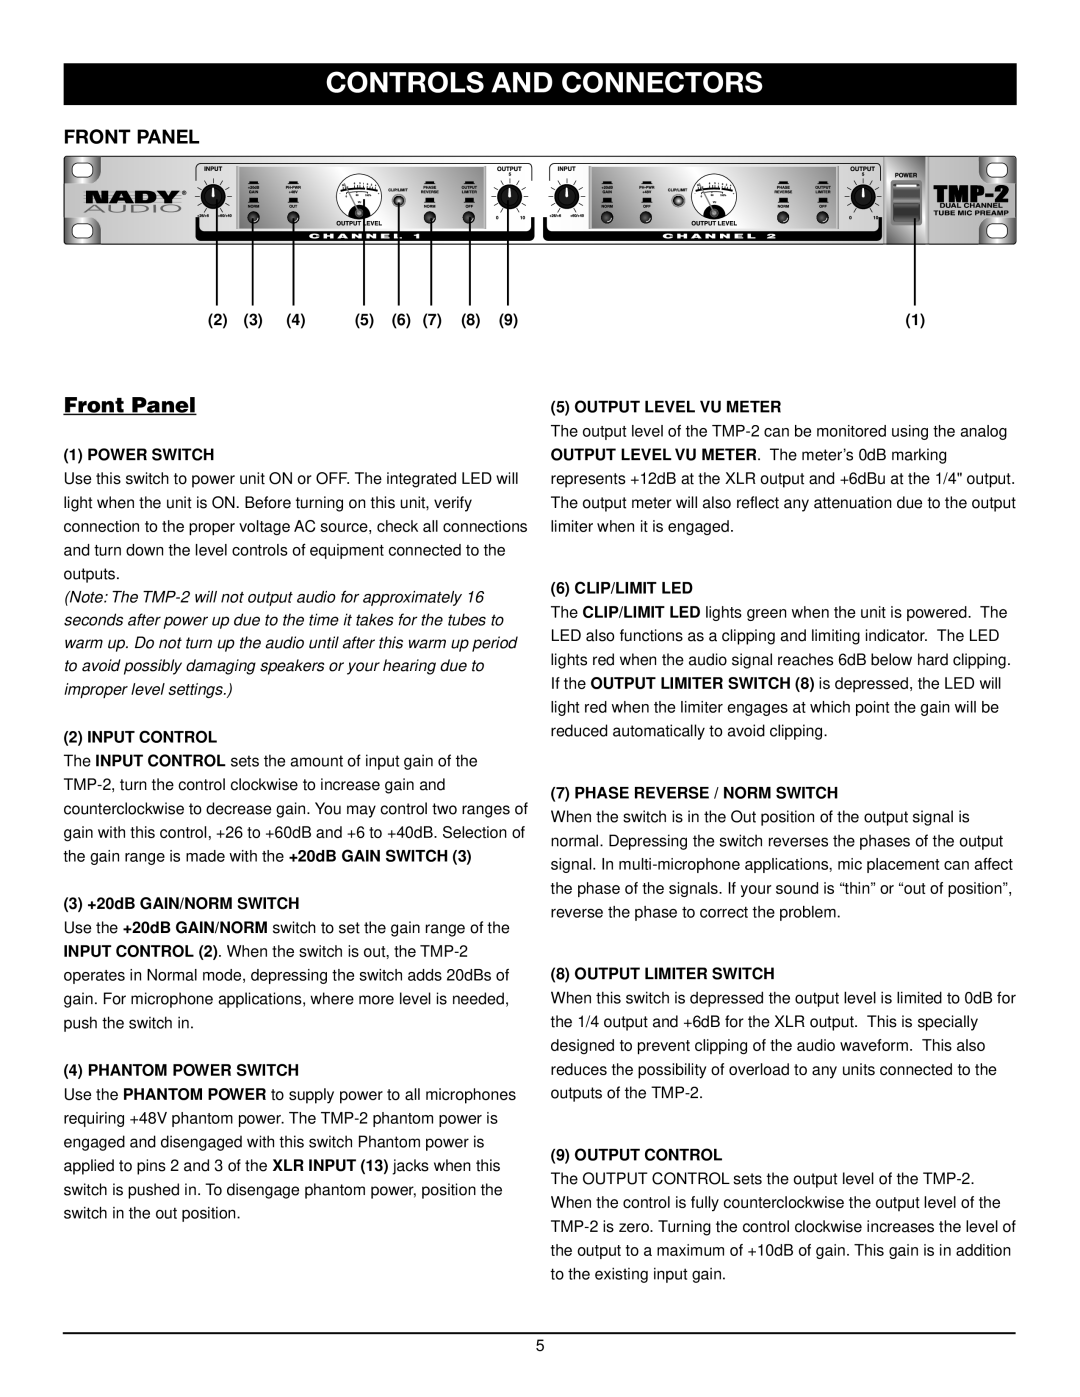
Nady Systems TMP-2 is a versatile and innovative device that has become a focal point for audio professionals and enthusiasts alike. Designed primarily as a dynamic microphone preamplifier, this product stands out due to its blend of advanced technology, user-friendly features, and rugged build quality.One of the main features of the TMP-2 is its dual-channel capability, allowing users to process two microphone signals simultaneously. This is particularly beneficial for podcasters, musicians, and content creators who want to capture stereo sound or record interviews with high audio fidelity. The unit incorporates high-quality analog circuitry that ensures low noise levels and high dynamic range, making it suitable for both studio and live applications.
The TMP-2 is equipped with a phantom power feature that can supply +48V to condenser microphones, expanding the range of microphone types that can be effectively utilized. This feature enhances the flexibility of the device in various recording settings, catering to different microphone styles and vocal requirements. Additionally, the input gain control on each channel allows for precise adjustment of levels, ensuring that users can achieve the desired sound without distortion.
Another remarkable technology integrated into the TMP-2 is its built-in compressor and limiter. This functionality is crucial for managing audio levels and preventing clipping, especially in dynamic recording environments where volume can fluctuate significantly. By allowing users to set thresholds and ratios, the TMP-2 ensures that the audio remains clean and professional, even in challenging conditions.
The compact and rugged design of the TMP-2 makes it perfect for portable use. Weighing less than many competing units, it easily fits into a carry bag alongside other essential gear. Its durable chassis can withstand the rigors of regular transport, while also featuring rubber feet that reduce vibration during use.
In summary, the Nady Systems TMP-2 is a cutting-edge microphone preamp that combines essential features, innovative technology, and robust construction. With its dual-channel processing, phantom power, built-in compression, and portability, it is an excellent choice for anyone seeking to elevate their audio recording experience, whether in a professional studio or on the go.

