Lightning Wireless Guitar Operation
Your Lightning Guitar can be operated either as a conventional guitar with the supplied cord or completely wireless, utiliz- ing its built-in transmitter and the wireless receiver built into the WGA-15 Guitar Amplifier. Cord operation is possible with the WGA-15 or any guitar amp and is sometimes convenient and preferred.
Before playing your guitar, either wired or wireless, you should familiarize yourself with its controls and understand their operation.
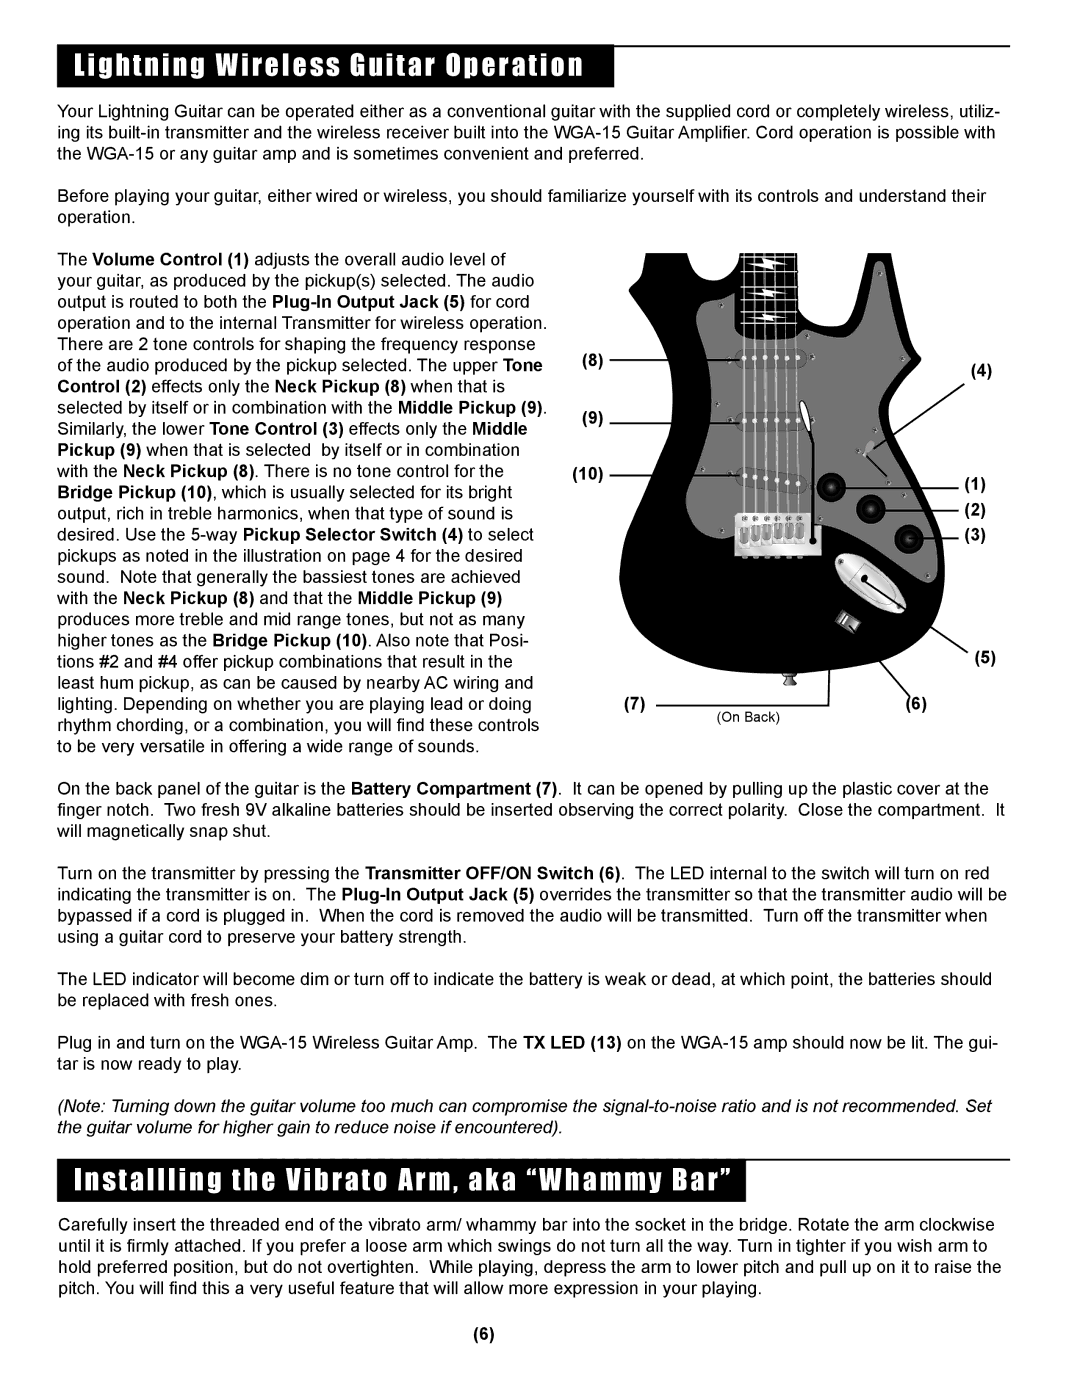
The Volume Control (1) adjusts the overall audio level of your guitar, as produced by the pickup(s) selected. The audio output is routed to both the Plug-In Output Jack (5) for cord operation and to the internal Transmitter for wireless operation. There are 2 tone controls for shaping the frequency response of the audio produced by the pickup selected. The upper Tone Control (2) effects only the Neck Pickup (8) when that is selected by itself or in combination with the Middle Pickup (9). Similarly, the lower Tone Control (3) effects only the Middle Pickup (9) when that is selected by itself or in combination with the Neck Pickup (8). There is no tone control for the Bridge Pickup (10), which is usually selected for its bright output, rich in treble harmonics, when that type of sound is desired. Use the 5-way Pickup Selector Switch (4) to select pickups as noted in the illustration on page 4 for the desired sound. Note that generally the bassiest tones are achieved with the Neck Pickup (8) and that the Middle Pickup (9) produces more treble and mid range tones, but not as many higher tones as the Bridge Pickup (10). Also note that Posi- tions #2 and #4 offer pickup combinations that result in the least hum pickup, as can be caused by nearby AC wiring and lighting. Depending on whether you are playing lead or doing rhythm chording, or a combination, you will find these controls to be very versatile in offering a wide range of sounds.
(8) | (4) |
|
(9) | |
(10) | (1) |
|
| (2) |
| (3) |
(5)
On the back panel of the guitar is the Battery Compartment (7). It can be opened by pulling up the plastic cover at the finger notch. Two fresh 9V alkaline batteries should be inserted observing the correct polarity. Close the compartment. It will magnetically snap shut.
Turn on the transmitter by pressing the Transmitter OFF/ON Switch (6). The LED internal to the switch will turn on red indicating the transmitter is on. The Plug-In Output Jack (5) overrides the transmitter so that the transmitter audio will be bypassed if a cord is plugged in. When the cord is removed the audio will be transmitted. Turn off the transmitter when using a guitar cord to preserve your battery strength.
The LED indicator will become dim or turn off to indicate the battery is weak or dead, at which point, the batteries should be replaced with fresh ones.
Plug in and turn on the WGA-15 Wireless Guitar Amp. The TX LED (13) on the WGA-15 amp should now be lit. The gui- tar is now ready to play.
(Note: Turning down the guitar volume too much can compromise the signal-to-noise ratio and is not recommended. Set the guitar volume for higher gain to reduce noise if encountered).
Installling the Vibrato Arm, aka “Whammy Bar”
Carefully insert the threaded end of the vibrato arm/ whammy bar into the socket in the bridge. Rotate the arm clockwise until it is firmly attached. If you prefer a loose arm which swings do not turn all the way. Turn in tighter if you wish arm to hold preferred position, but do not overtighten. While playing, depress the arm to lower pitch and pull up on it to raise the pitch. You will find this a very useful feature that will allow more expression in your playing.
(6)