Appendix

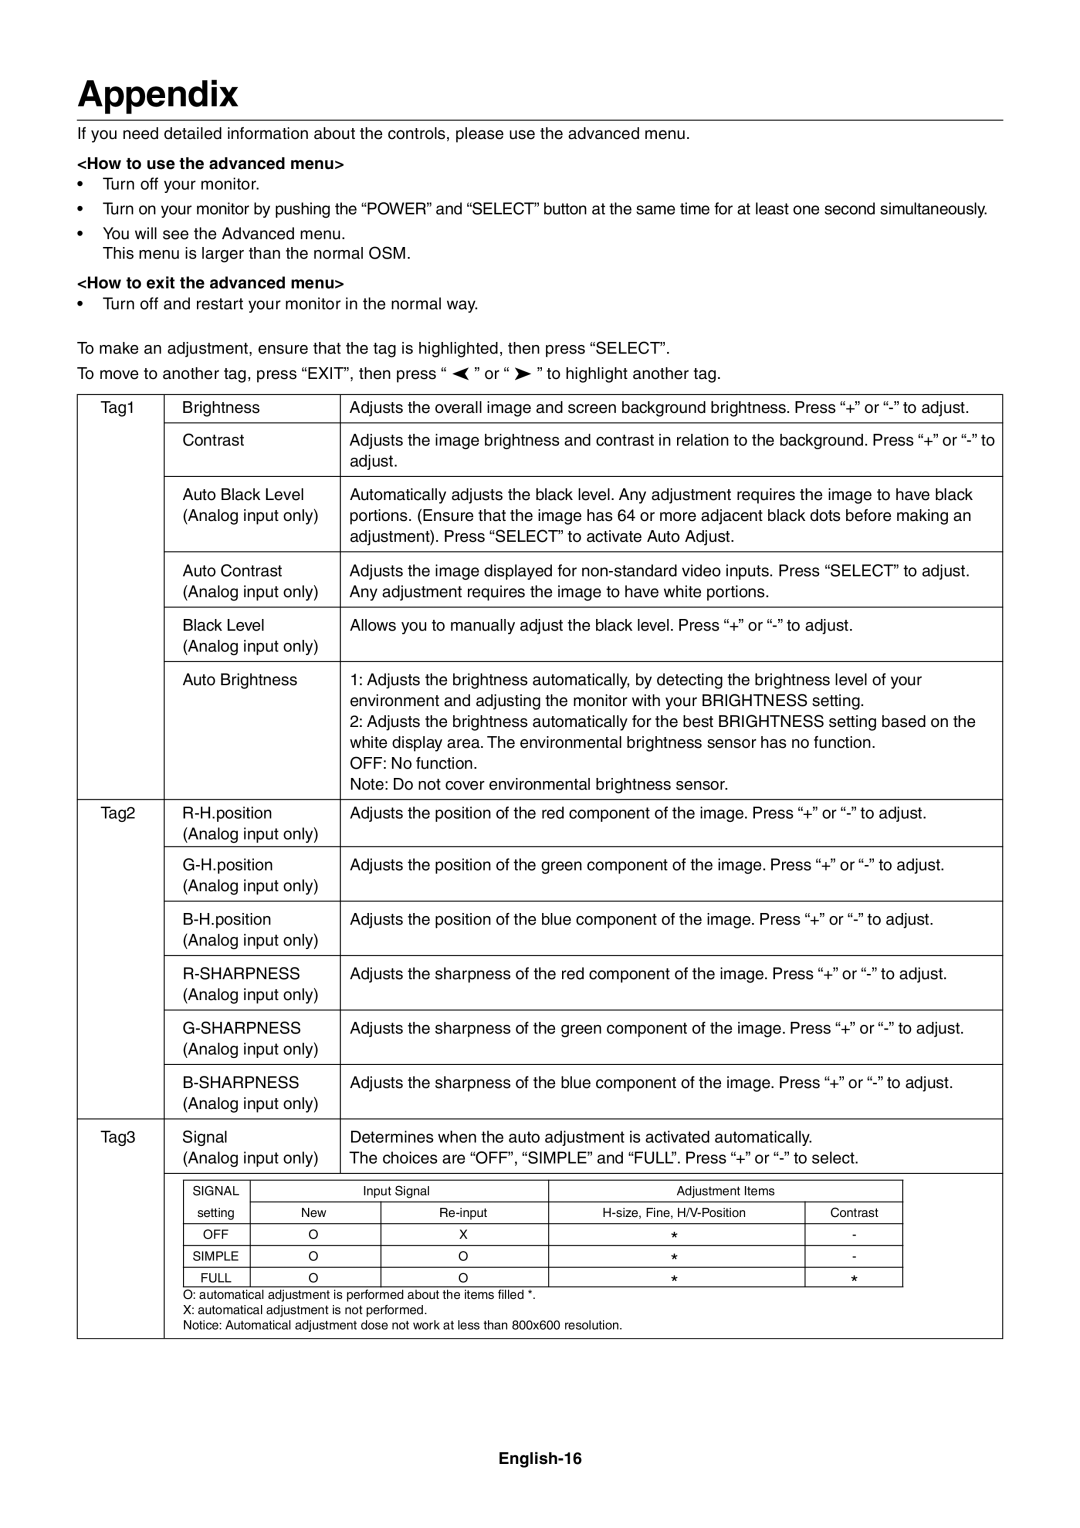
If you need detailed information about the controls, please use the advanced menu.

<How to use the advanced menu>

Turn off your monitor.

Turn on your monitor by pushing the “POWER” and “SELECT” button at the same time for at least one second simultaneously.

You will see the Advanced menu.

This menu is larger than the normal OSM.

<How to exit the advanced menu>

Turn off and restart your monitor in the normal way.

To make an adjustment, ensure that the tag is highlighted, then press “SELECT”.

To move to another tag, press “EXIT”, then press “ ” or “ ” to highlight another tag.

Tag1

Brightness


Adjusts the overall image and screen background brightness. Press “+” or “-” to adjust.


Contrast


Adjusts the image brightness and contrast in relation to the background. Press “+” or “-” to


adjust.


Auto Black Level

Automatically adjusts the black level. Any adjustment requires the image to have black


(Analog input only)

portions. (Ensure that the image has 64 or more adjacent black dots before making an


adjustment). Press “SELECT” to activate Auto Adjust.


Auto Contrast


Adjusts the image displayed for non-standard video inputs. Press “SELECT” to adjust.


(Analog input only)

Any adjustment requires the image to have white portions.


Black Level


Allows you to manually adjust the black level. Press “+” or “-” to adjust.


(Analog input only)


Auto Brightness


1: Adjusts the brightness automatically, by detecting the brightness level of your


environment and adjusting the monitor with your BRIGHTNESS setting.


2: Adjusts the brightness automatically for the best BRIGHTNESS setting based on the


white display area. The environmental brightness sensor has no function.


OFF: No function.


Note: Do not cover environmental brightness sensor.


Tag2

R-H.position


Adjusts the position of the red component of the image. Press “+” or “-” to adjust.


(Analog input only)


G-H.position


Adjusts the position of the green component of the image. Press “+” or “-” to adjust.


(Analog input only)


B-H.position


Adjusts the position of the blue component of the image. Press “+” or “-” to adjust.


(Analog input only)


R-SHARPNESS


Adjusts the sharpness of the red component of the image. Press “+” or “-” to adjust.


(Analog input only)


G-SHARPNESS

Adjusts the sharpness of the green component of the image. Press “+” or “-” to adjust.


(Analog input only)


B-SHARPNESS


Adjusts the sharpness of the blue component of the image. Press “+” or “-” to adjust.


(Analog input only)


Tag3

Signal


Determines when the auto adjustment is activated automatically.


(Analog input only)

The choices are “OFF”, “SIMPLE” and “FULL”. Press “+” or “-” to select.


SIGNAL


Input Signal

Adjustment Items


setting


New


Re-input

H-size, Fine, H/V-Position


Contrast


OFF


O


X

*


-


SIMPLE


O


O

*


-


FULL


O


O

*


*


O: automatical adjustment is performed about the items filled *.


X: automatical adjustment is not performed.


Notice: Automatical adjustment dose not work at less than 800x600 resolution.


English-16

Page 18
Image 18
NEC 1980FXi user manual Appendix, How to use the advanced menu, How to exit the advanced menu, English-16

1980FXi specifications

The NEC 1980FXi, launched in the early 1990s, was a pioneering product in the realm of personal computing, specifically aimed at enhancing business productivity and performance. With its cutting-edge technologies for that era, the 1980FXi quickly became recognized for its reliability and efficiency.

One of the standout features of the NEC 1980FXi was its robust processing power, powered by a 32-bit Intel 80386 processor. This processor offered significant performance improvements compared to its predecessors, enabling users to run more complex applications and multitask effectively. The robust architecture allowed for advanced computational capabilities, making it suitable for demanding business environments.

The NEC 1980FXi included an impressive memory capacity for its time, supporting up to 16 MB of RAM. This substantial memory allowance facilitated smoother operation of applications and improved overall system responsiveness. The motherboard offered sockets for additional memory expansion, offering users a clear upgrade path as their computational needs grew over time.

In terms of storage, the 1980FXi featured a hard disk drive, with options typically starting at 40 MB, allowing users to store vast amounts of data, documents, and software. This was complemented by the inclusion of a 3.5-inch floppy disk drive, ensuring compatibility with the prevalent software formats of the day.

Another notable attribute of the NEC 1980FXi was its graphics capabilities. The system supported VGA graphics, providing enhanced visual clarity and color depth for users. This was especially significant for desktop publishing, graphic design, and other visual applications that required detailed graphics output.

Connectivity was also a focus for the NEC 1980FXi. The system came equipped with several ports, including serial and parallel ports, which allowed for easy attachment of peripherals such as printers, modems, and external storage devices. The inclusion of an expansion bus meant that users could further enhance their systems by adding additional hardware components as needed.

With a design that prioritized ease of use, the NEC 1980FXi featured a compact and well-ventilated case, ensuring optimal performance while minimizing heat production. The configuration was user-friendly, which helped organizations streamline their operations without needing extensive technical expertise.

Overall, the NEC 1980FXi represented a significant step forward in personal computing during the early 1990s, combining powerful processing, ample storage, and expandable architecture into a compact and efficient package. This made it a reliable choice for businesses seeking to leverage technology for enhanced productivity and innovation. As a product of its time, the 1980FXi played a vital role in shaping the evolution of desktop computing.