Quick Start
To attach the MultiSync® LCD monitor to your system, follow these instructions:
1.Turn off the power to your computer.
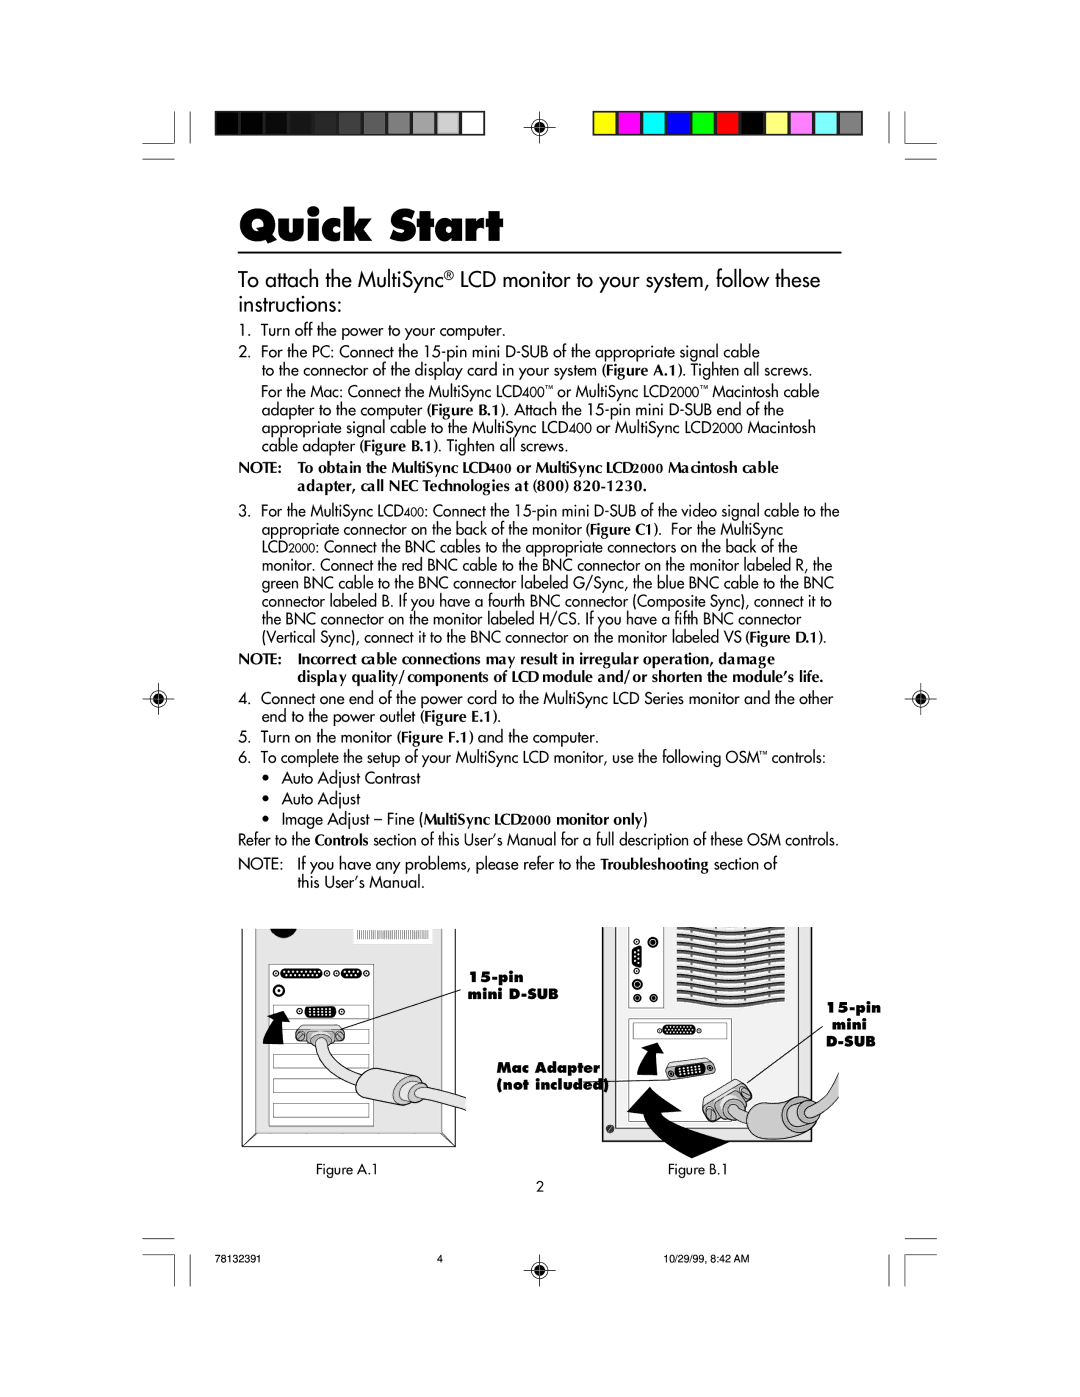
2.For the PC: Connect the
to the connector of the display card in your system (Figure A.1). Tighten all screws. For the Mac: Connect the MultiSync LCD400™ or MultiSync LCD2000™ Macintosh cable adapter to the computer (Figure B.1). Attach the
NOTE: To obtain the MultiSync LCD400 or MultiSync LCD2000 Macintosh cable adapter, call NEC Technologies at (800)
3.For the MultiSync LCD400: Connect the
NOTE: Incorrect cable connections may result in irregular operation, damage display quality/components of LCD module and/or shorten the module’s life.
4.Connect one end of the power cord to the MultiSync LCD Series monitor and the other end to the power outlet (Figure E.1).
5.Turn on the monitor (Figure F.1) and the computer.
6.To complete the setup of your MultiSync LCD monitor, use the following OSM™ controls:
•Auto Adjust Contrast
•Auto Adjust
•Image Adjust – Fine (MultiSync LCD2000 monitor only)
Refer to the Controls section of this User’s Manual for a full description of these OSM controls.
NOTE: If you have any problems, please refer to the Troubleshooting section of this User’s Manual.
| |
| mini |
| |
| mini |
| |
| Mac Adapter |
| (not included) |
Figure A.1 | Figure B.1 |
| 2 |
78132391 | 4 | 10/29/99, 8:42 AM |