1. Safety Instructions
Maintenance
![]() To avoid electrical shock, be sure to disconnect the power cord before cleaning the unit.
To avoid electrical shock, be sure to disconnect the power cord before cleaning the unit.
![]() Avoid using chemicals such as benzene, alcohol, gas, or turpentine when cleaning the unit.
Avoid using chemicals such as benzene, alcohol, gas, or turpentine when cleaning the unit.
![]() It is recommended that the air filter be replaced every two months (more frequently if the filter is visibly soiled).
It is recommended that the air filter be replaced every two months (more frequently if the filter is visibly soiled).
![]() When removing the filter from the
When removing the filter from the
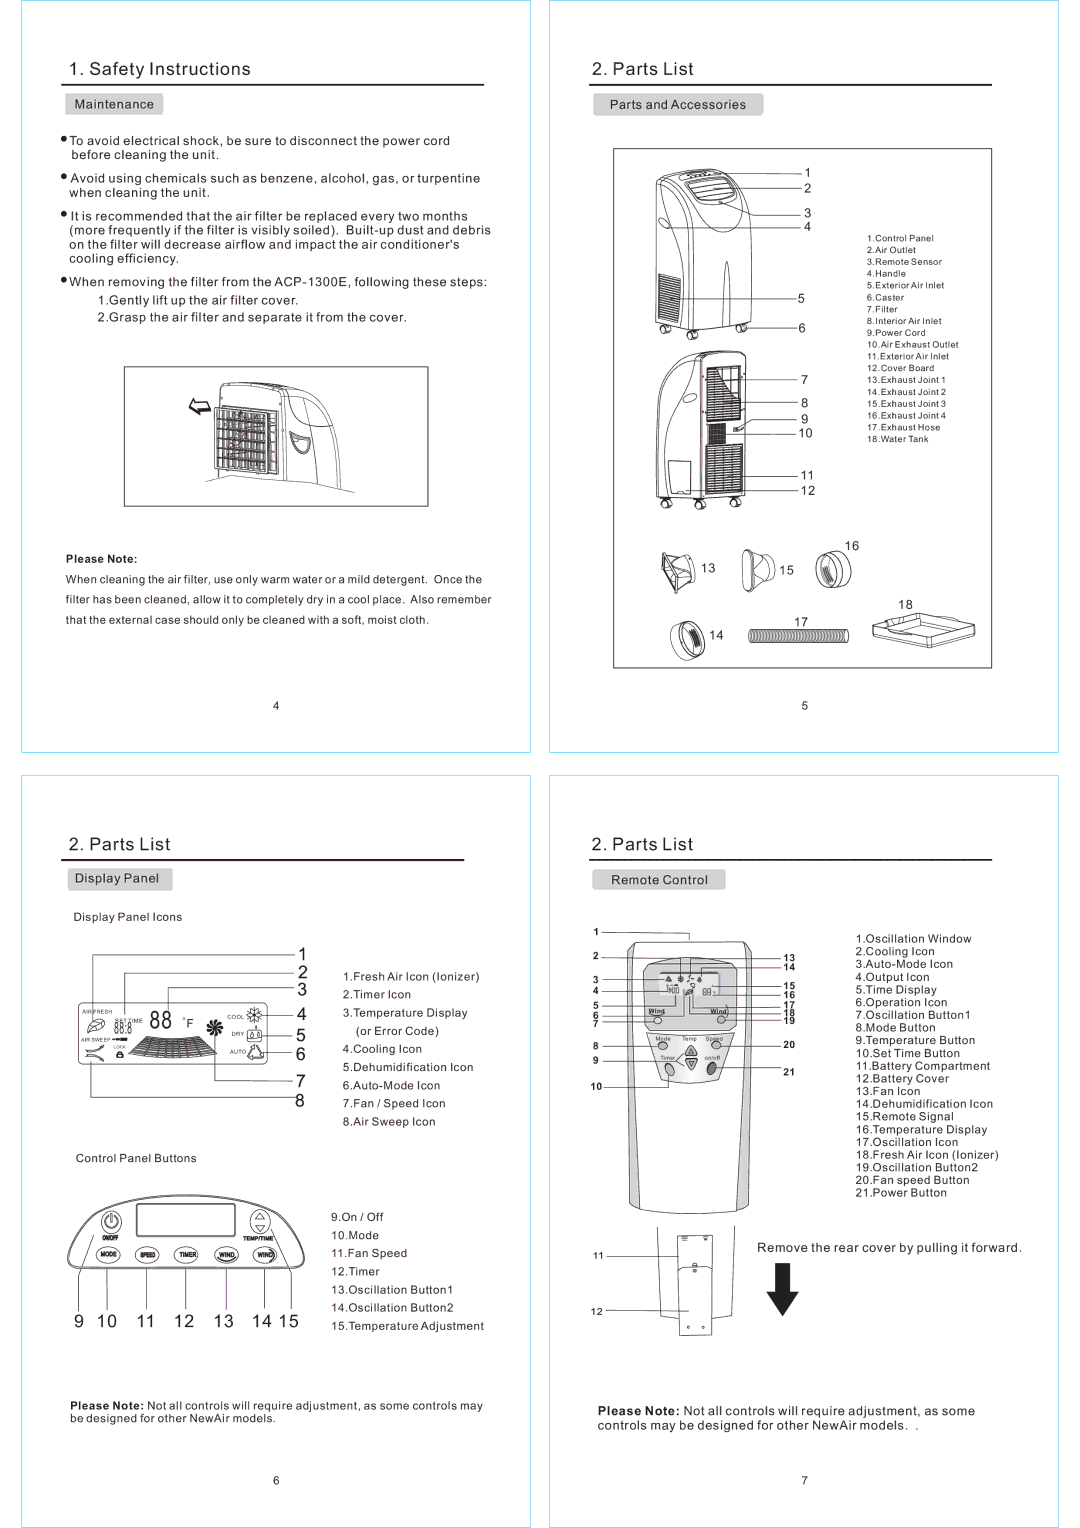
1.Gently lift up the air filter cover.
2.Grasp the air filter and separate it from the cover.
Please Note:
When cleaning the air filter, use only warm water or a mild detergent. Once the filter has been cleaned, allow it to completely dry in a cool place. Also remember that the external case should only be cleaned with a soft, moist cloth.
4
2. Parts List
Parts and Accessories
| 1 |
|
| 2 |
|
| 3 |
|
| 4 |
|
|
| 1.Control Panel |
|
| 2.Air Outlet |
|
| 3.Remote Sensor |
|
| 4.Handle |
|
| 5.Exterior Air Inlet |
| 5 | 6.Caster |
|
| 7.Filter |
| 6 | 8.Interior Air Inlet |
| 9.Power Cord | |
|
| |
|
| 10.Air Exhaust Outlet |
|
| 11.Exterior Air Inlet |
|
| 12.Cover Board |
| 7 | 13.Exhaust Joint 1 |
|
| 14.Exhaust Joint 2 |
| 8 | 15.Exhaust Joint 3 |
| 9 | 16.Exhaust Joint 4 |
| 17.Exhaust Hose | |
| 10 | |
| 18.Water Tank | |
|
| |
| 11 |
|
| 12 |
|
|
| 16 |
13 | 15 |
|
|
| 18 |
| 17 |
|
14 |
|
|
| 5 |
|
2. Parts List
2. Parts List
Display Panel
Display Panel Icons
Remote Control
AIR FRESH | 88 | DRY |
88:8 | ||
SET TIME |
| COOL |
|
| F |
AIR SWEEP |
|
|
LOCK
AUTO
Control Panel Buttons
1.Fresh Air Icon (Ionizer) 2.Timer Icon 3.Temperature Display
(or Error Code) 4.Cooling Icon 5.Dehumidification Icon
1 |
|
|
| |
2 |
|
| 13 | |
|
|
| 14 | |
3 |
|
| 15 | |
4 |
|
| ||
| F | 16 | ||
|
|
| ||
5 | Wind | Wind | 17 | |
6 | 18 | |||
|
| |||
|
| 19 | ||
7 |
|
| ||
|
|
|
| Mode | Temp Speed |
8 |
| 20 |
9 | Timer | on/off |
|
|
21
10
1.Oscillation Window 2.Cooling Icon
ON/OFF |
|
|
| TEMP/TIME |
MODE | SPEED | TIMER | WIND | WIND |
9 10 11 12 13 14 15
9.On / Off 10.Mode 11.Fan Speed 12.Timer 13.Oscillation Button1 14.Oscillation Button2 15.Temperature Adjustment
Remove the rear cover by pulling it forward.
Please Note: Not all controls will require adjustment, as some controls may be designed for other NewAir models.
6
Please Note: Not all controls will require adjustment, as some controls may be designed for other NewAir models. .
7
