Installing Your Wireless Keypad
Your module can either be mounted on a wall or sit on a horizontal surface using the included tabletop mount adapter.
Wall Mount Your Wireless Keypad
Warning: When mounting near a window, drilling too close to the glass could break the glass and possibly cause it to shatter. The window extends deeper into the frame than can be seen; therefore, ensure your screw is beyond the glass before drilling.
1 Using the holes on the drilling template found later in this guide, mark the position of the holes to be drilled.
For drywall or other composite surfaces use a 7/32" drill bit. Drill a hole for each of the mounting screws and insert a plastic wall anchor into each hole.
For other solid surfaces, use a 1/16" drill bit. Drill a pilot hole for each of the mounting screws.
1.6mm (1/16 inch) maximum
2 Using the screws provided, secure the module to the wall. When mounting the screws to the wall, leave 1/16" (1.6 mm) space between the screw head and the wall. Using the mounting holes, slide the module down on to the screws until it is firmly seated.
Wall Mount Drilling Template
Mounting tools: Screwdriver, electric drill or awl. On hard surfaces, Motorola recommends that you
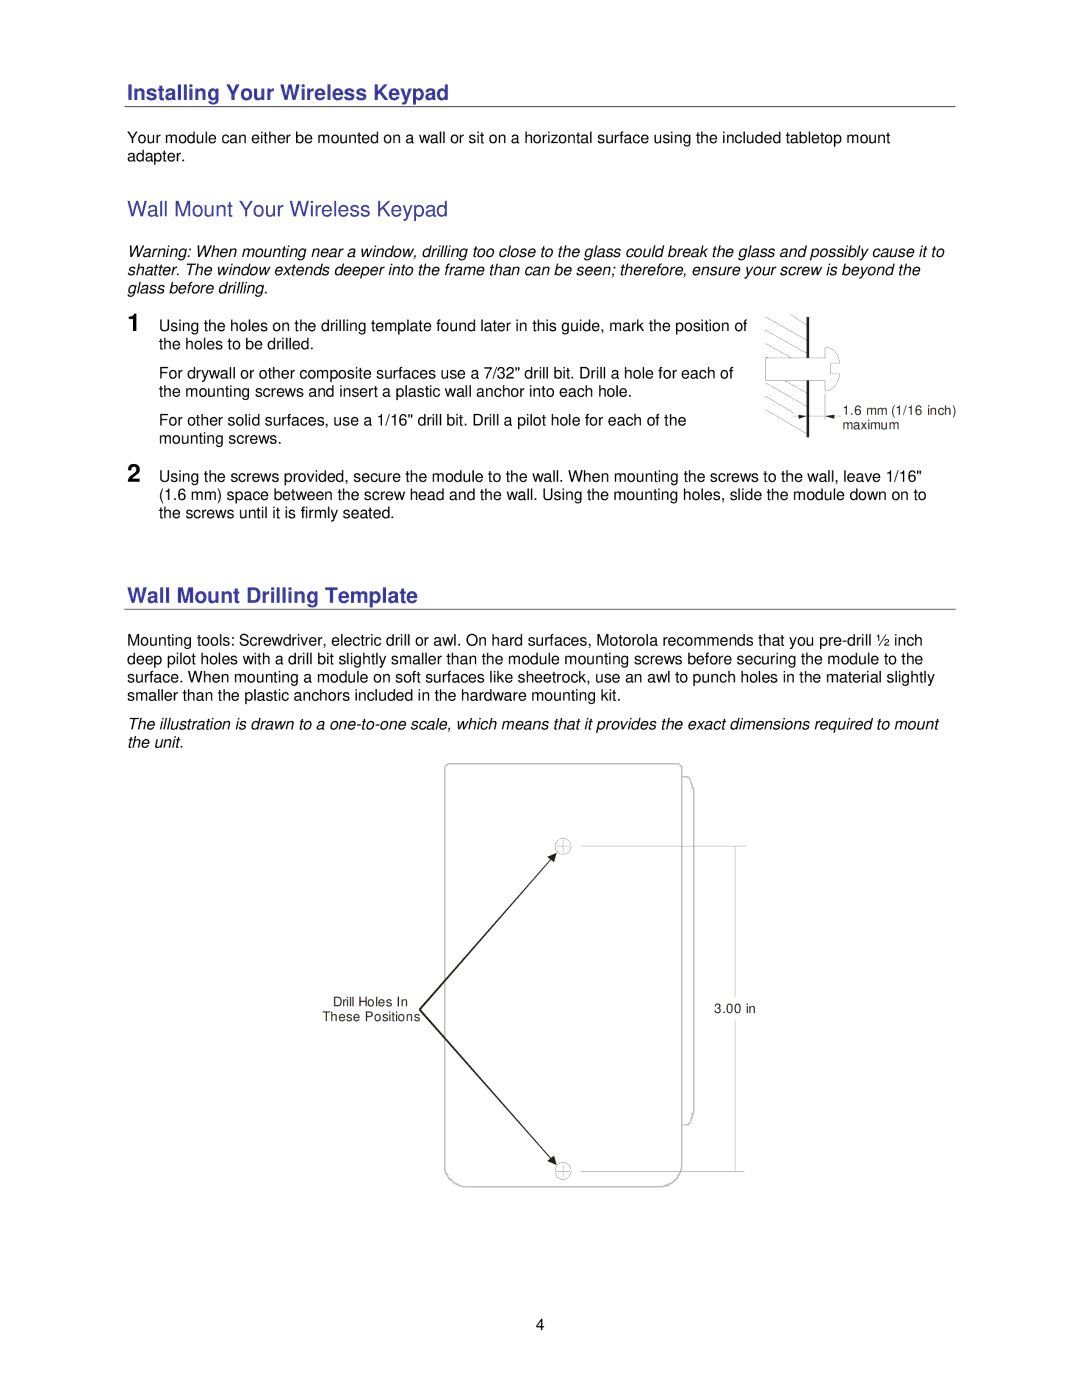
The illustration is drawn to a
Drill Holes In |
|
|
|
|
|
|
|
|
|
|
|
| |
|
|
| 3.00 in | |||
These Positions |
|
|
| |||
|
|
|
|
|
| |
|
|
|
|
|
| |
|
|
|
|
|
|
|
|
|
|
|
|
|
|
|
|
|
|
|
|
|
4