
AVDA-3 specifications
The Niles Audio AVDA-3 is a robust and versatile audio distribution amplifier designed for both residential and commercial audio systems. This device serves as an essential component in multi-room audio setups, enabling users to enjoy high-quality sound throughout an entire space without sacrificing audio performance.One of the standout features of the AVDA-3 is its ability to deliver three independent channels of amplification. Each channel can support various audio sources, making it ideal for situations where different rooms or zones require distinct audio streams. With its advanced circuitry, the AVDA-3 efficiently distributes power to connected speakers, ensuring that every area receives clear and balanced sound.
The AVDA-3 employs sophisticated technologies that enhance both sound quality and user experience. With a total output power of 30 watts per channel, it provides ample power for most residential applications. Its Class D amplification technology offers several advantages, including high efficiency, minimal heat generation, and a compact design. This allows the amplifier to be integrated seamlessly into various home environments, whether it's in a dedicated audio rack or mounted directly in a media cabinet.
Users will appreciate the intuitive control features of the AVDA-3. The device supports both infrared and RS-232 control protocols, making it compatible with a wide range of home automation systems. This flexibility ensures that users can easily manage their audio distribution in conjunction with other smart home devices.
In addition, the Niles Audio AVDA-3 features advanced protection circuitry to safeguard both the amplifier and connected speakers from potential issues such as short circuits and overheating. This reliability is crucial, especially in systems where the equipment may be in continuous use.
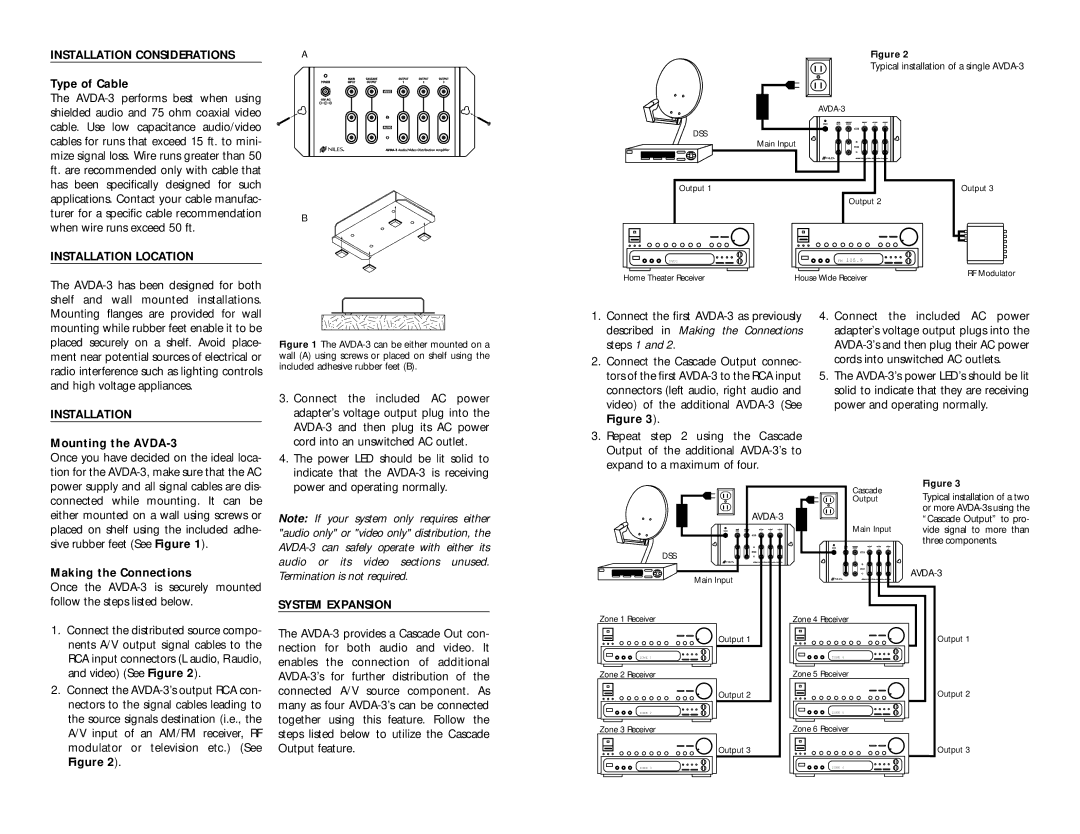
The compact design of the AVDA-3 also stands out, making it easy to install in various configurations. It is designed for easy access to inputs and outputs, enabling quick setup and adjustments as needed. With its sleek and unobtrusive look, it blends well with any decor.
Overall, the Niles Audio AVDA-3 is an impressive solution for those seeking high-quality audio distribution capabilities. Its combination of multiple channels, advanced technologies, and user-friendly features make it a preferred choice for audiophiles and professionals looking to create an immersive audio experience throughout their spaces. Whether for home theater setups or background music in a commercial establishment, the AVDA-3 is a reliable and efficient amplifier that delivers outstanding performance.