Figure 2
Loosening the
Screws for a Flush Fit
Speakers
Figure 1
Wiring Diagram
M

W E A T H E R P R O O F M U T I N G S T E R E O V O L U M E C O N T R O L S

W E A T H E R P R O O F U T I N G S T E R E O V O L U M E C O N T R O L S

MOUNTING LOCATION

WMVC 100: Convenient mounting locations include:

On a porch or patio wall.

Near doorways.

Close to a telephone.

WMVC 100E: Convenient mounting locations include:

At poolside.

Near a hot tub.

Near a barbecue.

Some states or municipalities allow installation of devices such as the MVC 100 in the same junction box as 110V devices, with a low-voltage partition between the devices. We do not rec- ommend this, because speaker wires can act as an antenna for electrical noise. Locating speaker wires too close to a light switch or dimmer may cause the speakers to emit a popping or buzzing sound. If you must locate the IM volume control near electrical devices, install it in a separate metal junction box, ground the box to the electrical-system ground, and route the speaker wires several feet away from the electrical wiring.

power to operate the muting function of the volume control. Therefore, two conductor power wire must be run to each vol- ume control location along with four conductor speaker wire.

WMVC 100: Before you install the WMVC 100 into an exist- ing wall, consider the possibility of hidden obstructions inside the wall, such as wood and metal studs; electrical, telephone, or other wiring; plumbing; and conduit.

1.Install the junction box in the usual manner.

2.Run all necessary wiring to the volume control. Label the wires for future reference.

WMVC 100E:

1.Run the necessary wiring up through the conduit and the opening at the base of the enclosure. Label the wires for future reference.

2.Mount the entire enclosure atop the PVC conduit.

INSTALLATION

1.Locate the 4 pin speaker wire connector plugs (and remove them if they are plugged in). See Figure 5.

3. Use a small flathead screw-

Receiver

driver or your thumbnail to

12VDC


raise the locking tabs,


exposing the holes on the

MVC HUB4

removable connector plug.


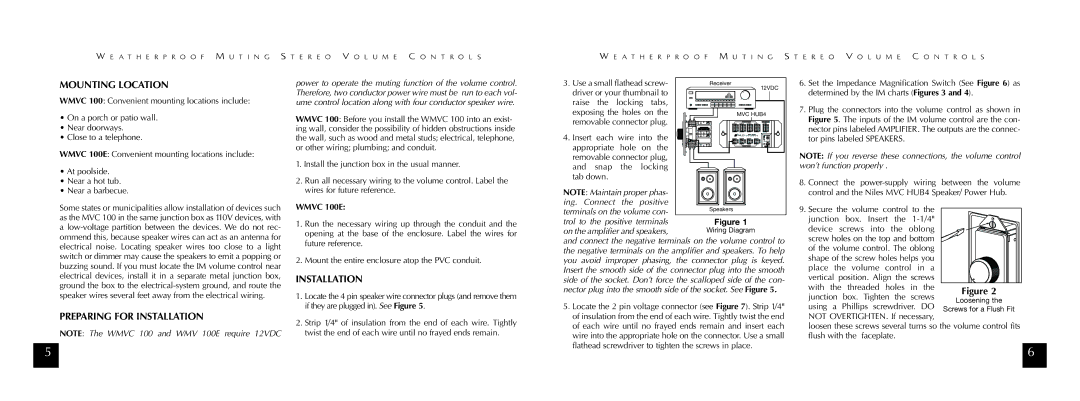
4. Insert each wire into the appropriate hole on the removable connector plug, and snap the locking tab down.

NOTE: Maintain proper phas- ing. Connect the positive terminals on the volume con- trol to the positive terminals on the amplifier and speakers,

and connect the negative terminals on the volume control to the negative terminals on the amplifier and speakers. To help you avoid improper phasing, the connector plug is keyed. Insert the smooth side of the connector plug into the smooth side of the socket. Don’t force the scalloped side of the con- nector plug into the smooth side of the socket. See Figure 5.

5. Locate the 2 pin voltage connector (see Figure 7). Strip 1/4"

6.Set the Impedance Magnification Switch (See Figure 6) as determined by the IM charts (Figures 3 and 4).

7.Plug the connectors into the volume control as shown in Figure 5. The inputs of the IM volume control are the con- nector pins labeled AMPLIFIER. The outputs are the connec- tor pins labeled SPEAKERS.

NOTE: If you reverse these connections, the volume control won’t function properly .

8.Connect the power-supply wiring between the volume control and the Niles MVC HUB4 Speaker/ Power Hub.

9.Secure the volume control to the junction box. Insert the 1-1/4" device screws into the oblong screw holes on the top and bottom of the volume control. The oblong shape of the screw holes helps you place the volume control in a vertical position. Align the screws

with the threaded holes in the junction box. Tighten the screws using a Phillips screwdriver. DO

PREPARING FOR INSTALLATION

2. Strip 1/4" of insulation from the end of each wire. Tightly


NOTE: The WMVC 100 and WMV 100E require 12VDC

twist the end of each wire until no frayed ends remain.

5

of insulation from the end of each wire. Tightly twist the end

of each wire until no frayed ends remain and insert each

wire into the appropriate hole on the connector. Use a small

flathead screwdriver to tighten the screws in place.

NOT OVERTIGHTEN. If necessary,

loosen these screws several turns so the volume control fits flush with the faceplate.

6

Page 4
Image 4
Niles Audio HDL-4, SPS-4, or SPS-6 specifications Mounting Location, Preparing for Installation, Wmvc 100E

or SPS-6, HDL-4, SPS-4 specifications

Niles Audio has established itself as a leader in the world of high-quality audio solutions for both residential and commercial environments. Among its impressive lineup, the SPS-4, HDL-4, and SPS-6 speakers stand out, catering to a variety of audiophiles' needs with cutting-edge technology and exceptional sound quality.

The Niles Audio SPS-4 is designed as a premium surface-mount speaker ideal for outdoor or high-mount applications. One of its main features is the weather-resistant construction that ensures durability and performance under various environmental conditions. With a 4-inch woofer and a 1-inch tweeter, the SPS-4 delivers a balanced sound profile, providing clear highs and robust lows. The speaker's unique waveguide technology enhances dispersion, allowing for a wider sound field that fills outdoor spaces effectively. Additionally, the speaker is easy to install, making it an excellent choice for both homeowners and installers seeking flexibility.

Moving to the HDL-4, this speaker exhibits Niles' commitment to innovation in home audio. With a sleek, compact design, the HDL-4 is engineered for in-wall or in-ceiling installation, blending seamlessly into any décor. Its dual 4-inch woofers and a powerful 1-inch tweeter work together to provide exceptional clarity and depth. The speaker features Niles' patented wide dispersion technology, which allows sound to spread evenly across a room, ensuring that every listener enjoys the same quality of audio regardless of their position. This is particularly beneficial for larger areas, making the HDL-4 a versatile addition to any home theater or multi-room audio system.

Finally, the SPS-6 builds upon the strengths of its predecessors while offering enhanced sound performance for larger spaces. Equipped with dual 6.5-inch woofers and a 1-inch soft dome tweeter, the SPS-6 creates a full-bodied sound experience that impresses even the most discerning audiophiles. This speaker also utilizes Niles' innovative enclosure design, which minimizes distortion and maximizes sound clarity. The SPS-6 is designed with versatility in mind, allowing it to be used in a variety of configurations, whether as part of a multi-channel setup or as standalone speakers in a stereo configuration.

Overall, the Niles Audio SPS-4, HDL-4, and SPS-6 speakers exemplify the brand's dedication to quality, technology, and user-friendly designs. Whether you're looking to enhance your outdoor experience with the SPS-4, integrate the HDL-4 seamlessly into your home, or amplify your listening with the SPS-6, Niles Audio provides exceptional options tailored to various needs and environments, ensuring superior sound performance for all.