ASSEMBLY
Assembly requires two persons. Set the treadmill in a cleared area and remove all packing materials. Do not dispose of the packing materials until assembly is completed.
Note: The underside of the treadmill walking belt is coated with
Assembly requires the included allen wrench ![]() and your own phillips screwdriver
and your own phillips screwdriver ![]()
![]() ,
,
standard screwdriver ![]()
![]() , and wire cutters
, and wire cutters ![]() . For help identifying the assembly hard- ware, see the hardware drawings below.
. For help identifying the assembly hard- ware, see the hardware drawings below.
Cover Screw | 1” Tek Screw (82) |
Star Washer |
|
Base Plate Bolt | Handrail Bolt |
Short Console |
|
Bolt |
|
Console Bolt | Pulse Bar Bolt |
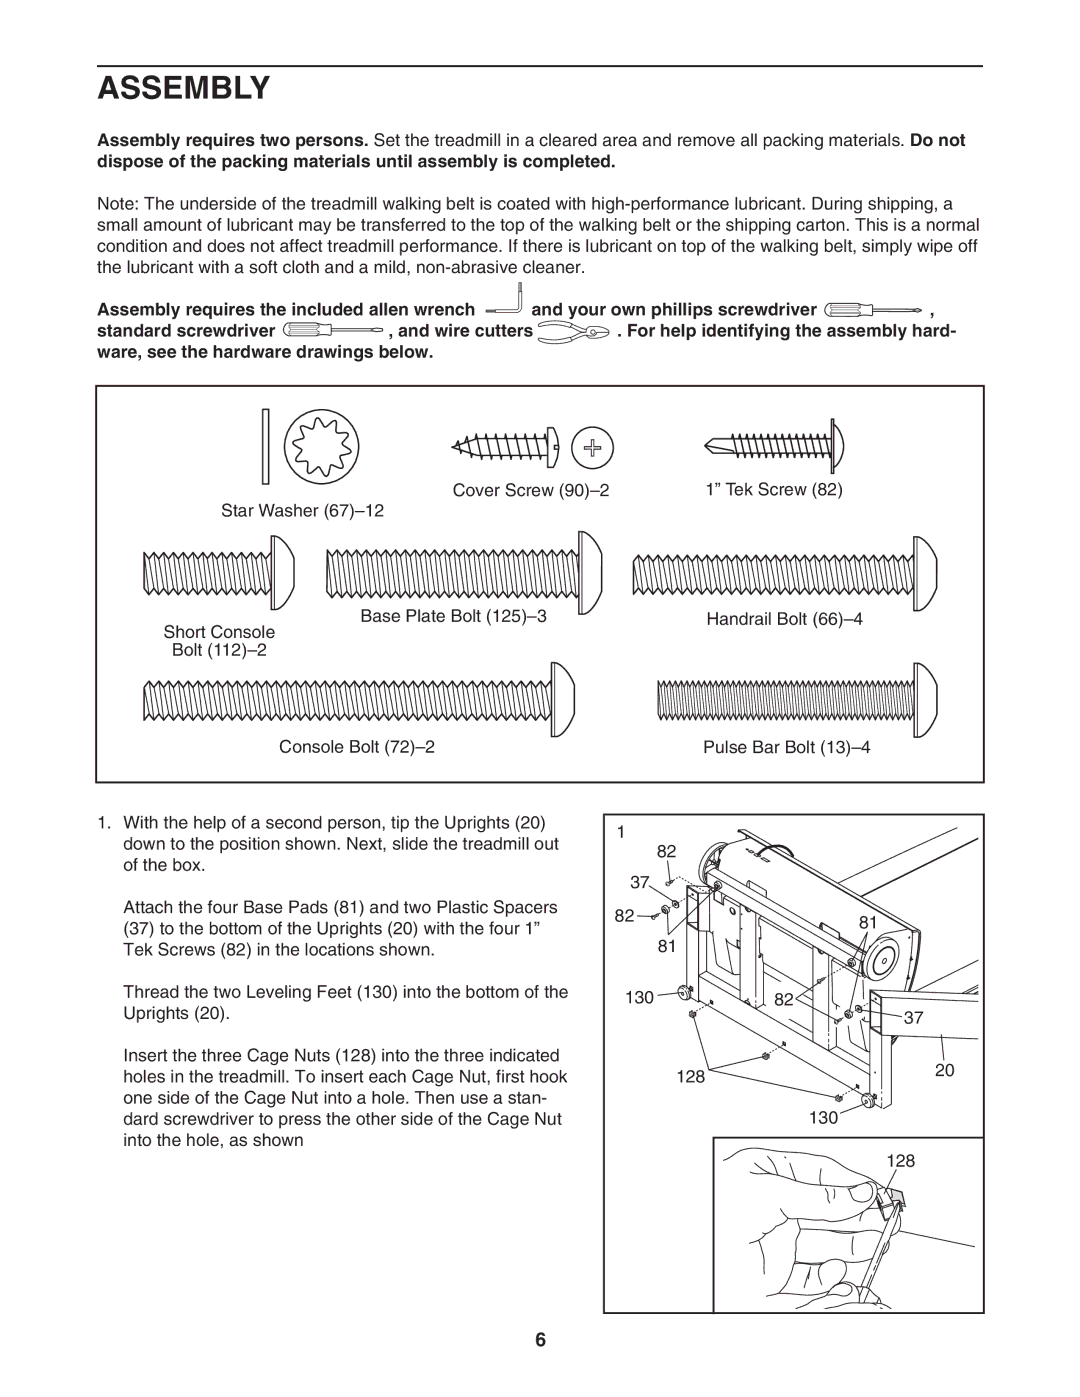
1.With the help of a second person, tip the Uprights (20) down to the position shown. Next, slide the treadmill out of the box.
Attach the four Base Pads (81) and two Plastic Spacers (37) to the bottom of the Uprights (20) with the four 1” Tek Screws (82) in the locations shown.
Thread the two Leveling Feet (130) into the bottom of the Uprights (20).
Insert the three Cage Nuts (128) into the three indicated holes in the treadmill. To insert each Cage Nut, first hook one side of the Cage Nut into a hole. Then use a stan- dard screwdriver to press the other side of the Cage Nut into the hole, as shown
1 | 82 |
|
|
| |
37 |
|
|
82 |
| 81 |
|
| |
| 81 |
|
130 |
| 82 |
|
| 37 |
| 128 | 20 |
|
| |
|
| 130 |
|
| 128 |
6