
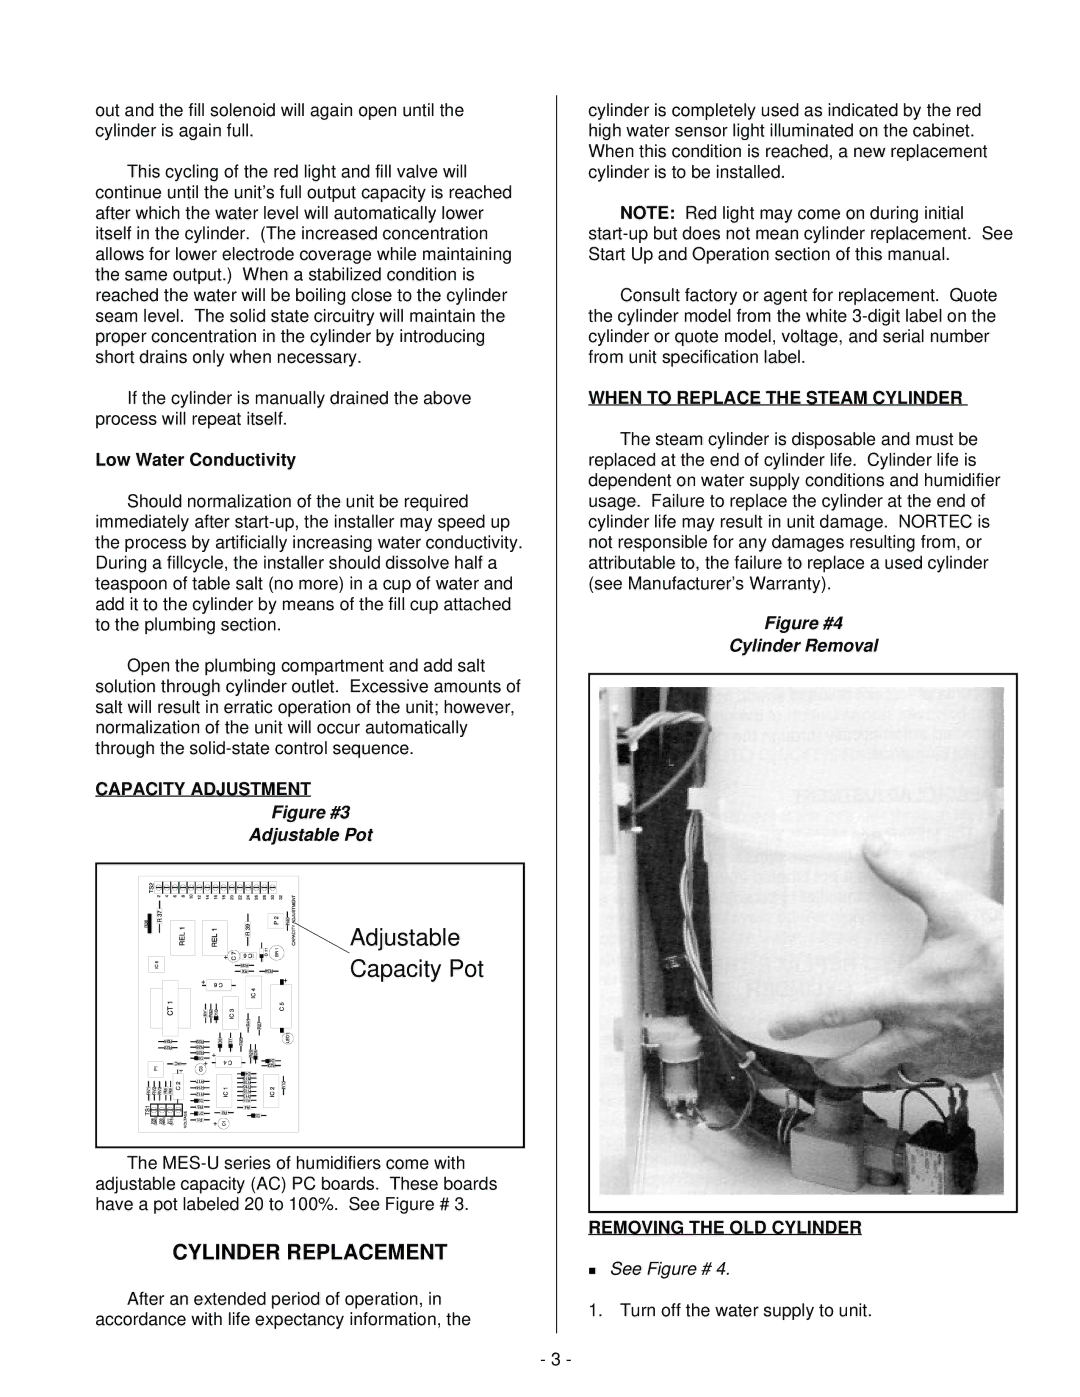
MES-U specifications
Nortec Industries MES-U is a cutting-edge Manufacturing Execution System (MES) designed to enhance operational efficiency and performance in manufacturing environments. As industry demands for agility and responsiveness grow, the MES-U stands out as a crucial tool for modern manufacturers looking to optimize their production processes.One of the main features of the MES-U is its real-time data acquisition capability. The system integrates seamlessly with various machines and equipment, collecting data continuously as products move through the production line. This provides operators with an immediate overview of performance metrics, allowing for quick decision-making and timely interventions when issues arise. The ability to monitor production in real-time ensures that manufacturers can maintain high productivity levels and reduce downtime.
Another significant feature of the Nortec Industries MES-U is its user-friendly interface. The intuitive design allows operators at all levels of expertise to navigate the system easily. Key information such as production schedules, machine statuses, and quality control metrics are presented clearly, enabling efficient workflow management. This accessibility is crucial in enabling teams to adapt quickly to changes in production demand and operational challenges.
The MES-U employs advanced analytics and reporting tools that empower manufacturers to leverage the data collected. Users can generate detailed reports on production metrics, quality data, and operational efficiency, enabling ongoing assessment and strategy refinement. This data-driven approach helps organizations uncover insights that can lead to improved processes, waste reduction, and cost savings.
Integration is another critical characteristic of the MES-U. The system can connect with other enterprise-level solutions, such as Enterprise Resource Planning (ERP) systems and Supply Chain Management (SCM) tools, providing a cohesive view of the entire production ecosystem. This interoperability facilitates better coordination between departments and enhances overall organizational agility.
Scalability is also a defining aspect of the MES-U. Whether a manufacturer operates a single facility or multiple sites, the system can adapt to varying levels of complexity and production demands. This flexibility ensures that as companies grow and evolve, their MES can support new requirements without significant disruption.
In summary, Nortec Industries MES-U is a robust and versatile solution that combines real-time data acquisition, user-friendly design, advanced analytics, and seamless integration capabilities. With these features, manufacturers can enhance their operational efficiency, adapt quickly to changes, and drive continuous improvement across their processes.