5.The warnings, precautions, and instructions discussed in this manual can not cover all possible conditions and situations that may occur. The operator must understand that common sense and caution are factors which cannot be built into this product, but must be supplied by the operator.
ASSEMBLY AND OPERATING INSTRUCTIONS
To attach a quick connector
!WARNING
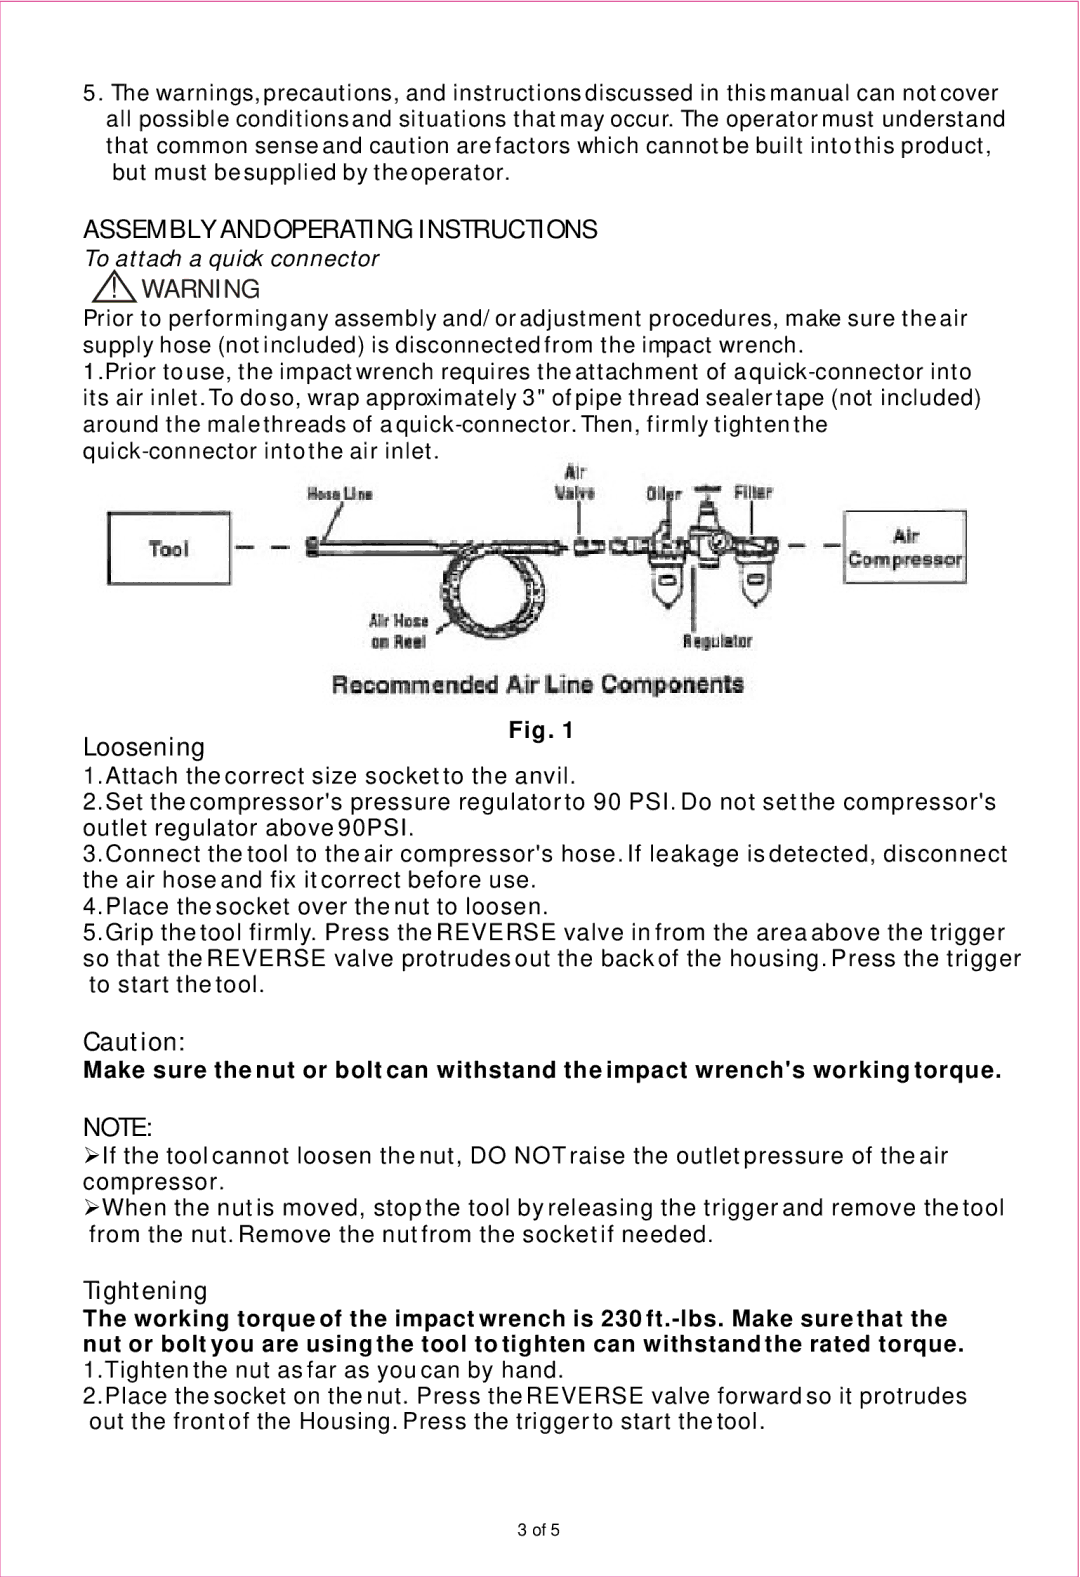
Prior to performing any assembly and/or adjustment procedures, make sure the air supply hose (not included) is disconnected from the impact wrench.
1.Prior to use, the impact wrench requires the attachment of a
Fig. 1
Loosening
1.Attach the correct size socket to the anvil.
2.Set the compressor's pressure regulator to 90 PSI. Do not set the compressor's outlet regulator above 90PSI.
3.Connect the tool to the air compressor's hose. If leakage is detected, disconnect the air hose and fix it correct before use.
4.Place the socket over the nut to loosen.
5.Grip the tool firmly. Press the REVERSE valve in from the area above the trigger so that the REVERSE valve protrudes out the back of the housing. Press the trigger to start the tool.
Caution:
Make sure the nut or bolt can withstand the impact wrench's working torque.
NOTE:
ØIf the tool cannot loosen the nut, DO NOT raise the outlet pressure of the air compressor.
ØWhen the nut is moved, stop the tool by releasing the trigger and remove the tool from the nut. Remove the nut from the socket if needed.
Tightening
The working torque of the impact wrench is 230
1.Tighten the nut as far as you can by hand.
2.Place the socket on the nut. Press the REVERSE valve forward so it protrudes out the front of the Housing. Press the trigger to start the tool.
3 of 5