9
FUNCTIONALDESCRIPTION CAUTION:
• Always be sure that the tool is switched off and
unplugged before adjusting or checking function on the
tool.
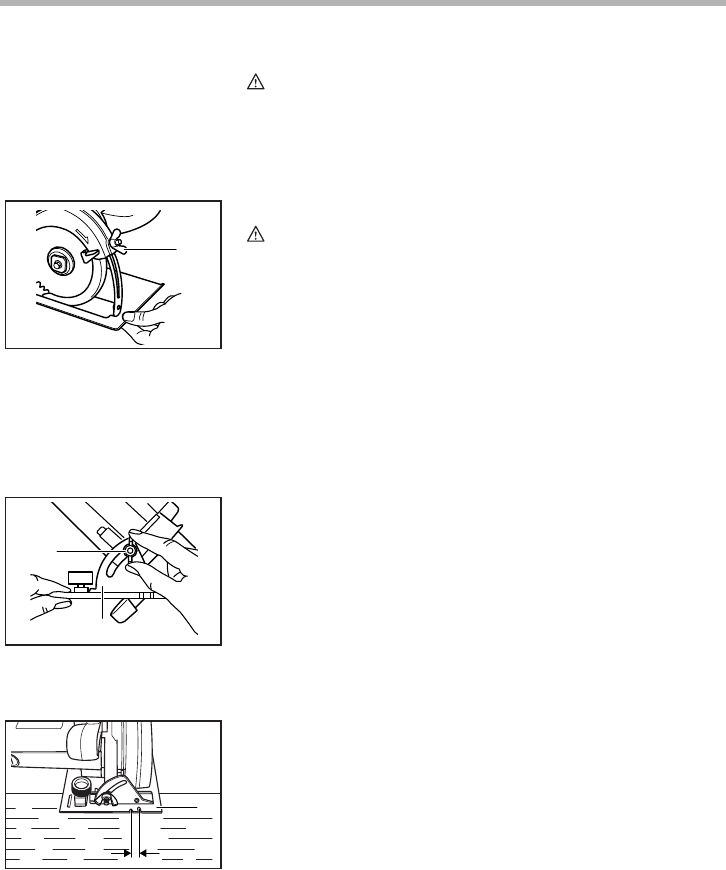
Adjusting depth of cut
CAUTION:
• After adjusting the depth of cut, always tighten the
clamping screw securely.
Loosen the clamping screw on the depth guide and move the
base up or down. At the desired depth of cut, secure the
base byt ightening the clamping screw.
Forcleanser, safer cuts, set cut depth so that n o more than a
blade tooth length projects below workpiece surface. Using
proper cut depth helps to reduce potential for dangerous
KICKBACKSwhich ca n cause personal injury.
Bevel cutting
Loosen the clamping screw on the bevel scale plate on the
front of the base. Set forthe de sired angle (0° - 45°) by tilting
accordingly,then tighten the clam ping screw securely.
Sighting
Forstrai ghtc uts,a lign the A position on the front of the base
with yourcutting line. For 45° bevel cuts, align the B position
withit.
1. Clamping screw
001238
1
1. Clamping screw
2. Bevelscale plate
1
2
001239
1. Base plate
001240
A
1
B