
BLACK NICKEL 1/4" AIR ANGLE DIE GRINDER specifications
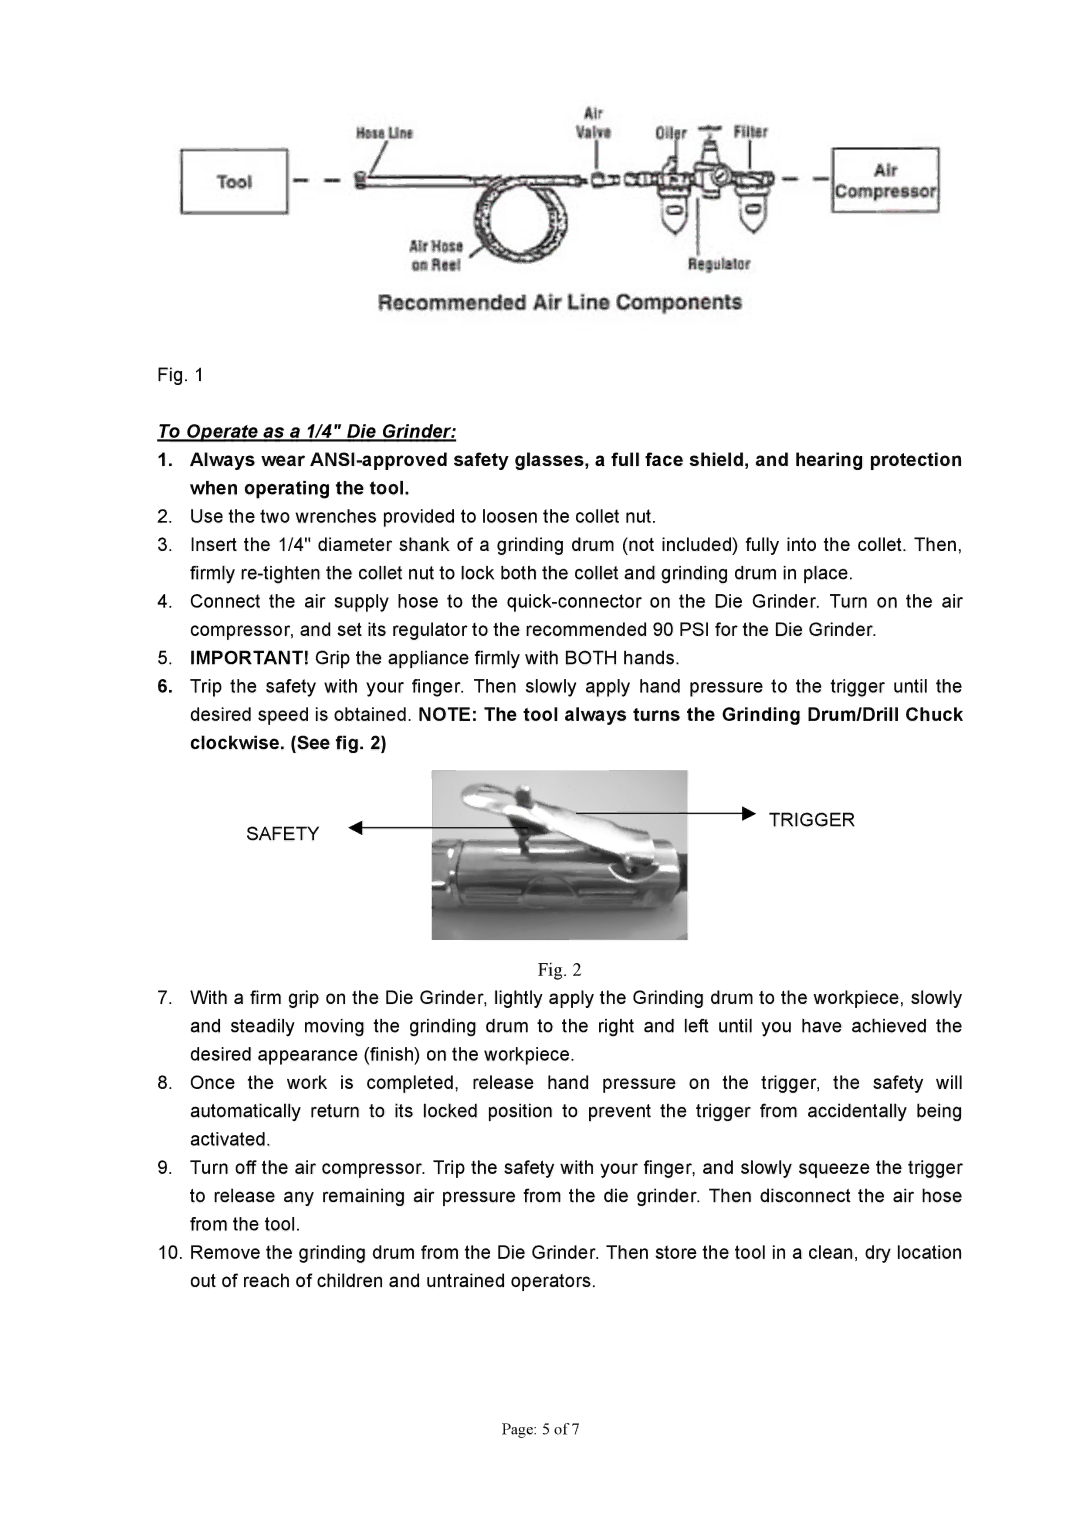
The Northern Industrial Tools Black Nickel 1/4" Air Angle Die Grinder is a versatile and powerful tool designed for precision grinding, polishing, and finishing tasks in various applications. Built for both professional and DIY users, this air angle die grinder is engineered to handle tough jobs with ease and efficiency.One of its main features is the 1/4" collet, which provides excellent compatibility with a wide array of grinding and cutting attachments. This allows users to easily switch tools depending on their specific needs, from sanding and polishing to burr removal and metal shaping. The 90-degree angle design enhances accessibility to tight spaces, making it ideal for intricate work and hard-to-reach areas that a straight die grinder might not be able to handle.
The Black Nickel coating not only adds to the aesthetic appeal of the die grinder but also offers a layer of protection against corrosion and wear. This durability is crucial for tools frequently exposed to metal shavings, dust, and other harsh environments. Additionally, the lightweight aluminum housing contributes to the tool's overall portability, ensuring comfortable handling over extended periods of use without causing fatigue.
Powered by an efficient air motor, the die grinder delivers high RPMs (revolutions per minute), providing substantial power for heavy-duty tasks while maintaining a smooth and controllable operation. Its ergonomic design features a comfortable grip, allowing for maximum maneuverability during prolonged sessions. The safety throttle lever prevents accidental startups and ensures that the tool remains under the user's control at all times.
For enhanced performance, the Northern Industrial Tools Black Nickel 1/4" Air Angle Die Grinder is designed for easy maintenance. Its access to the internal components allows for quick lubrication and servicing, ensuring consistent operation over time. Users benefit from reduced downtime and increased productivity, making it a valuable addition to any workshop or job site.
In summary, the Northern Industrial Tools Black Nickel 1/4" Air Angle Die Grinder is a reliable and efficient tool that delivers exceptional performance for a range of applications. With its durable construction, versatile features, and user-friendly design, it stands out as an excellent choice for anyone looking to achieve high-quality results in their grinding and finishing tasks.