READ & SAVE THESE INSTRUCTIONS! INSTALLATION INSTRUCTIONS
Cube Speakers
Model:
Power Handling Capacity: 100 Watts RMS
Impedance: 8 Ohms nominal
Features:
•Meets or exceeds Electronic Industry Association (EIA) standard
•Magnetically Shielded
•Twin, wide range, 2.5" woofers
•Frequency Response:
•Sensitivity: @ 1 meter with 1 Watt input: 86 dB
•Nominal Impedance: 8 Ohms
INTRODUCTION
These indoor speakers are designed to be used in a home theater system as rear and/or front speakers and make an excellent low cost, great sounding system when used in conjunction with Sensonic powered subwoofers such as SS4108 or MS4110P. They can also be used as speakers for background music reproduction.
INSTALLATION
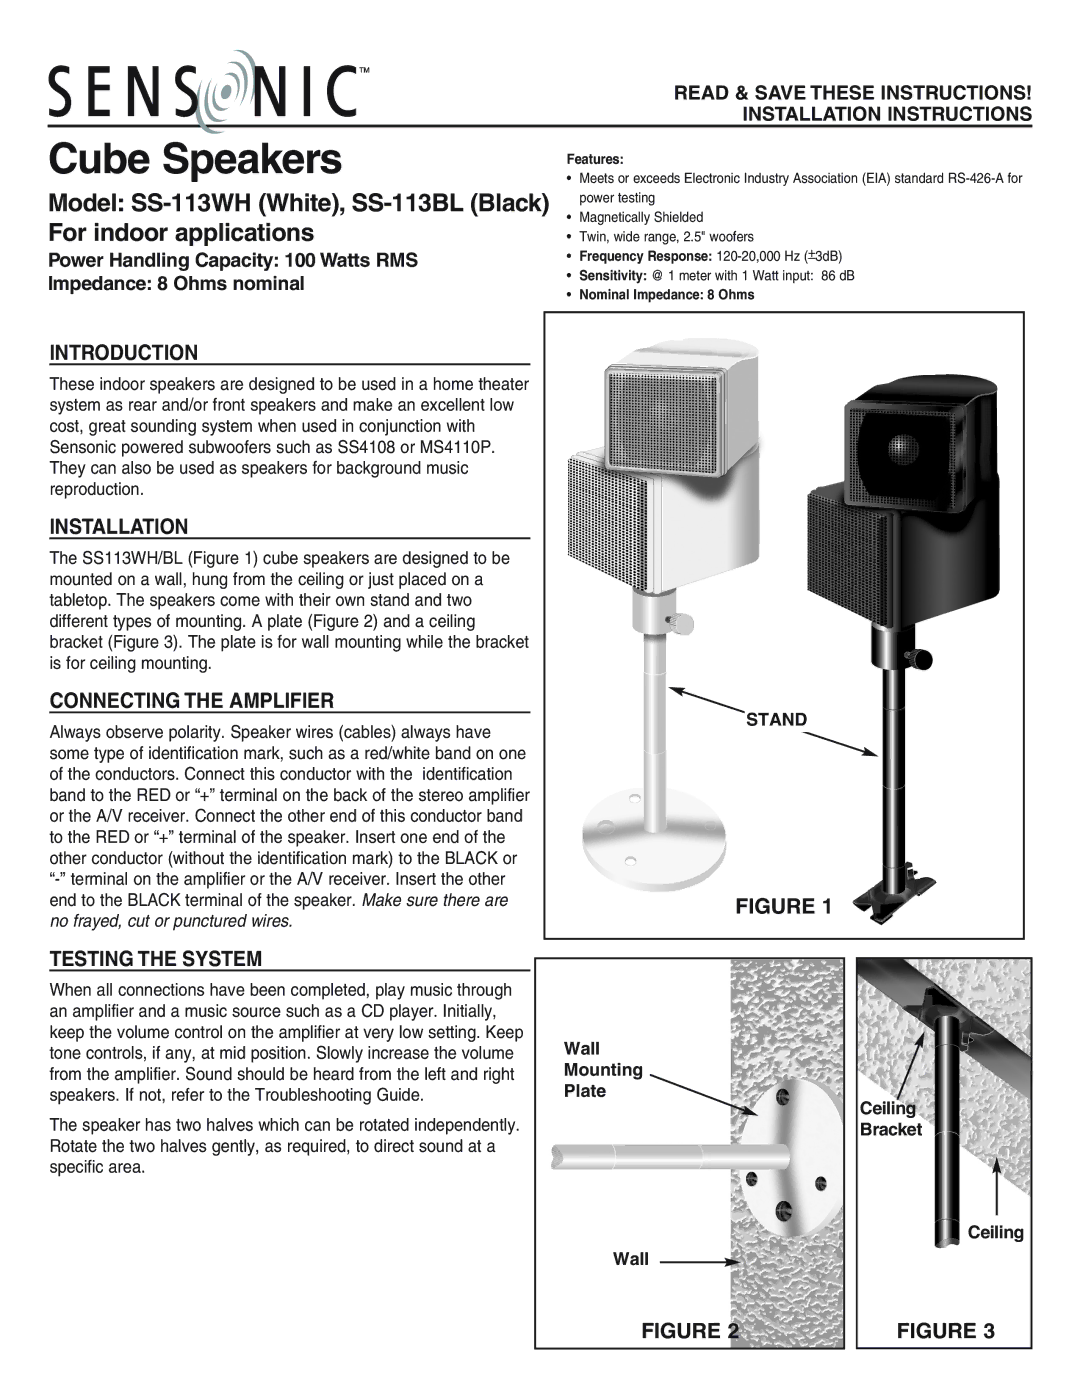
The SS113WH/BL (Figure 1) cube speakers are designed to be mounted on a wall, hung from the ceiling or just placed on a tabletop. The speakers come with their own stand and two different types of mounting. A plate (Figure 2) and a ceiling bracket (Figure 3). The plate is for wall mounting while the bracket is for ceiling mounting.
CONNECTING THE AMPLIFIER
Always observe polarity. Speaker wires (cables) always have some type of identification mark, such as a red/white band on one of the conductors. Connect this conductor with the identification band to the RED or “+” terminal on the back of the stereo amplifier or the A/V receiver. Connect the other end of this conductor band to the RED or “+” terminal of the speaker. Insert one end of the other conductor (without the identification mark) to the BLACK or
TESTING THE SYSTEM
When all connections have been completed, play music through an amplifier and a music source such as a CD player. Initially, keep the volume control on the amplifier at very low setting. Keep tone controls, if any, at mid position. Slowly increase the volume from the amplifier. Sound should be heard from the left and right speakers. If not, refer to the Troubleshooting Guide.
The speaker has two halves which can be rotated independently. Rotate the two halves gently, as required, to direct sound at a specific area.
STAND
FIGURE 1
Wall
Mounting
Plate
Ceiling
Bracket
Ceiling
Wall
FIGURE 2
FIGURE 3