MANUAL

I n s t a l l a t i o n U s i n g O p t i o n a l

Double Swivel Bracket

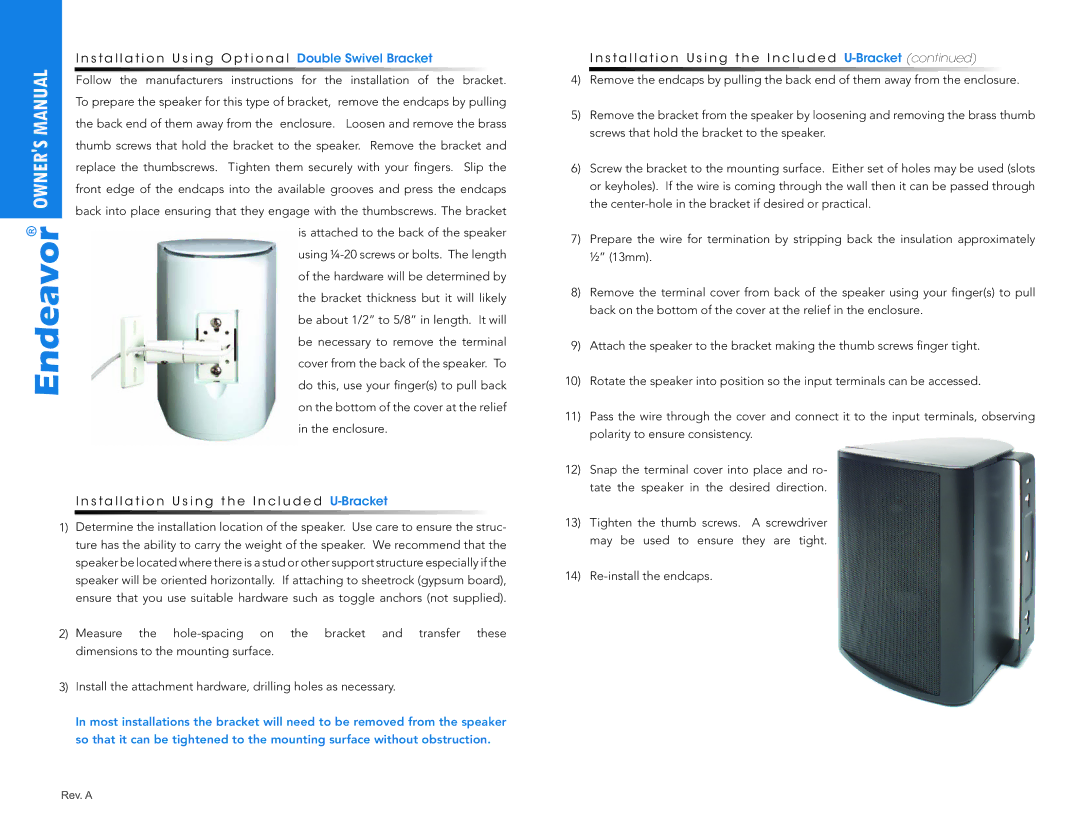
Follow the manufacturers instructions

for the installation of the bracket.


To prepare the speaker for this type of bracket,

remove the endcaps by pulling


the back end of them away from the enclosure.

Loosen and remove the brass

OWNER'S

thumb screws that hold the bracket to the speaker. Remove the bracket and

replace the thumbscrews. Tighten them securely with your fingers. Slip the


front edge of the endcaps into the available grooves and press the endcaps back into place ensuring that they engage with the thumbscrews. The bracket is attached to the back of the speaker using ¼-20 screws or bolts. The length of the hardware will be determined by the bracket thickness but it will likely be about 1/2” to 5/8” in length. It will be necessary to remove the terminal cover from the back of the speaker. To do this, use your finger(s) to pull back on the bottom of the cover at the relief

in the enclosure.

I n s t a l l a t i o n U s i n g t h e I n c l u d e d U-Bracket

1)Determine the installation location of the speaker. Use care to ensure the struc- ture has the ability to carry the weight of the speaker. We recommend that the speaker be located where there is a stud or other support structure especially if the speaker will be oriented horizontally. If attaching to sheetrock (gypsum board), ensure that you use suitable hardware such as toggle anchors (not supplied).

2)Measure the hole-spacing on the bracket and transfer these dimensions to the mounting surface.

3)Install the attachment hardware, drilling holes as necessary.

In most installations the bracket will need to be removed from the speaker so that it can be tightened to the mounting surface without obstruction.

I n s t a l l a t i o n U s i n g t h e I n c l u d e d U-Bracket(continued)

4)Remove the endcaps by pulling the back end of them away from the enclosure.

5)Remove the bracket from the speaker by loosening and removing the brass thumb screws that hold the bracket to the speaker.

6)Screw the bracket to the mounting surface. Either set of holes may be used (slots or keyholes). If the wire is coming through the wall then it can be passed through the center-hole in the bracket if desired or practical.

7)Prepare the wire for termination by stripping back the insulation approximately ½” (13mm).

8)Remove the terminal cover from back of the speaker using your finger(s) to pull back on the bottom of the cover at the relief in the enclosure.

9)Attach the speaker to the bracket making the thumb screws finger tight.

10)Rotate the speaker into position so the input terminals can be accessed.

11)Pass the wire through the cover and connect it to the input terminals, observing polarity to ensure consistency.

12)Snap the terminal cover into place and ro- tate the speaker in the desired direction.

13)Tighten the thumb screws. A screwdriver may be used to ensure they are tight.

14)Re-install the endcaps.

Page 2
Image 2
OEM Systems IO-510-B, IO510B owner manual Double Swivel Bracket, Owners

IO510B, IO-510-B specifications

The OEM Systems IO510B, also known as IO-510-B, is a robust and versatile I/O interface designed for various industrial and automation applications. This device stands out due to its ability to facilitate communication between sensors, instruments, and control systems, making it a crucial component in the landscape of industrial automation.

One of the primary features of the IO510B is its extensive I/O capabilities. It supports multiple digital and analog inputs and outputs, providing flexibility for various types of devices and sensors. The versatility of the IO510B allows it to be utilized in numerous applications, from simple data acquisition systems to complex process control environments. This makes it an ideal choice for industries such as manufacturing, energy, and transportation.

In terms of connectivity, the IO510B offers a variety of communication protocols, including RS-232, RS-485, and CAN bus. This variety ensures that the device can integrate seamlessly into existing systems, allowing users to communicate with a diverse range of equipment without the need for extensive modifications. Additionally, the device supports fieldbus technologies, enabling efficient data exchange in distributed control systems.

The IO510B is equipped with advanced signal conditioning technologies, which enhance its capability to process and filter incoming data. This feature ensures that the system receives accurate and reliable information, crucial for making informed decisions in real-time applications. Moreover, it supports various sensor types, including thermocouples, RTDs, and pressure sensors, further expanding its usability in different scenarios.

Another significant characteristic of the IO510B is its rugged design, which allows it to operate effectively in harsh environments. The device is built to withstand extreme temperatures, humidity, and vibration, making it ideal for use in industrial settings where reliability is paramount. Its durable construction ensures longevity and reduces the need for frequent maintenance, which can be a costly endeavor for industries relying on continuous operation.

User-friendly software is another advantage of the IO510B, providing intuitive interfaces for monitoring and configuring the device. This ease of use maximizes productivity by minimizing setup time and facilitating quick troubleshooting.

In conclusion, the OEM Systems IO510B is a powerful I/O interface that combines flexibility, reliability, and advanced technology. With its extensive connectivity options, robust design, and user-friendly software, it serves as an essential tool for modern industrial automation and control, satisfying the demands of diverse sectors with ease.