ring can be obtained from 10 BAR. If the
∙Once the
∙Replace the
 (Fig. 4) Stretch the
 O-ring
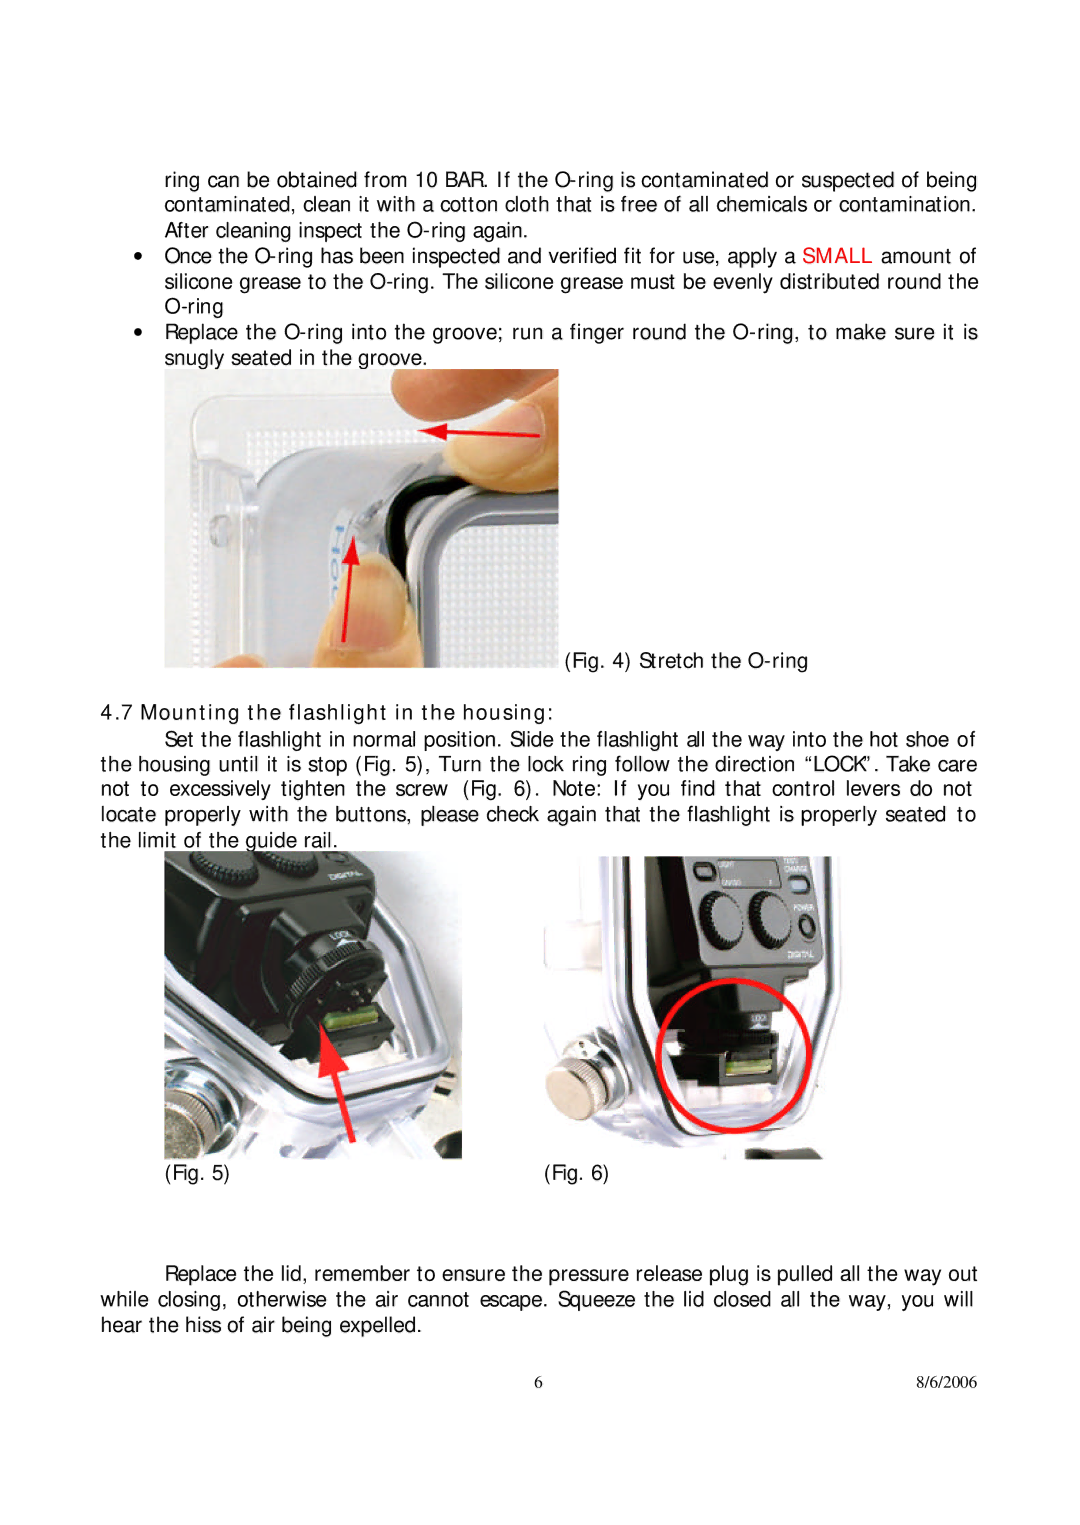
4.7 Mounting the flashlight in the housing:
Set the flashlight in normal position. Slide the flashlight all the way into the hot shoe of the housing until it is stop (Fig. 5), Turn the lock ring follow the direction “LOCK”. Take care not to excessively tighten the screw (Fig. 6). Note: If you find that control levers do not locate properly with the buttons, please check again that the flashlight is properly seated to the limit of the guide rail.
(Fig. 5) | (Fig. 6) |
Replace the lid, remember to ensure the pressure release plug is pulled all the way out while closing, otherwise the air cannot escape. Squeeze the lid closed all the way, you will hear the hiss of air being expelled.
6 | 8/6/2006 |