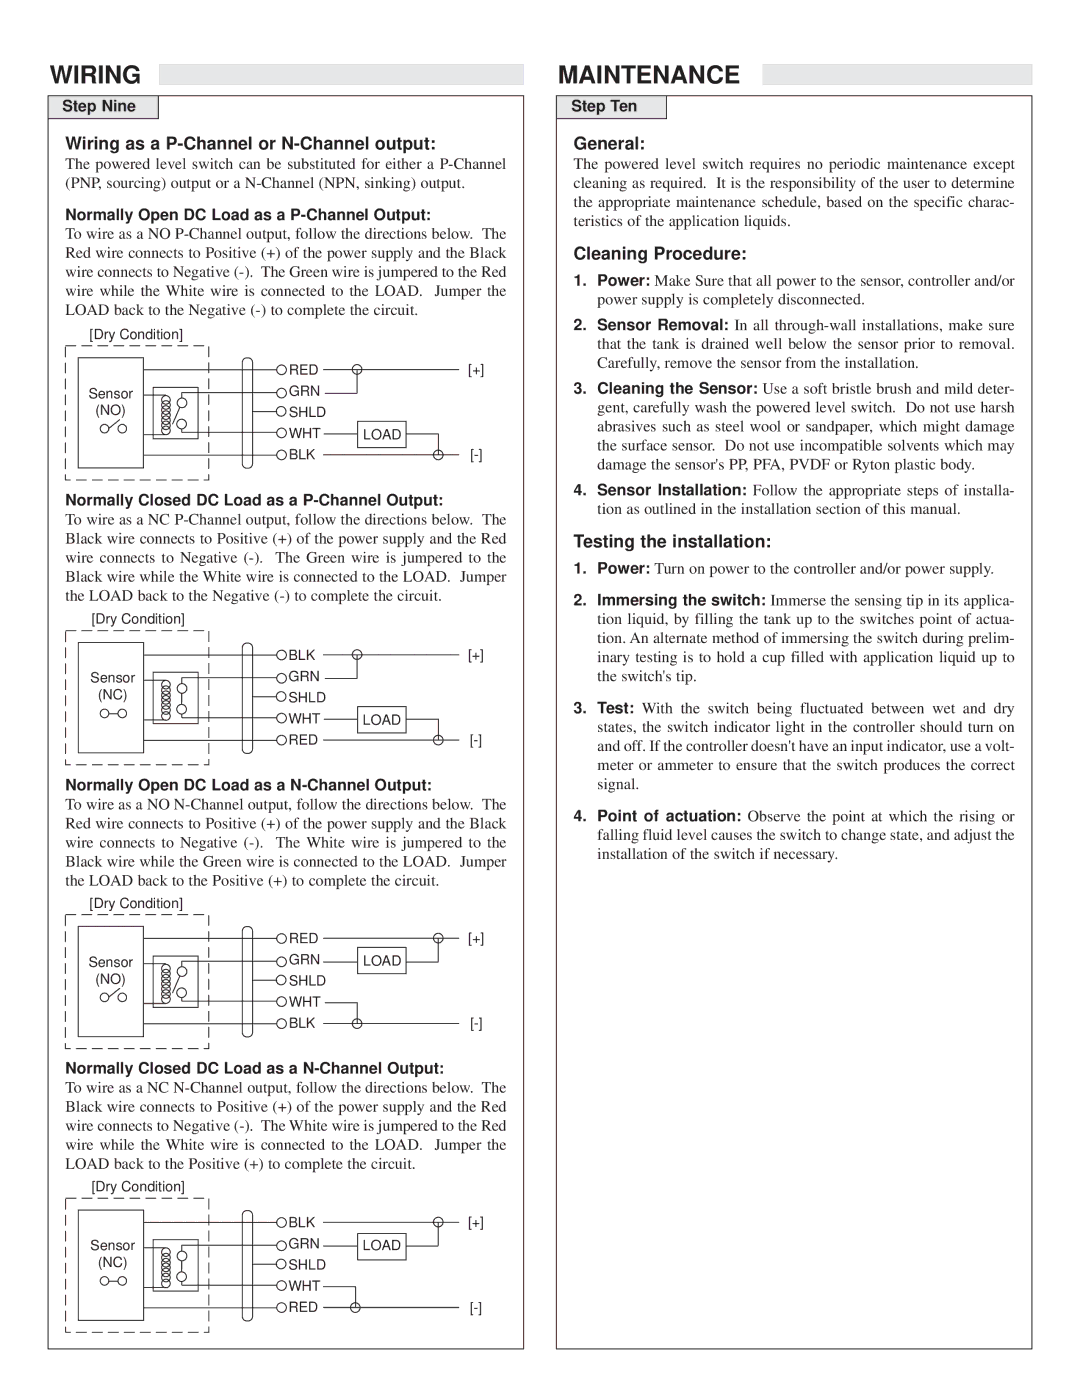
LVF-210, LVC-152, LVC-100, LTU-101, LVU-150 specifications
The Omega series offers a range of advanced lighting and visualization technologies, including the LTU-101, LVC-100, LVC-152, LVF-210, and LVU-150 models. Each of these products is designed to cater to various industrial, commercial, and residential requirements, showcasing exceptional features, reliability, and innovation.The Omega LTU-101 is a versatile lighting solution known for its energy efficiency and long lifespan. It employs advanced LED technology to deliver high illumination while consuming minimal power. The LTU-101 boasts a robust design, making it suitable for both indoor and outdoor applications. Additionally, its weather-resistant housing ensures durability in adverse conditions.
Next is the LVC-100, which focuses on providing superior visual clarity and color accuracy. This model is equipped with state-of-the-art optical technologies that enhance the viewing experience in various environments. The LVC-100 can easily be integrated into existing systems, making it a popular choice for commercial use, including retail and presentation settings. Its intuitive controls allow for flexible adjustment of brightness and color temperatures, enhancing user experience.
Moving to the LVC-152, this model excels in versatility and adaptability. Featuring a modular design, the LVC-152 can be customized with different light modules to meet specific lighting needs. This makes it ideal for multifaceted environments such as galleries, museums, or event spaces where dynamic lighting effects are required. The inclusion of smart technologies allows for remote management and programming, aligning well with modern automation systems.
For those seeking robust performance in challenging conditions, the LVF-210 stands out. Built for industrial applications, this fixture is engineered to withstand high levels of dust, moisture, and impact. It employs cutting-edge thermal management technologies to ensure optimal functioning even under extreme workloads, offering a reliable lighting solution for warehouses and manufacturing facilities.
Lastly, the LVU-150 is designed for versatility in both outdoor and indoor settings. Its compact size does not compromise its power, providing bright and uniform illumination. The LVU-150 incorporates intelligent sensors that adjust lighting based on ambient conditions, promoting energy savings without sacrificing performance.
With this impressive portfolio, Omega continually demonstrates its commitment to pushing the boundaries of lighting technology, ensuring a perfect combination of function, form, and efficiency across various applications.

