2 – 3 cm
6
➌Fitting the cuff and Start
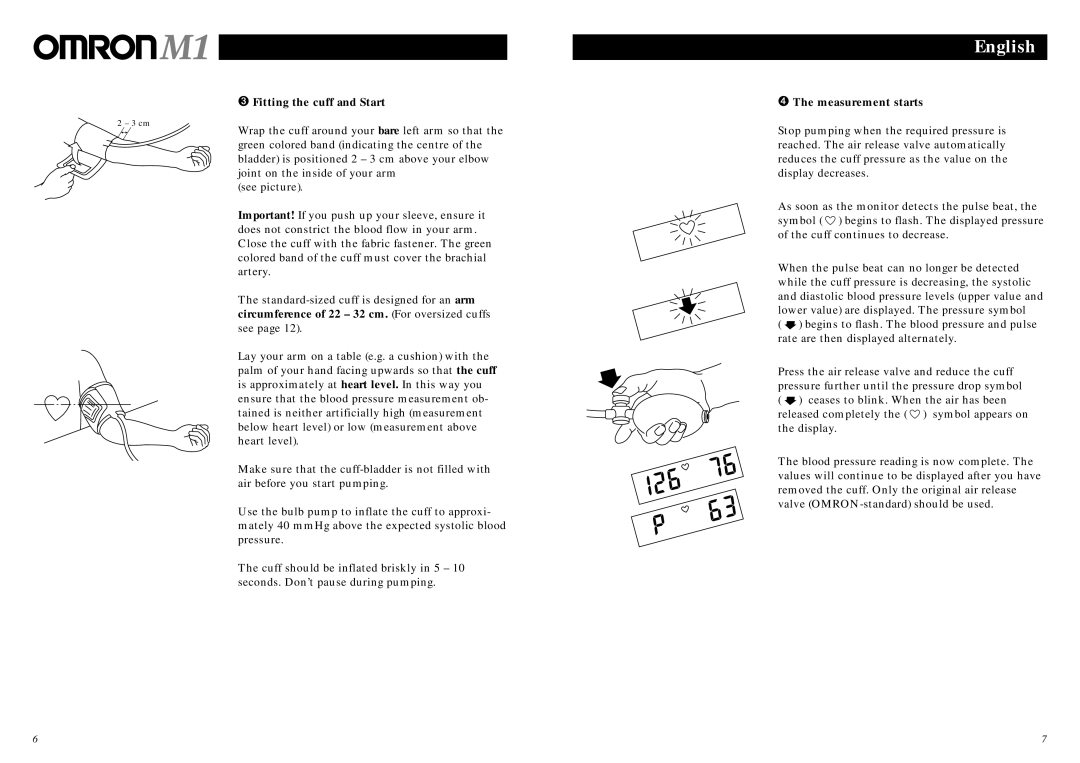
Wrap the cuff around your bare left arm so that the green colored band (indicating the centre of the bladder) is positioned 2 – 3 cm above your elbow joint on the inside of your arm
(see picture).
Important! If you push up your sleeve, ensure it does not constrict the blood flow in your arm. Close the cuff with the fabric fastener. The green colored band of the cuff must cover the brachial artery.
The
Lay your arm on a table (e.g. a cushion) with the palm of your hand facing upwards so that the cuff is approximately at heart level. In this way you ensure that the blood pressure measurement ob- tained is neither artificially high (measurement below heart level) or low (measurement above heart level).
Make sure that the
Use the bulb pump to inflate the cuff to approxi- mately 40 mmHg above the expected systolic blood pressure.
The cuff should be inflated briskly in 5 – 10 seconds. Don’t pause during pumping.
English
➍The measurement starts
Stop pumping when the required pressure is reached. The air release valve automatically reduces the cuff pressure as the value on the display decreases.
As soon as the monitor detects the pulse beat, the symbol ( ![]() ) begins to flash. The displayed pressure of the cuff continues to decrease.
) begins to flash. The displayed pressure of the cuff continues to decrease.
When the pulse beat can no longer be detected while the cuff pressure is decreasing, the systolic and diastolic blood pressure levels (upper value and lower value) are displayed. The pressure symbol
( ![]() ) begins to flash. The blood pressure and pulse rate are then displayed alternately.
) begins to flash. The blood pressure and pulse rate are then displayed alternately.
Press the air release valve and reduce the cuff pressure further until the pressure drop symbol ( ![]() ) ceases to blink. When the air has been released completely the (
) ceases to blink. When the air has been released completely the ( ![]() ) symbol appears on the display.
) symbol appears on the display.
The blood pressure reading is now complete. The values will continue to be displayed after you have removed the cuff. Only the original air release valve
7
