
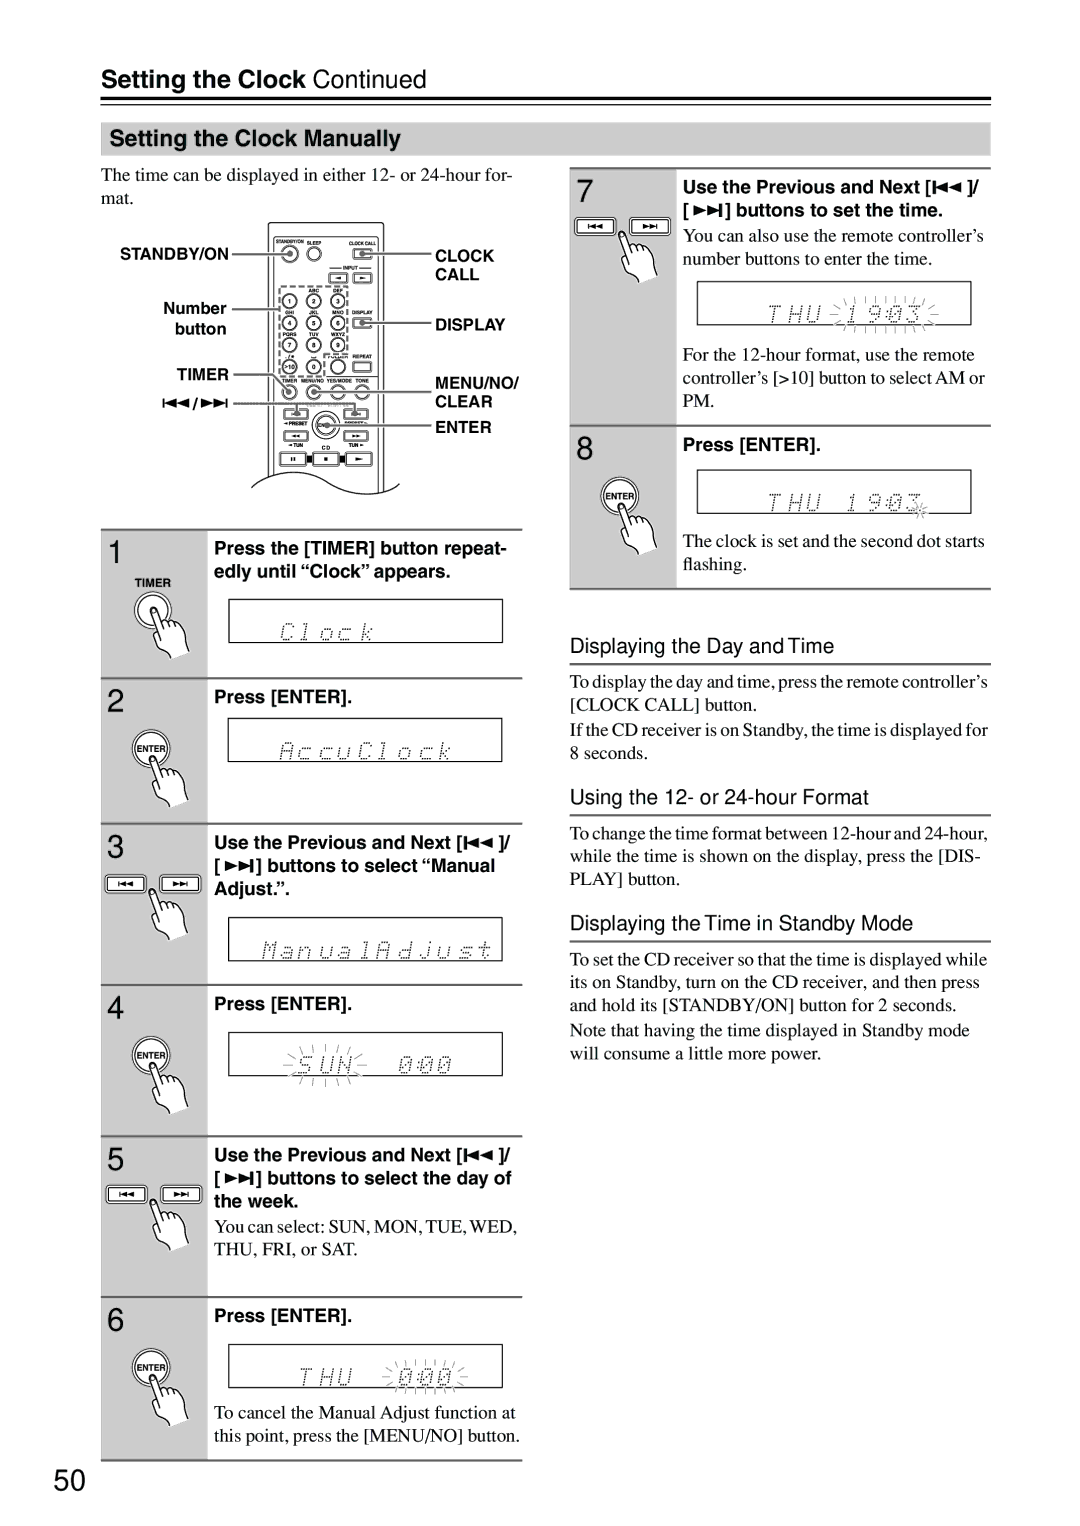
CR-515DAB, CR-315DAB specifications
The Onkyo CR-315DAB and CR-515DAB are compact stereo receiver systems that combine modern technology with classic audio performance. Designed for audiophiles and casual listeners alike, these systems provide a seamless blend of functionality and sound quality, making them suitable for a variety of listening environments.One of the standout features of both models is their exceptional sound quality, thanks to Onkyo's commitment to high-fidelity audio. Both the CR-315DAB and CR-515DAB incorporate a robust amplifier section, with the CR-515DAB offering a slightly higher wattage for enhanced audio power. This allows both units to deliver clear and dynamic sound across a wide range of frequencies, making them ideal for playing everything from classical music to modern pop.
These receivers support DAB (Digital Audio Broadcasting) tuning, allowing users to access a vast range of digital radio stations with superior sound quality. This feature is complemented by FM radio capabilities, ensuring that users can enjoy their favorite terrestrial broadcasts as well. The CR-515DAB model comes with additional streaming options, including Bluetooth connectivity, enabling users to easily stream music from their smartphones, tablets, or computers.
In terms of design, both the CR-315DAB and CR-515DAB exude a classic yet modern aesthetic, featuring a sleek chassis and intuitive controls. The user-friendly interface makes it easy to navigate through radio stations, files, and settings. The systems also boast a variety of input options, including USB ports, analogue inputs, and digital inputs, ensuring compatibility with a wide range of audio sources.
Both models feature a built-in CD player, catering to traditional music formats while also supporting various audio file types through USB input. The CR-515DAB, with its advanced digital processing, provides additional sound enhancements like equalization settings, allowing users to tailor their listening experience to their personal preferences.
Energy efficiency is another notable aspect, as Onkyo has designed these systems to minimize power consumption without compromising performance. With a compact footprint, the CR-315DAB and CR-515DAB are ideal for small living spaces, making them a perfect choice for anyone seeking high-quality audio in a space-saving design.
In summary, the Onkyo CR-315DAB and CR-515DAB represent outstanding options for anyone seeking a versatile and high-quality audio system. With their combination of modern connectivity, traditional features, and impressive sound quality, these models capture the essence of what a contemporary home audio system should be.