INSTALLATION
Front Panel Controls
I N S T A L L A T I O N
Typical Connection
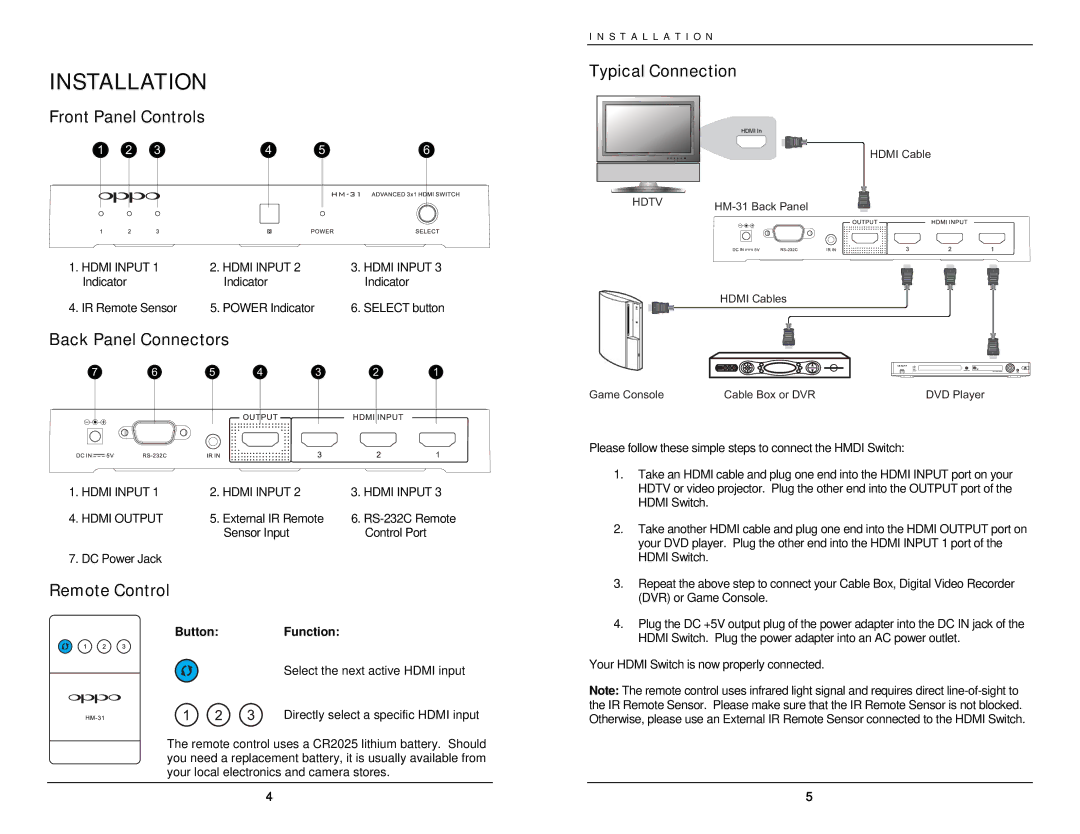
1 | 2 | 3 | 4 | 5 | 6 |
1. HDMI INPUT 1 | 2. HDMI INPUT 2 | 3. HDMI INPUT 3 |
Indicator | Indicator | Indicator |
4. IR Remote Sensor | 5. POWER Indicator | 6. SELECT button |
Back Panel Connectors
7 | 6 | 5 | 4 | 3 | 2 | 1 |
HDMI In
HDTV | |
|
HDMI Cables
HDMI Cable
1. HDMI INPUT 1 | 2. HDMI INPUT 2 | 3. HDMI INPUT 3 |
4. HDMI OUTPUT | 5. External IR Remote | 6. |
| Sensor Input | Control Port |
7. DC Power Jack |
|
|
Remote Control
Button: Function:
Select the next active HDMI input
Directly select a specific HDMI input
The remote control uses a CR2025 lithium battery. Should you need a replacement battery, it is usually available from your local electronics and camera stores.
4
Game Console | Cable Box or DVR | DVD Player |
Please follow these simple steps to connect the HMDI Switch:
1.Take an HDMI cable and plug one end into the HDMI INPUT port on your HDTV or video projector. Plug the other end into the OUTPUT port of the HDMI Switch.
2.Take another HDMI cable and plug one end into the HDMI OUTPUT port on your DVD player. Plug the other end into the HDMI INPUT 1 port of the HDMI Switch.
3.Repeat the above step to connect your Cable Box, Digital Video Recorder (DVR) or Game Console.
4.Plug the DC +5V output plug of the power adapter into the DC IN jack of the HDMI Switch. Plug the power adapter into an AC power outlet.
Your HDMI Switch is now properly connected.
Note: The remote control uses infrared light signal and requires direct
5
