Caution: Be careful not to get paint on the speaker elements.
Note: We recommend spray painting the grille to prevent blocking the grille holes with paint.
After the paint dries, remove the paint mask.
Replace the grille after mounting the speaker.
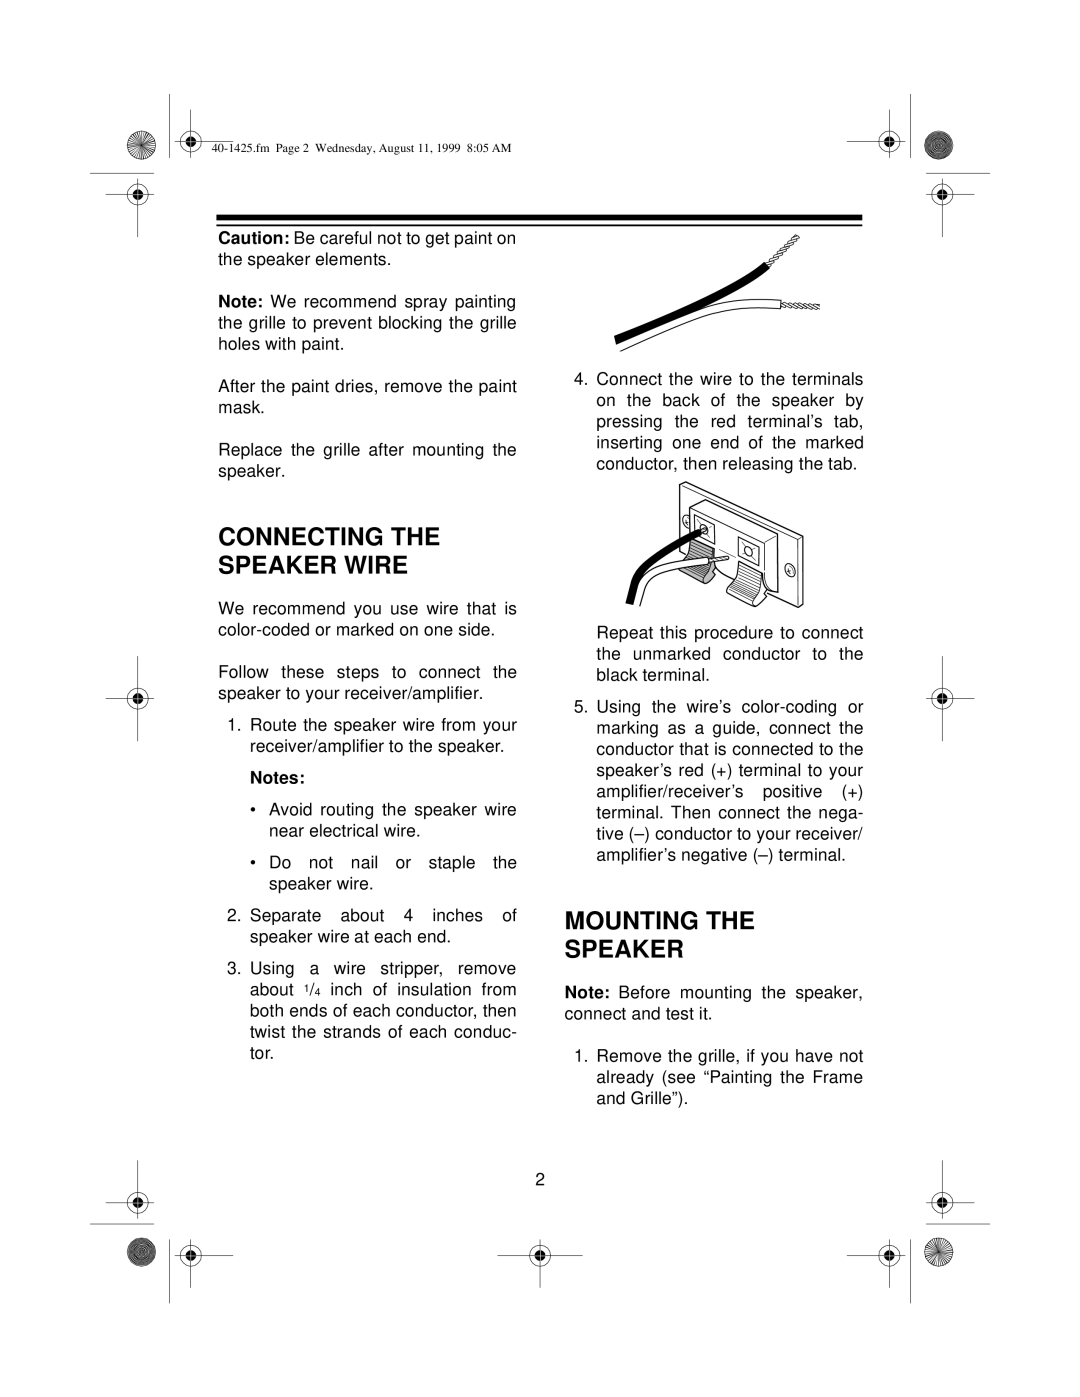
4.Connect the wire to the terminals on the back of the speaker by pressing the red terminal’s tab, inserting one end of the marked conductor, then releasing the tab.
CONNECTING THE
SPEAKER WIRE
We recommend you use wire that is
Follow these steps to connect the speaker to your receiver/amplifier.
1.Route the speaker wire from your receiver/amplifier to the speaker.
Notes:
•Avoid routing the speaker wire near electrical wire.
•Do not nail or staple the speaker wire.
2.Separate about 4 inches of speaker wire at each end.
3.Using a wire stripper, remove about 1/4 inch of insulation from both ends of each conductor, then twist the strands of each conduc- tor.
Repeat this procedure to connect the unmarked conductor to the black terminal.
5.Using the wire’s
MOUNTING THE
SPEAKER
Note: Before mounting the speaker, connect and test it.
1.Remove the grille, if you have not already (see “Painting the Frame and Grille”).
2