Manuals
/
Oreck
/
Household Appliance
/
Vacuum Cleaner
Oreck
XL2800H2
warranty
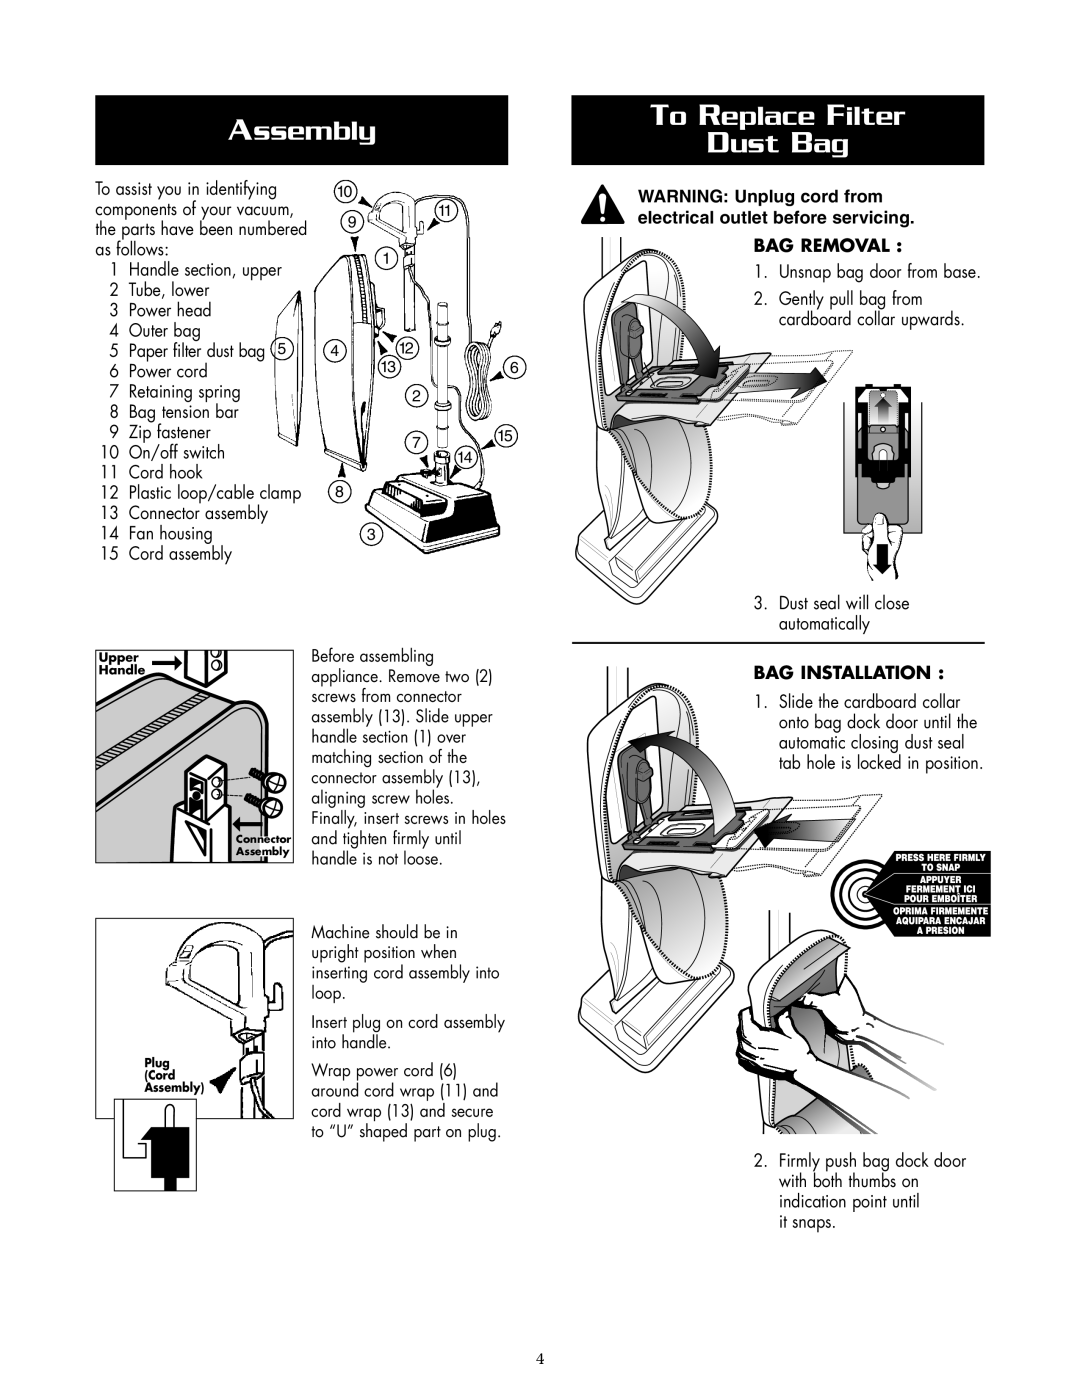
Assembly, To Replace Filter Dust Bag, Bag Removal, Bag Installation
Models:
XL2800H2
1
4
8
8
Download
8 pages
3.44 Kb
1
2
3
4
5
6
7
8
Troubleshooting
Install
Warranty
Accessories
To Adjust or Replace Brush
General Cleaner Care
Bulb Replacement
Page 4
Image 4
Page 3
Page 5
Page 4
Image 4
Page 3
Page 5
Contents
HIGH SPEED UPRIGHT VACUUM CLEANER WITH
CLEANING SYSTEM
USER’S GUIDE
Includes Safety Warnings Warranty
Table of Contents
SAVE THESE INSTRUCTIONS
SAFETY INSTRUCTIONS
USING THIS VACUUM CLEANER
Maintenance and Customer Service
Warranty
ACCESSORIES SOLD SEPARATELY
Assembly
To Replace Filter Dust Bag
BAG INSTALLATION
BAG REMOVAL
Operating Instructions
General Cleaner Care
To Operate
General Information
How to Replace a Worn Belt
To Adjust or Replace Brush
Bulb Replacement
Using A Fresh Air Tab
Stuffing or Blockage
D E F
Troubleshooting Guide
CALL CUSTOMER SERVICE HOT LINE
ORECK AUTHORIZED SERVICE CENTER
US CANADA
Top
Page
Image
Contents