EN
|
| GETTING STARTED |
|
| SETTING UP THE CLOCK |
1 |
| Insert batteries before first use, matching the polarity (+ |
| ||
|
| and |
|
| indicates the batteries are low. | |
2 |
| UNIT | LOCATION |
| Main unit | Clock display area | |
3 | 6 | ||
4 | 7 | Remote sensor | Weather display area |
|
| ||
| 8 |
|
|
|
| NOTE Do not use rechargeable batteries. It is | |
|
| recommended that you use alkaline batteries with | |
5 |
| this product for longer usage and lithium batteries for | |
|
| temperatures below freezing. | |
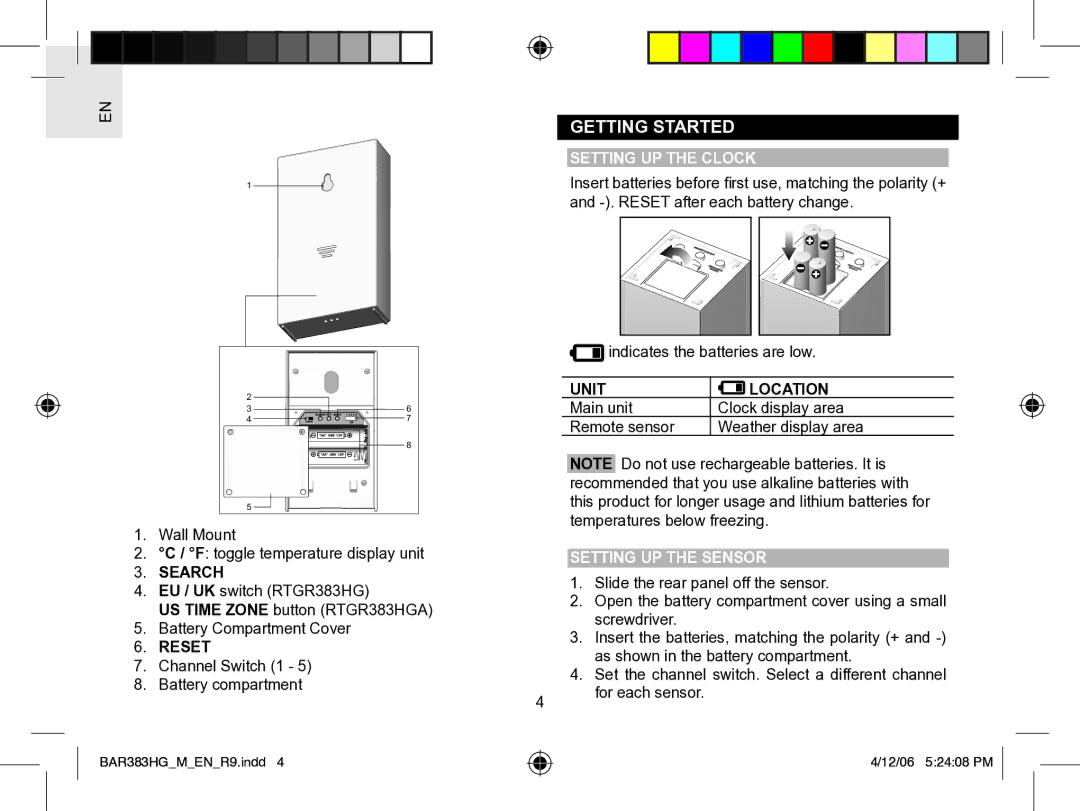
1. | Wall Mount |
|
| |
2. | °C / °F: toggle temperature display unit | SETTING UP THE SENSOR | ||
3. | SEARCH | |||
1. | Slide the rear panel off the sensor. | |||
4. | EU / UK switch (RTGR383HG) | |||
2. | Open the battery compartment cover using a small | |||
| US TIME ZONE button (RTGR383HGA) | |||
|
| screwdriver. | ||
5. | Battery Compartment Cover |
| ||
3. | Insert the batteries, matching the polarity (+ and | |||
6. | RESET | |||
| as shown in the battery compartment. | |||
7. | Channel Switch (1 - 5) |
| ||
4. | Set the channel switch. Select a different channel | |||
8. | Battery compartment | |||
| for each sensor. | |||
|
| 4 | ||
|
|
| ||
BAR383HG_M_EN_R9.indd 4
4/12/06 5:24:08 PM