DIGITAL INDOOR / OUTDOOR
THERMO CLOCK
Model : NAW881EXT
INTRODUCTION
•Thank you for your purchase of this Digital
•Your Digital
•In order to optimize its functions, be sure to read this instruction manual carefully before use.
•Keep this manual handy for future reference.
FEATURES
•Digital LCD Thermometer with Clock.
•Temperature/Clock alternate display function at 3 seconds cycle.
•User selectable indoor or outdoor temperature measurement.
•User selectable °C or °F temperature units of measure.
•Wall mounting and table standing feature.
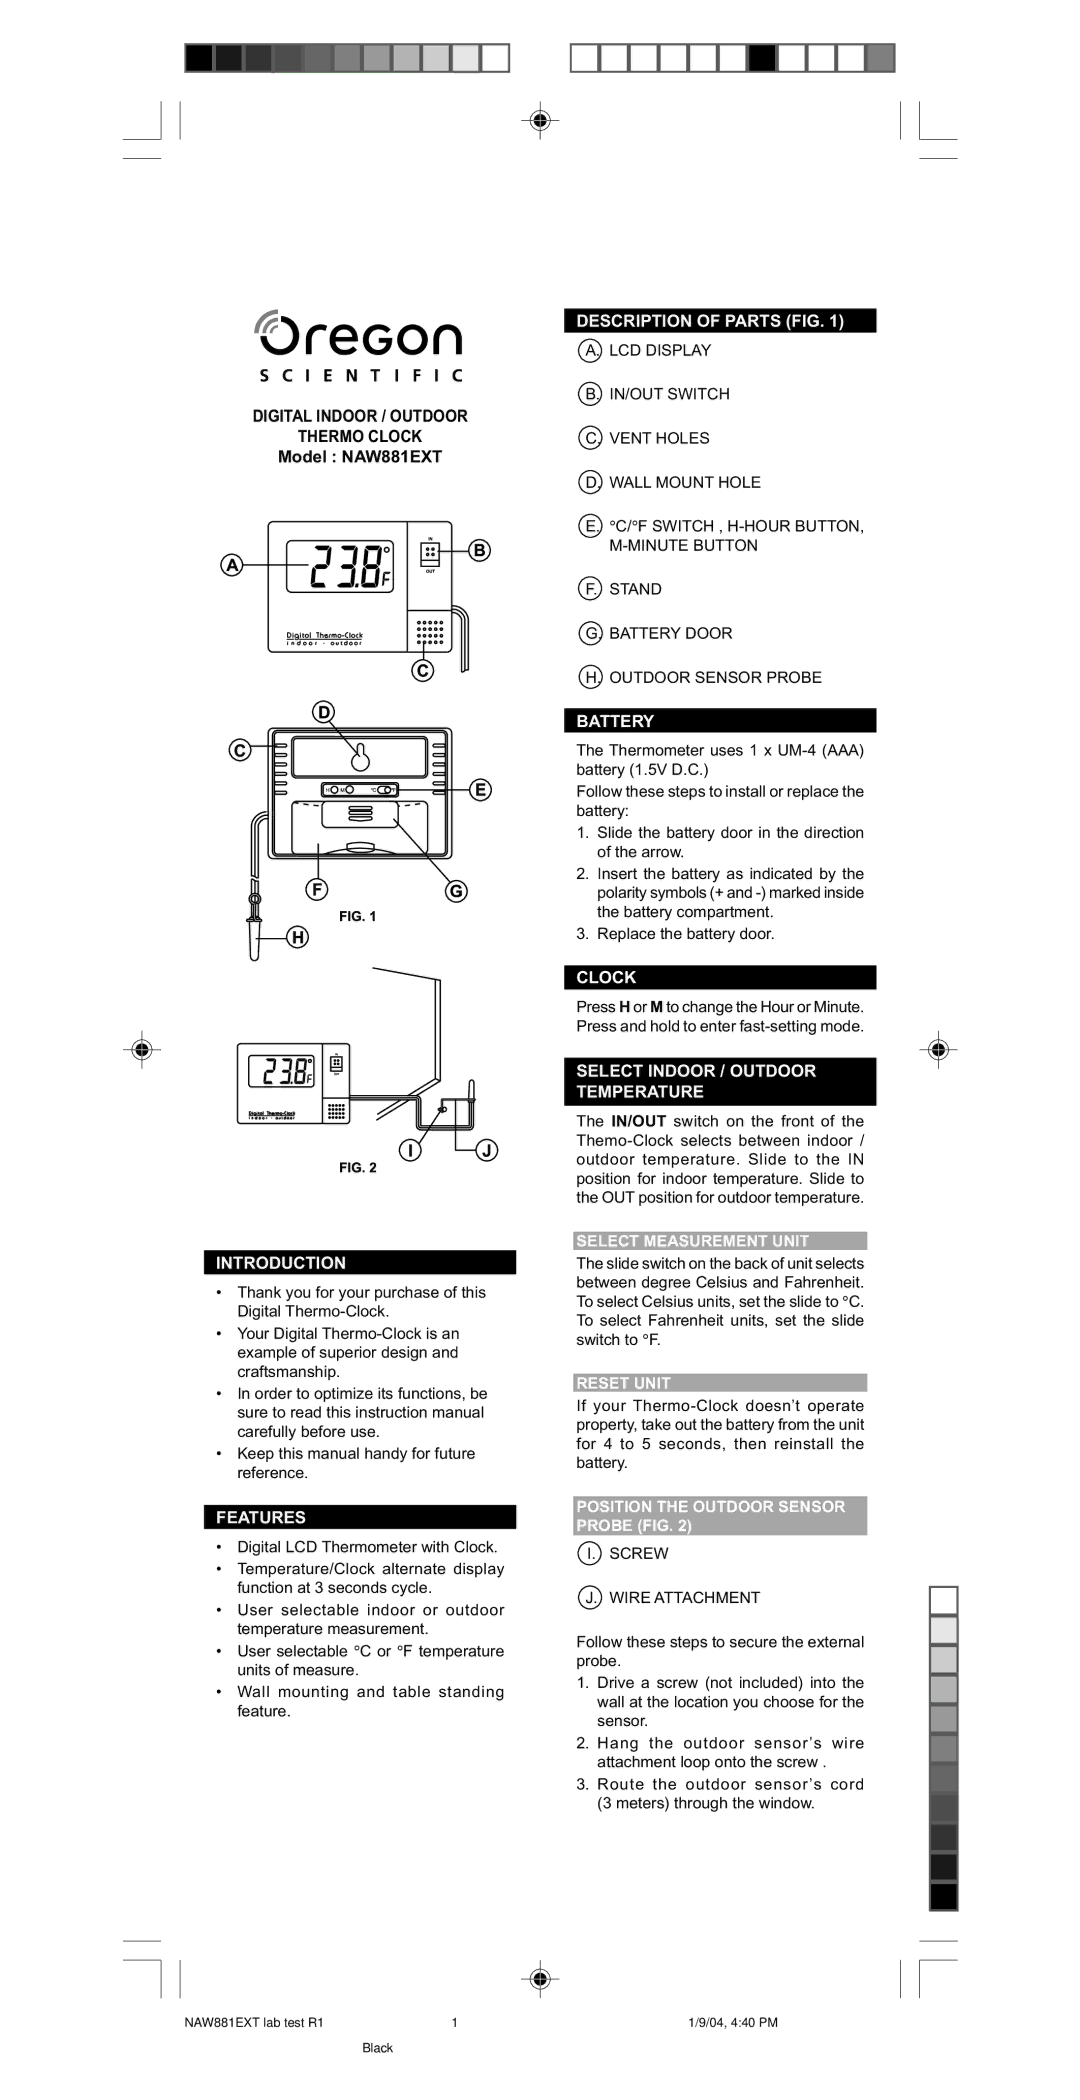
DESCRIPTION OF PARTS (FIG. 1)
A.LCD DISPLAY
B.IN/OUT SWITCH
C.VENT HOLES
D.WALL MOUNT HOLE
E.°C/°F SWITCH ,
F.STAND
G.BATTERY DOOR
H.OUTDOOR SENSOR PROBE
BATTERY
The Thermometer uses 1 x
Follow these steps to install or replace the battery:
1.Slide the battery door in the direction of the arrow.
2.Insert the battery as indicated by the polarity symbols (+ and
3.Replace the battery door.
CLOCK
Press H or M to change the Hour or Minute. Press and hold to enter
SELECT INDOOR / OUTDOOR TEMPERATURE
The IN/OUT switch on the front of the
SELECT MEASUREMENT UNIT
The slide switch on the back of unit selects between degree Celsius and Fahrenheit. To select Celsius units, set the slide to °C. To select Fahrenheit units, set the slide switch to °F.
RESET UNIT
If your
POSITION THE OUTDOOR SENSOR PROBE (FIG. 2)
I. SCREW
J. WIRE ATTACHMENT
Follow these steps to secure the external probe.
1.Drive a screw (not included) into the wall at the location you choose for the sensor.
2.Hang the outdoor sensor’s wire attachment loop onto the screw .
3.Route the outdoor sensor’s cord (3 meters) through the window.
NAW881EXT lab test R1 | 1 | 1/9/04, 4:40 PM |
Black