EN

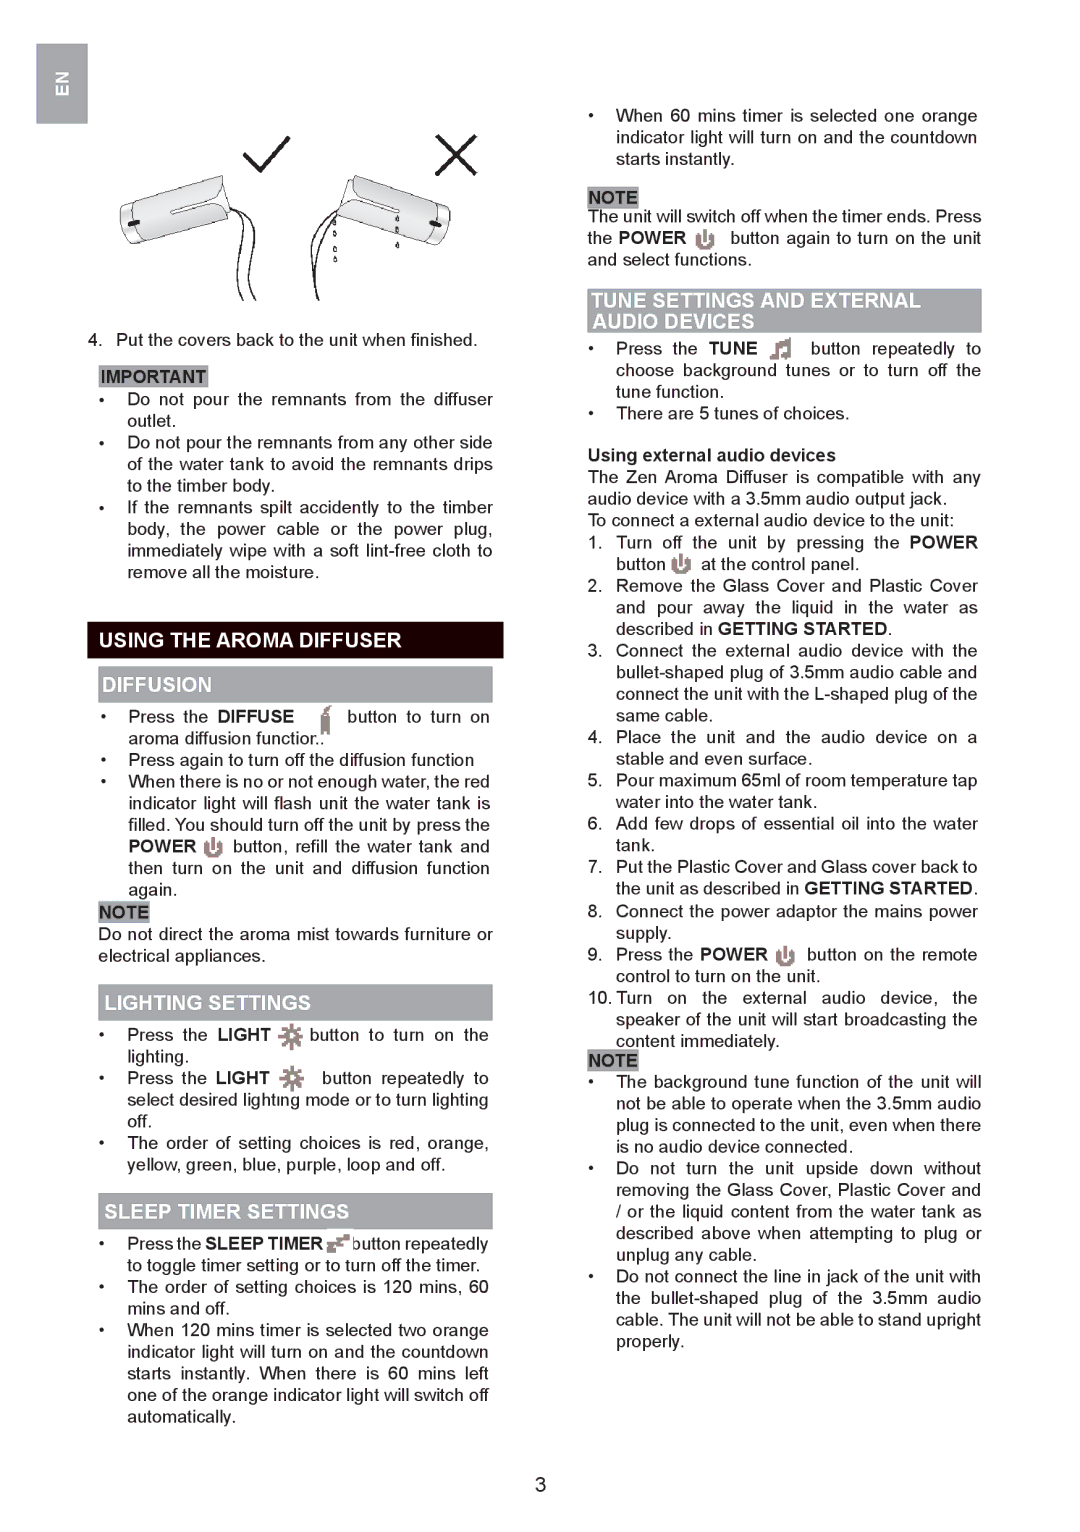
4.Put the covers back to the unit when finished.

IMPORTANT

Do not pour the remnants from the diffuser outlet.

Do not pour the remnants from any other side of the water tank to avoid the remnants drips to the timber body.

If the remnants spilt accidently to the timber body, the power cable or the power plug, immediately wipe with a soft lint-free cloth to remove all the moisture.

USING THE AROMA DIFFUSER

DIFFUSION

Press the DIFFUSE button to turn on aroma diffusion function.

Press again to turn off the diffusion function

When there is no or not enough water, the red indicator light will flash unit the water tank is filled. You should turn off the unit by press the POWER button, refill the water tank and then turn on the unit and diffusion function again.

NOTE

Do not direct the aroma mist towards furniture or electrical appliances.

LIGHTING SETTINGS

Press the LIGHT button to turn on the lighting.

Press the LIGHT button repeatedly to select desired lighting mode or to turn lighting off.

The order of setting choices is red, orange, yellow, green, blue, purple, loop and off.

SLEEP TIMER SETTINGS

Press the SLEEP TIMER button repeatedly to toggle timer setting or to turn off the timer.

The order of setting choices is 120 mins, 60 mins and off.

When 120 mins timer is selected two orange indicator light will turn on and the countdown starts instantly. When there is 60 mins left one of the orange indicator light will switch off automatically.

When 60 mins timer is selected one orange indicator light will turn on and the countdown starts instantly.

NOTE

The unit will switch off when the timer ends. Press

the POWER button again to turn on the unit and select functions.

TUNE SETTINGS AND EXTERNAL AUDIO DEVICES

Press the TUNE button repeatedly to choose background tunes or to turn off the tune function.

There are 5 tunes of choices.

Using external audio devices

The Zen Aroma Diffuser is compatible with any audio device with a 3.5mm audio output jack.

To connect a external audio device to the unit:

1.Turn off the unit by pressing the POWER button at the control panel.

2.Remove the Glass Cover and Plastic Cover and pour away the liquid in the water as described in GETTING STARTED.

3.Connect the external audio device with the bullet-shaped plug of 3.5mm audio cable and connect the unit with the L-shaped plug of the same cable.

4.Place the unit and the audio device on a stable and even surface.

5.Pour maximum 65ml of room temperature tap water into the water tank.

6.Add few drops of essential oil into the water tank.

7.Put the Plastic Cover and Glass cover back to the unit as described in GETTING STARTED.

8.Connect the power adaptor the mains power supply.

9.Press the POWER button on the remote control to turn on the unit.

10.Turn on the external audio device, the speaker of the unit will start broadcasting the

content immediately.

NOTE

The background tune function of the unit will not be able to operate when the 3.5mm audio plug is connected to the unit, even when there is no audio device connected.

Do not turn the unit upside down without removing the Glass Cover, Plastic Cover and / or the liquid content from the water tank as described above when attempting to plug or unplug any cable.

Do not connect the line in jack of the unit with the bullet-shaped plug of the 3.5mm audio cable. The unit will not be able to stand upright properly.

3

Page 5
Image 5
Oregon Scientific WS909 user manual Using the Aroma Diffuser Diffusion, Lighting Settings, Sleep Timer Settings

WS909 specifications

The Oregon Scientific WS909 is a sophisticated weather station that seamlessly combines functionality with modern design, making it an ideal choice for weather enthusiasts and everyday users alike. One of the primary features of the WS909 is its ability to provide accurate and real-time weather data, including temperature, humidity, barometric pressure, and rainfall. This comprehensive information helps users make informed decisions about their daily activities and planning.

The WS909 utilizes advanced wireless technology to transmit data from outdoor sensors to the main unit. The use of a 433 MHz frequency ensures a reliable and interference-free connection, allowing users to monitor their environment without any hassle. Moreover, its extended wireless range means that the sensor can be placed far from the receiving unit, thereby giving users the flexibility to position it optimally for the most accurate readings.

A standout characteristic of the WS909 is its impressive digital display, which presents essential data in an easy-to-read format. Users benefit from a backlit screen that enhances visibility in low-light conditions, ensuring that weather information is always accessible. The device also features a user-friendly interface, allowing users to navigate through various settings effortlessly.

Another notable feature of the Oregon Scientific WS909 is its ability to forecast weather changes. By analyzing barometric pressure, the device provides short-term weather forecasts, allowing users to anticipate changes in weather conditions. This predictive capability is invaluable for planning outdoor activities, gardening, or even traveling.

Additionally, the WS909 integrates advanced technology for long-term data tracking. Users can access historical weather data, which is crucial for understanding weather patterns over time. This feature is particularly beneficial for those interested in agriculture or climate research, as it provides insights into seasonal changes.

In summary, the Oregon Scientific WS909 is an exceptional weather station that merges innovative technology with practical characteristics. With its accurate sensors, reliable wireless transmission, easy-to-read display, and predictive weather capabilities, it serves as an essential tool for anyone looking to stay informed about their local weather conditions. Whether for personal interest or professional use, the WS909 meets the needs of a versatile user base.