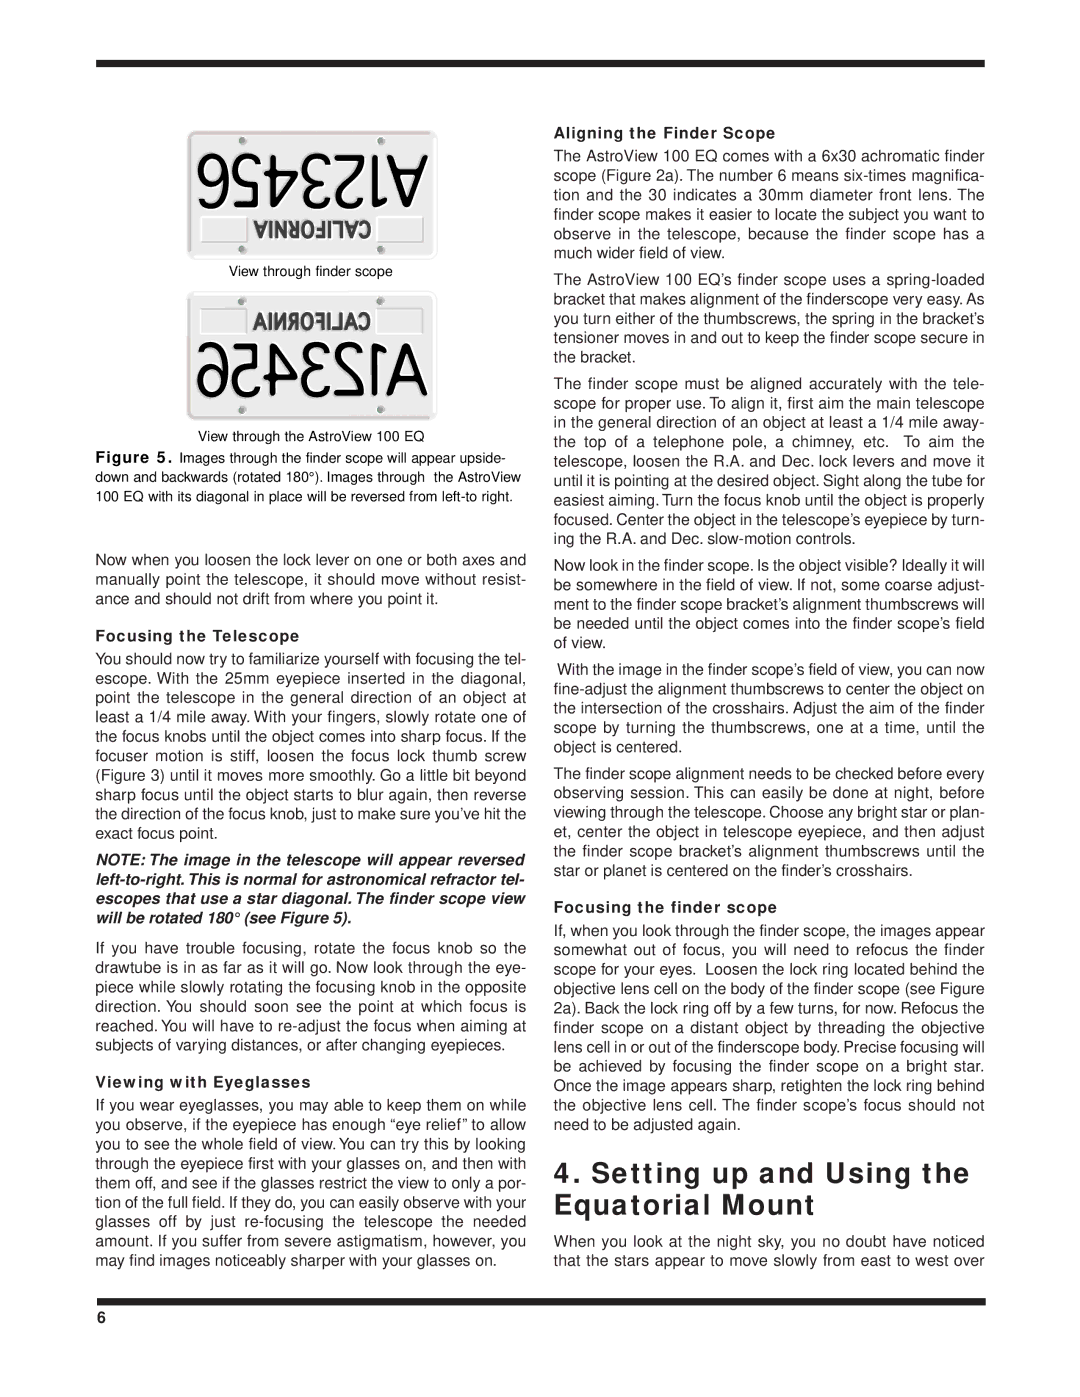
View through finder scope

View through the AstroView 100 EQ

Figure 5. Images through the finder scope will appear upside- down and backwards (rotated 180°). Images through the AstroView 100 EQ with its diagonal in place will be reversed from left-to right.

Now when you loosen the lock lever on one or both axes and manually point the telescope, it should move without resist- ance and should not drift from where you point it.

Focusing the Telescope

You should now try to familiarize yourself with focusing the tel- escope. With the 25mm eyepiece inserted in the diagonal, point the telescope in the general direction of an object at least a 1/4 mile away. With your fingers, slowly rotate one of the focus knobs until the object comes into sharp focus. If the focuser motion is stiff, loosen the focus lock thumb screw (Figure 3) until it moves more smoothly. Go a little bit beyond sharp focus until the object starts to blur again, then reverse the direction of the focus knob, just to make sure you’ve hit the exact focus point.

NOTE: The image in the telescope will appear reversed left-to-right. This is normal for astronomical refractor tel- escopes that use a star diagonal. The finder scope view will be rotated 180° (see Figure 5).

If you have trouble focusing, rotate the focus knob so the drawtube is in as far as it will go. Now look through the eye- piece while slowly rotating the focusing knob in the opposite direction. You should soon see the point at which focus is reached. You will have to re-adjust the focus when aiming at subjects of varying distances, or after changing eyepieces.

Viewing with Eyeglasses

If you wear eyeglasses, you may able to keep them on while you observe, if the eyepiece has enough “eye relief” to allow you to see the whole field of view. You can try this by looking through the eyepiece first with your glasses on, and then with them off, and see if the glasses restrict the view to only a por- tion of the full field. If they do, you can easily observe with your glasses off by just re-focusing the telescope the needed amount. If you suffer from severe astigmatism, however, you may find images noticeably sharper with your glasses on.

Aligning the Finder Scope

The AstroView 100 EQ comes with a 6x30 achromatic finder scope (Figure 2a). The number 6 means six-times magnifica- tion and the 30 indicates a 30mm diameter front lens. The finder scope makes it easier to locate the subject you want to observe in the telescope, because the finder scope has a much wider field of view.

The AstroView 100 EQ’s finder scope uses a spring-loaded bracket that makes alignment of the finderscope very easy. As you turn either of the thumbscrews, the spring in the bracket’s tensioner moves in and out to keep the finder scope secure in the bracket.

The finder scope must be aligned accurately with the tele- scope for proper use. To align it, first aim the main telescope in the general direction of an object at least a 1/4 mile away- the top of a telephone pole, a chimney, etc. To aim the telescope, loosen the R.A. and Dec. lock levers and move it until it is pointing at the desired object. Sight along the tube for easiest aiming. Turn the focus knob until the object is properly focused. Center the object in the telescope’s eyepiece by turn- ing the R.A. and Dec. slow-motion controls.

Now look in the finder scope. Is the object visible? Ideally it will be somewhere in the field of view. If not, some coarse adjust- ment to the finder scope bracket’s alignment thumbscrews will be needed until the object comes into the finder scope’s field of view.

With the image in the finder scope’s field of view, you can now fine-adjust the alignment thumbscrews to center the object on the intersection of the crosshairs. Adjust the aim of the finder scope by turning the thumbscrews, one at a time, until the object is centered.

The finder scope alignment needs to be checked before every observing session. This can easily be done at night, before viewing through the telescope. Choose any bright star or plan- et, center the object in telescope eyepiece, and then adjust the finder scope bracket’s alignment thumbscrews until the star or planet is centered on the finder’s crosshairs.

Focusing the finder scope

If, when you look through the finder scope, the images appear somewhat out of focus, you will need to refocus the finder scope for your eyes. Loosen the lock ring located behind the objective lens cell on the body of the finder scope (see Figure 2a). Back the lock ring off by a few turns, for now. Refocus the finder scope on a distant object by threading the objective lens cell in or out of the finderscope body. Precise focusing will be achieved by focusing the finder scope on a bright star. Once the image appears sharp, retighten the lock ring behind the objective lens cell. The finder scope’s focus should not need to be adjusted again.

4.Setting up and Using the Equatorial Mount

When you look at the night sky, you no doubt have noticed that the stars appear to move slowly from east to west over

6

Page 6
Image 6
Orion 100 EQ instruction manual Setting up and Using the Equatorial Mount, Focusing the Telescope, Viewing with Eyeglasses

100 EQ specifications

The Orion 100 EQ is a high-performance telescope designed for both novice and experienced astronomers. Combining precision engineering with user-friendly features, this telescope offers an exceptional observing experience.

One of the standout features of the Orion 100 EQ is its 100mm diameter aperture, which allows for ample light gathering capabilities. This feature is essential for observing faint celestial objects, making it ideal for viewing planets, star clusters, and nebulae. The optics are made from high-quality glass and are fully coated to enhance light transmission and image clarity.

The computer-controlled equatorial mount of the Orion 100 EQ is another significant advancement in its design. This mount utilizes a durable, smooth operation mechanism that allows for easy tracking of celestial objects as they move across the night sky. The built-in dual axis slow motion controls provide astronomers with the ability to make fine adjustments to their viewing angle, ensuring that the object of interest remains centered in the eyepiece.

Another key technology included in the Orion 100 EQ is its robust and portable design. Weighing in at just under 25 pounds, the telescope is lightweight enough to transport easily but offers the stability necessary for steady views during observation. The adjustable aluminum tripod further enhances the telescope's stability while providing a sturdy platform for observers.

For beginners, the Orion 100 EQ is user-friendly and easy to set up. The telescope comes with a detailed instruction manual that guides users through the assembly process. Moreover, Orion includes a selection of eyepieces and a finderscope to assist users in locating celestial objects quickly. A 25mm Plössl eyepiece and a 10mm Plössl eyepiece come standard, allowing for a range of magnifications suitable for various observing conditions.

In terms of characteristics, the Orion 100 EQ stands out with its solid build quality and intuitive design. Its sleek black finish not only adds to its aesthetic appeal but also ensures both durability and resistance to weather conditions. The telescope's user-friendly nature, combined with its impressive optical performance, makes it a perfect choice for astronomy enthusiasts.

Overall, the Orion 100 EQ is a versatile telescope that caters to a wide audience. Whether you are a novice taking your first steps into astronomy or an experienced observer seeking a reliable tool for deep-sky exploration, the Orion 100 EQ promises to deliver an outstanding visual experience and a deeper connection with the cosmos. With its thoughtfully designed features and technologies, it is indeed a worthwhile investment for anyone passionate about stargazing.