Manuals
/
Orion
/
Lawn and Garden
/
Telescope
Orion
102mm EQ If the alignment screw is a large screw, If the alignment screw is a small screw
Models:
102mm EQ
1
19
19
Download
19 pages
31 Kb
12
13
14
15
16
17
18
19
Specs
Warranty
Maintenance
Assembly
Star-Testing the Telescope
Focusing the Telescope
Page 19
Image 19
Page 18
Page 19
Page 19
Image 19
Page 18
Page 19
Contents
Orion StarMax 102mm EQ
#9824 Equatorial Maksutov-Cassegrain Telescope
Customer Support
E-mail support@telescope.com
Finder scope Finder scope bracket Eyepiece Star diagonal
2. Parts List
Table of Contents
1. Unpacking
R.A. setting circle lock thumbscrew R.A. setting circle
3. Assembly
Dec. slow-motion control cable Dec. setting circle
Latitude adjustment t-bolt Latitude lock t-bolt Azimuth lock knob
Balancing the Telescope
4. Getting Started
Spring-loaded tensioner
Eyepiece end of finder scope Alignment thumb screws O-ring
Do You Wear Eyeglasses?
Focusing the Telescope
Aligning the Finder Scope
Focus
5. Setting Up and Using the Equatorial Mount
Objective lens
Alignment
Tracking Celestial Objects
Understanding the Setting Circles
Calibrating the Right Ascension Setting Circle
Use of the R.A. and Dec. Slow-Motion Control Cables
Finding Objects With the Setting Circles
Dec. coordinate indicator arrow Celestial equator Dec. =
Use these numbers on the R.A. setting circle Northern Hemisphere
Plastic R.A. gear cover R.A. coordinate indicator arrow
“Seeing” and Transparency
6. Using Your Telescope- Astronomical Observing
a.b c.d
Choosing an Observing Site
Magnification = focal length of telescope ÷ focal length of eyepiece
A. The Moon
B. The Sun
C. The Planets
How to Find Deep-Sky Objects Star Hopping
D. The Stars
E. Deep-Sky Objects
Cleaning the Tube
9. Care and Maintenance
7. Terrestrial Viewing
8. Photography
10. Specifications
Page
Customer Support Help Line 800676-1343 Day or Evening
Orion Telescopes & Binoculars
Post Office Box 1815, Santa Cruz, CA
One-Year Limited Warranty
Star-Testing the Telescope
Collimating Orion StarMax and Apex Maksutov-Cassegrain Telescopes
Collimating the StarMax/Apex
Figure 2a
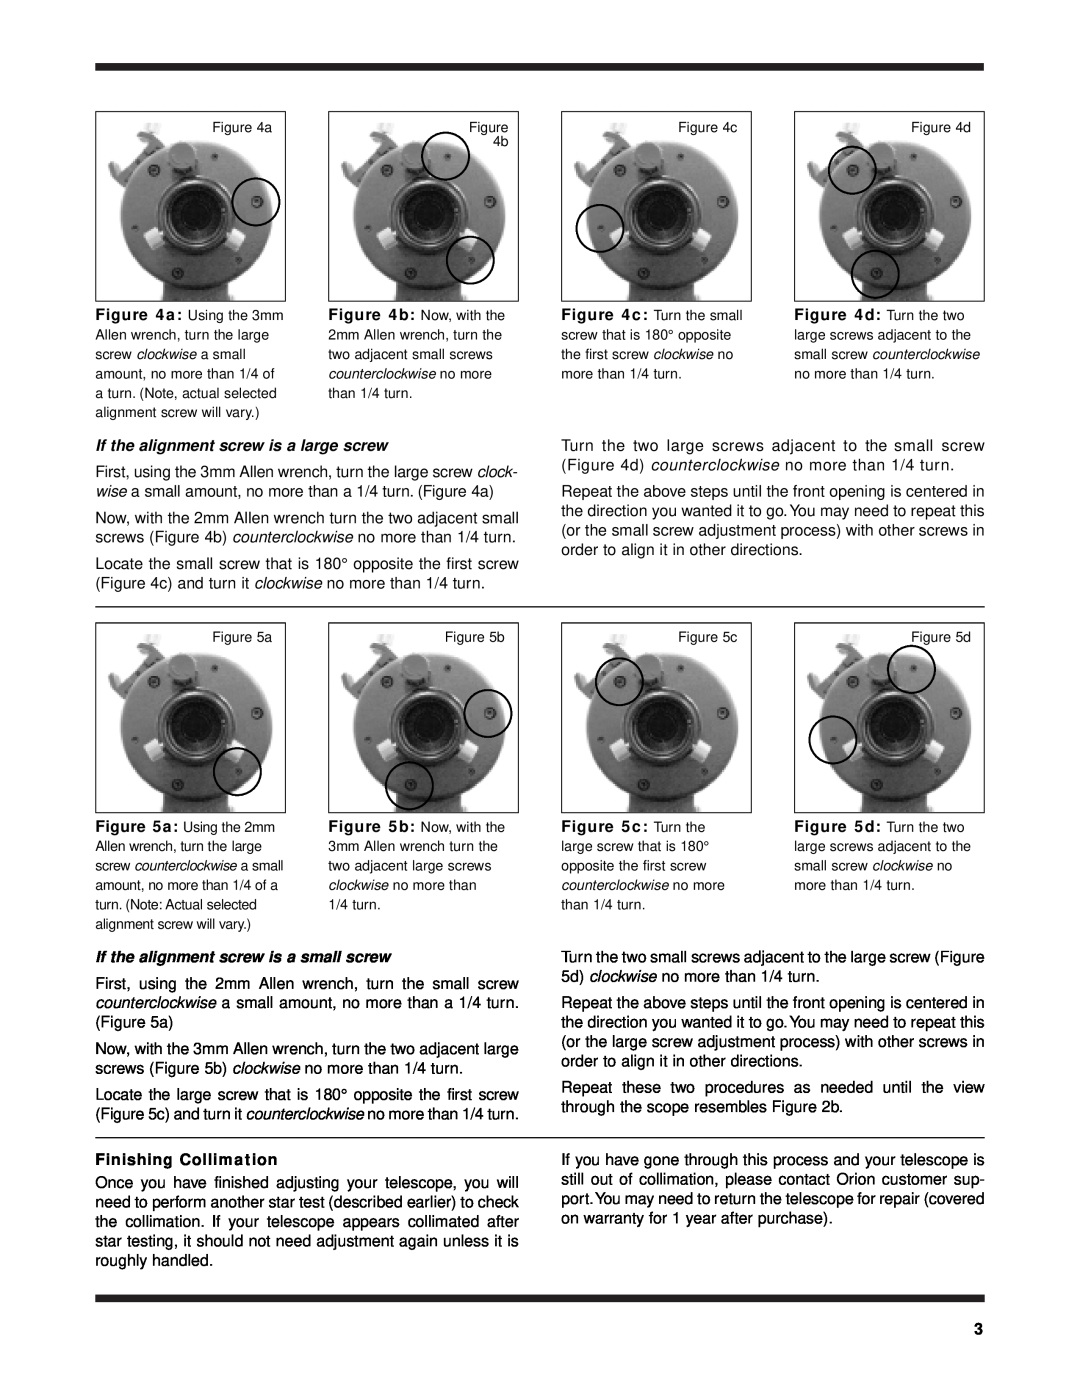
If the alignment screw is a small screw
If the alignment screw is a large screw
Finishing Collimation
Top
Page
Image
Contents