R.A. worm gear shaft ![]()
Brass gear of R.A. | Hole |
motor assembly |
Figure 3. The motor is attached to the front of the mount by a socket head cap screw pushed up through the hole in the rear of the mount.
motor assembly’s brass gear is on, and attach it to the opposite end of the worm gear shaft.
4.Slide the open end of the manual clutch assembly (Figure
4)onto the wormgear shaft. Rotate the manual clutch assembly so that the setscrew will press against the flat on the R.A. worm gear shaft. Secure the manual clutch assembly by tightening the setscrew with a 2mm Allen wrench.
Brass gear
Setscrew
Thumbwheel
Open end
Figure 4. The manual clutch assembly.
5.Make certain that the teeth of the motor assembly gear mesh with the teeth of the manual clutch assembly gear. Also, make certain the gears are not too tightly pressed together. You can adjust the way the gears mesh by tight- ening or loosening the socket-head cap screw that is used to attach the R.A. motor assembly to the mount. If the gears are not meshed correctly or are too tightly pressed together, then the drive will not track properly, or at all.
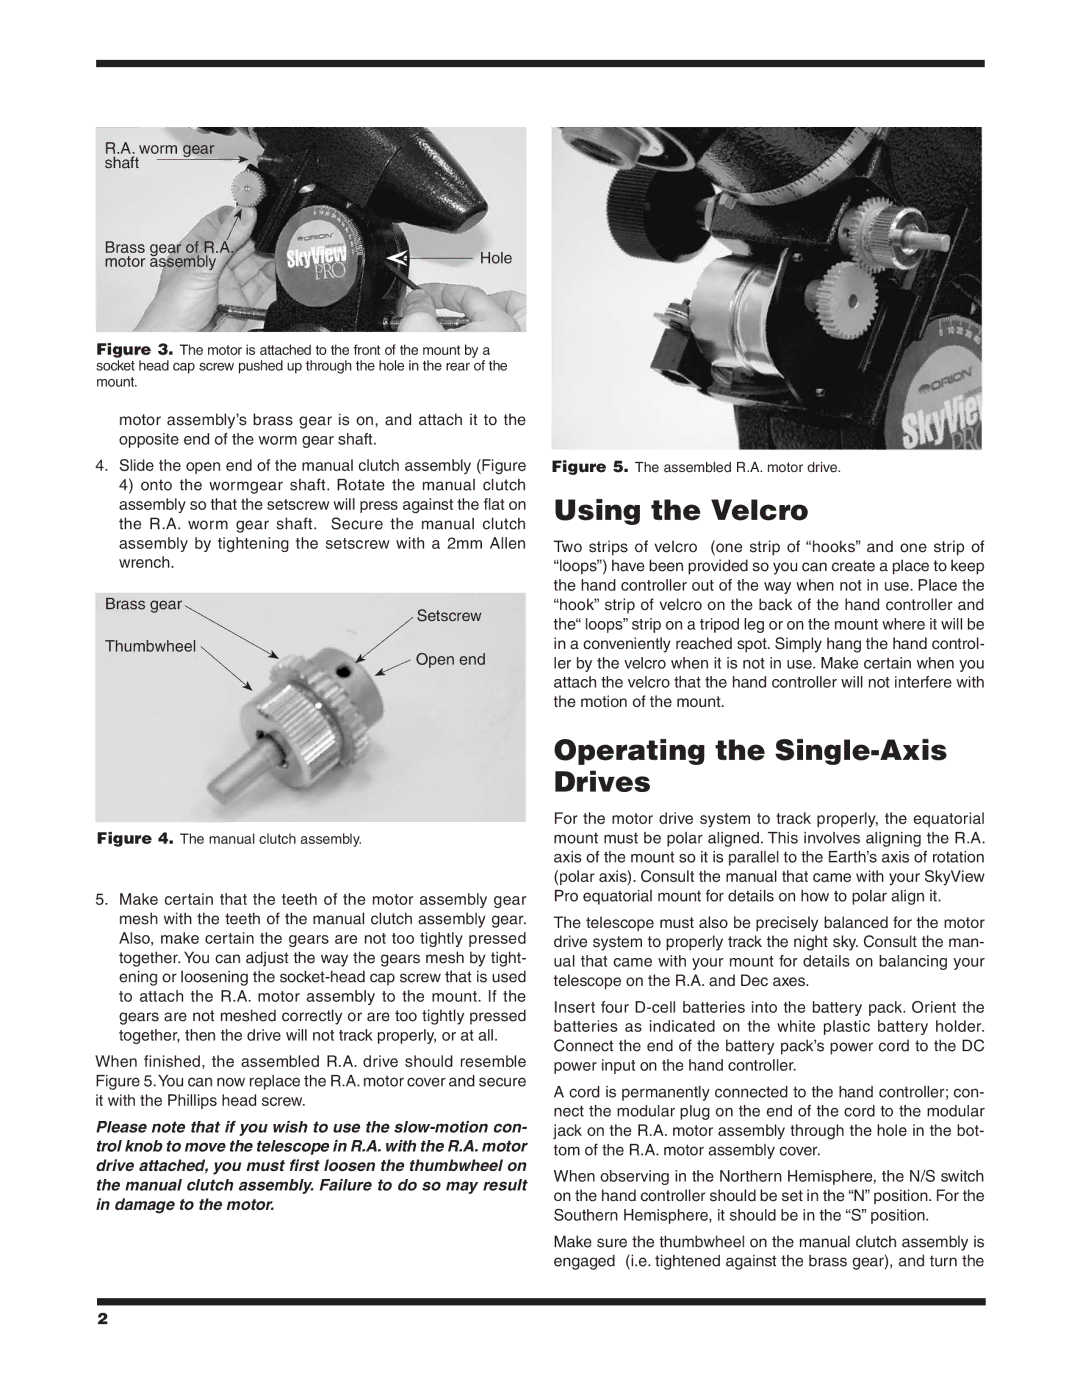
When finished, the assembled R.A. drive should resemble Figure 5.You can now replace the R.A. motor cover and secure it with the Phillips head screw.
Please note that if you wish to use the
Figure 5. The assembled R.A. motor drive.
Using the Velcro
Two strips of velcro (one strip of “hooks” and one strip of “loops”) have been provided so you can create a place to keep the hand controller out of the way when not in use. Place the “hook” strip of velcro on the back of the hand controller and the“ loops” strip on a tripod leg or on the mount where it will be in a conveniently reached spot. Simply hang the hand control- ler by the velcro when it is not in use. Make certain when you attach the velcro that the hand controller will not interfere with the motion of the mount.
Operating the Single-Axis Drives
For the motor drive system to track properly, the equatorial mount must be polar aligned. This involves aligning the R.A. axis of the mount so it is parallel to the Earth’s axis of rotation (polar axis). Consult the manual that came with your SkyView Pro equatorial mount for details on how to polar align it.
The telescope must also be precisely balanced for the motor drive system to properly track the night sky. Consult the man- ual that came with your mount for details on balancing your telescope on the R.A. and Dec axes.
Insert four
A cord is permanently connected to the hand controller; con- nect the modular plug on the end of the cord to the modular jack on the R.A. motor assembly through the hole in the bot- tom of the R.A. motor assembly cover.
When observing in the Northern Hemisphere, the N/S switch on the hand controller should be set in the “N” position. For the Southern Hemisphere, it should be in the “S” position.
Make sure the thumbwheel on the manual clutch assembly is engaged (i.e. tightened against the brass gear), and turn the
2