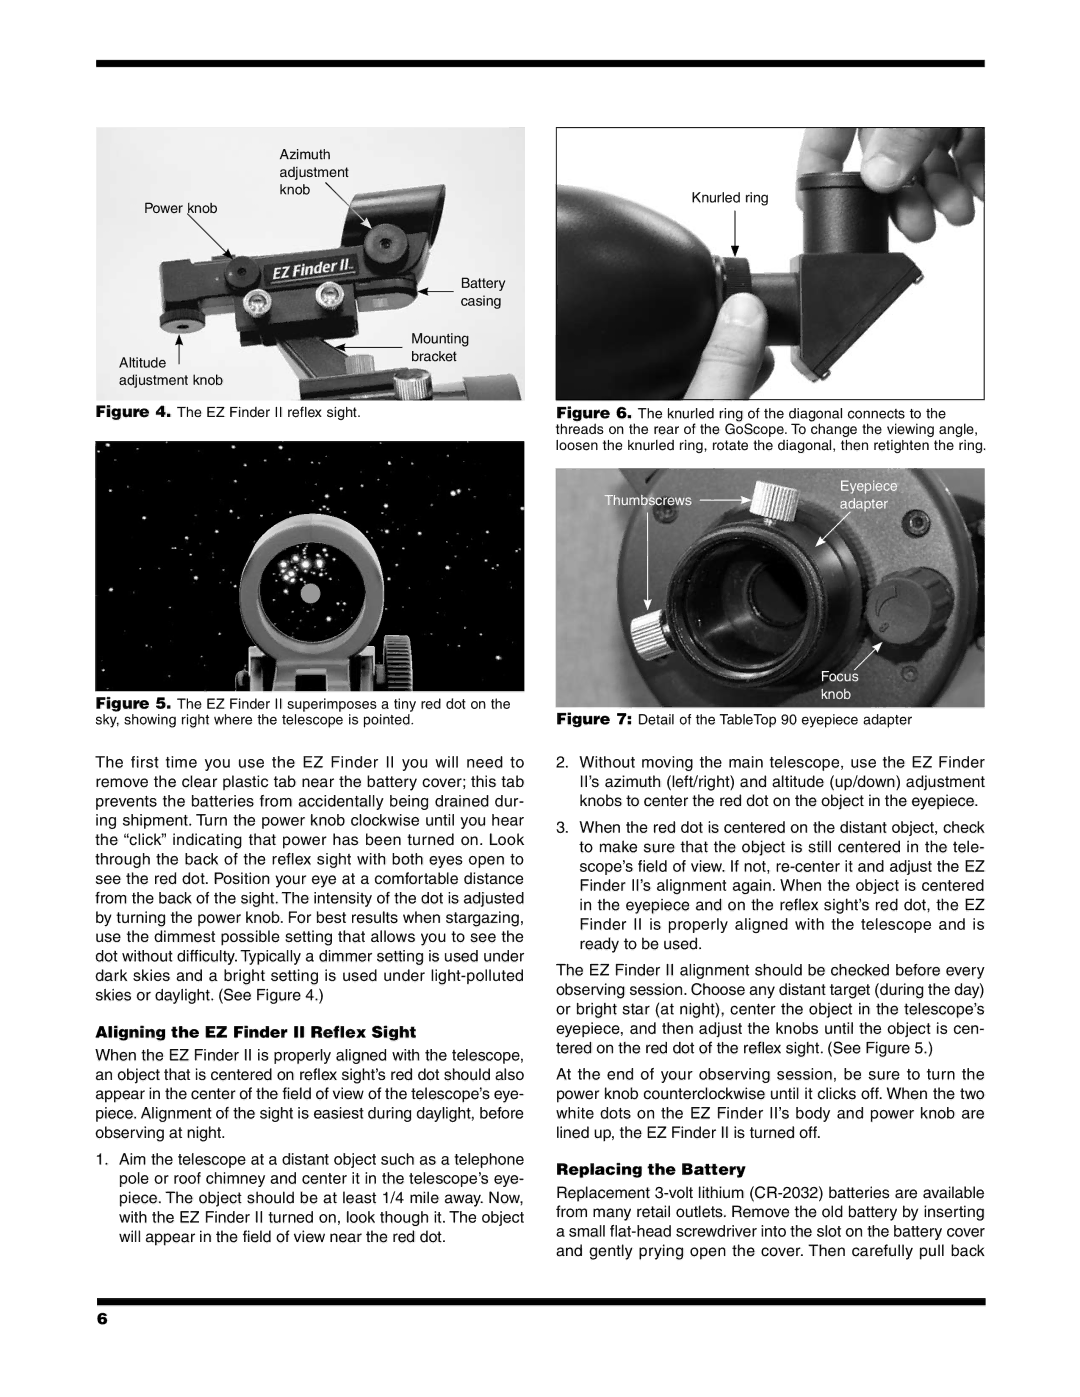
Azimuth adjustment knob
Power knob
Altitude adjustment knob
Figure 4. The EZ Finder II reflex sight.
Battery casing
Mounting bracket
Knurled ring
Figure 6. The knurled ring of the diagonal connects to the threads on the rear of the GoScope. To change the viewing angle, loosen the knurled ring, rotate the diagonal, then retighten the ring.
Eyepiece
Thumbscrews | adapter |
Figure 5. The EZ Finder II superimposes a tiny red dot on the sky, showing right where the telescope is pointed.
The first time you use the EZ Finder II you will need to remove the clear plastic tab near the battery cover; this tab prevents the batteries from accidentally being drained dur- ing shipment. Turn the power knob clockwise until you hear the “click” indicating that power has been turned on. Look through the back of the reflex sight with both eyes open to see the red dot. Position your eye at a comfortable distance from the back of the sight. The intensity of the dot is adjusted by turning the power knob. For best results when stargazing, use the dimmest possible setting that allows you to see the dot without difficulty. Typically a dimmer setting is used under dark skies and a bright setting is used under
Aligning the EZ Finder II Reflex Sight
When the EZ Finder II is properly aligned with the telescope, an object that is centered on reflex sight’s red dot should also appear in the center of the field of view of the telescope’s eye- piece. Alignment of the sight is easiest during daylight, before observing at night.
1.Aim the telescope at a distant object such as a telephone pole or roof chimney and center it in the telescope’s eye- piece. The object should be at least 1/4 mile away. Now, with the EZ Finder II turned on, look though it. The object will appear in the field of view near the red dot.
Focus knob
Figure 7: Detail of the TableTop 90 eyepiece adapter
2.Without moving the main telescope, use the EZ Finder II’s azimuth (left/right) and altitude (up/down) adjustment knobs to center the red dot on the object in the eyepiece.
3.When the red dot is centered on the distant object, check to make sure that the object is still centered in the tele- scope’s field of view. If not,
The EZ Finder II alignment should be checked before every observing session. Choose any distant target (during the day) or bright star (at night), center the object in the telescope’s eyepiece, and then adjust the knobs until the object is cen- tered on the red dot of the reflex sight. (See Figure 5.)
At the end of your observing session, be sure to turn the power knob counterclockwise until it clicks off. When the two white dots on the EZ Finder II’s body and power knob are lined up, the EZ Finder II is turned off.
Replacing the Battery
Replacement
6