
EQ-2M, EQ-1M specifications
The Orion EQ-2M and EQ-1M are two remarkable telescope mounts that cater to both amateur and seasoned astronomers seeking a balance of precision, ease of use, and advanced technology. Designed specifically for astrophotography and visual observation, these mounts provide users with a sturdy and reliable platform to explore the night sky.The Orion EQ-2M is ideally suited for those who are delving into astrophotography. With its robust equatorial design, it allows astronomers to track celestial objects with remarkable accuracy. One standout feature is its GoTo functionality, which relies on a computerized system that can automatically locate thousands of astronomical objects at the touch of a button. This feature is particularly beneficial for beginners who may not yet be familiar with star mapping.
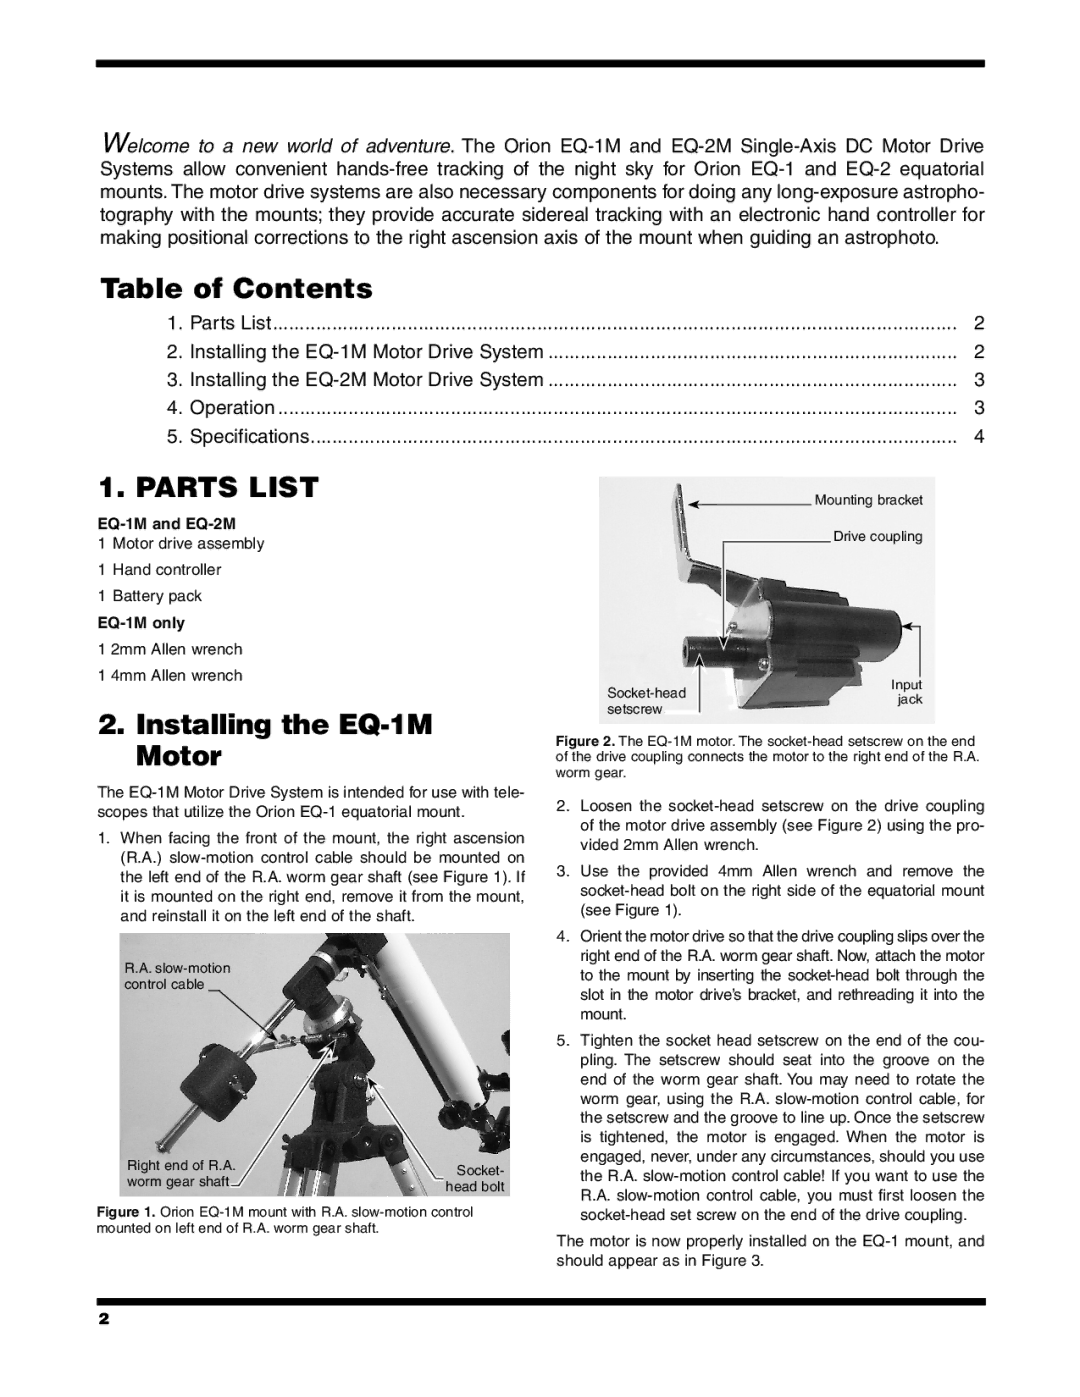
The EQ-1M, on the other hand, presents a more simplified version of equatorial mounting, targeting casual observers and those new to stargazing. While it lacks the GoTo functionality of the EQ-2M, it still provides a smooth and stable platform for astronomical observation. Its lightweight design makes it exceptionally portable, making it easy to set up and transport for a night under the stars.
Both mounts are engineered with high-quality materials that ensure durability and stability. The EQ-2M comes equipped with a motorized drive system that allows for automatic tracking of celestial objects, significantly enhancing the experience for astrophotographers looking to capture long-exposure images without trails. The EQ-1M, while manually operated, still allows for precise movement, making it suitable for traditional visual astronomy.
User-friendly features are paramount in both models. The mounts incorporate easy-to-read settings for altitude and azimuth adjustments. Additionally, the intuitive control panel on the EQ-2M allows users to navigate through various modes and settings effortlessly.
Together, the Orion EQ-2M and EQ-1M serve as excellent tools for the astronomy community. Their respective features cater to different requirements, whether you seek automated tracking capabilities or a straightforward mount. With these models, both beginner astronomers and seasoned observers can engage in celestial exploration with ease, depth, and excitement. Their versatility and user-centric design reflect Orion’s commitment to quality and innovation in the realm of telescopic observation.