learning about your electric griddle
a
b
c
d
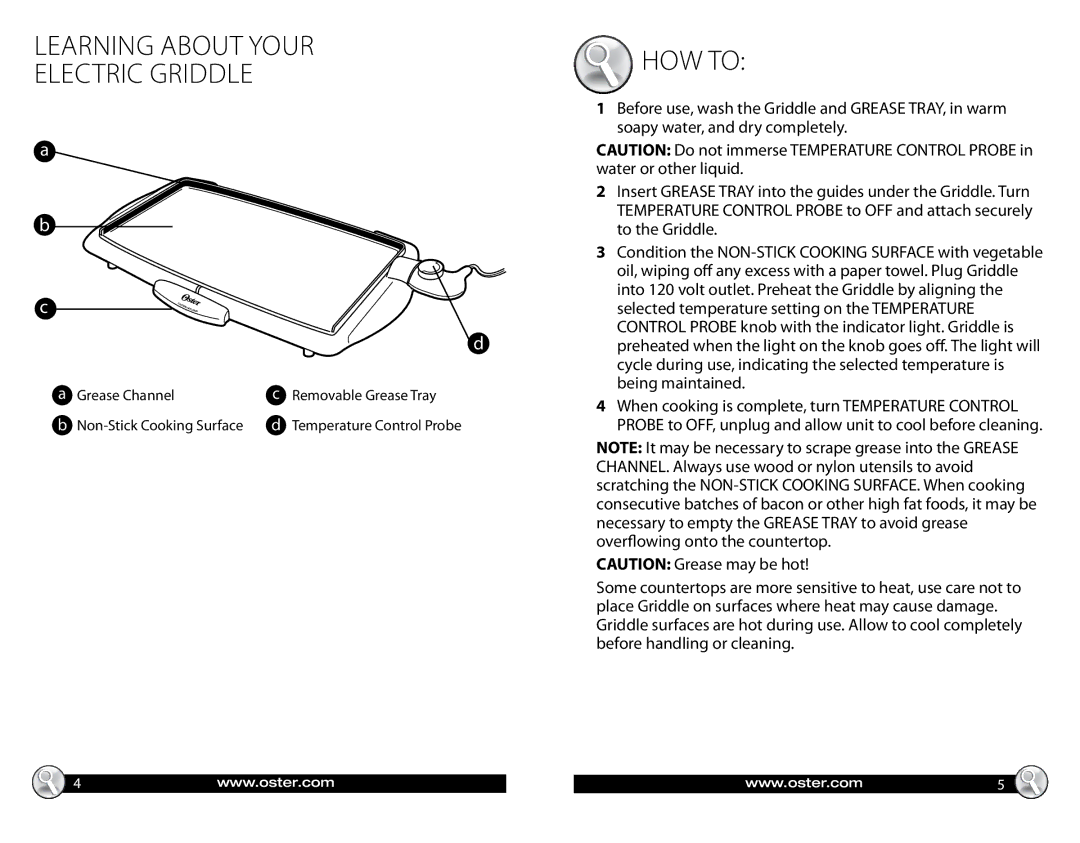
a Grease Channel | c | Removable Grease Tray |
b | d | Temperature Control Probe |
4www.oster.com
 How To:
1Before use, wash the Griddle and GREASE TRAY, in warm soapy water, and dry completely.
CAUTION: Do not immerse TEMPERATURE CONTROL PROBE in water or other liquid.
2Insert GREASE TRAY into the guides under the Griddle. Turn TEMPERATURE CONTROL PROBE to OFF and attach securely to the Griddle.
3Condition the
4When cooking is complete, turn TEMPERATURE CONTROL PROBE to OFF, unplug and allow unit to cool before cleaning.
NOTE: It may be necessary to scrape grease into the GREASE CHANNEL. Always use wood or nylon utensils to avoid scratching the
CAUTION: Grease may be hot!
Some countertops are more sensitive to heat, use care not to place Griddle on surfaces where heat may cause damage. Griddle surfaces are hot during use. Allow to cool completely before handling or cleaning.
www.oster.com5