
153034-000-000, Electronic Control Blender specifications
The Oster Electronic Control Blender, model 153034-000-000, is a standout kitchen appliance designed to elevate your blending experience. Combining advanced technology with user-friendly features, this blender caters to both amateur cooks and culinary aficionados alike.One of the main features of the Oster Electronic Control Blender is its powerful motor, typically boasting around 600 to 1200 watts of blending power. This ensures that tough ingredients, such as ice or frozen fruits, are effortlessly crushed, resulting in smooth and consistent blends every time. The motor’s robust design allows for efficient processing, whether you're making smoothies, soups, or sauces.
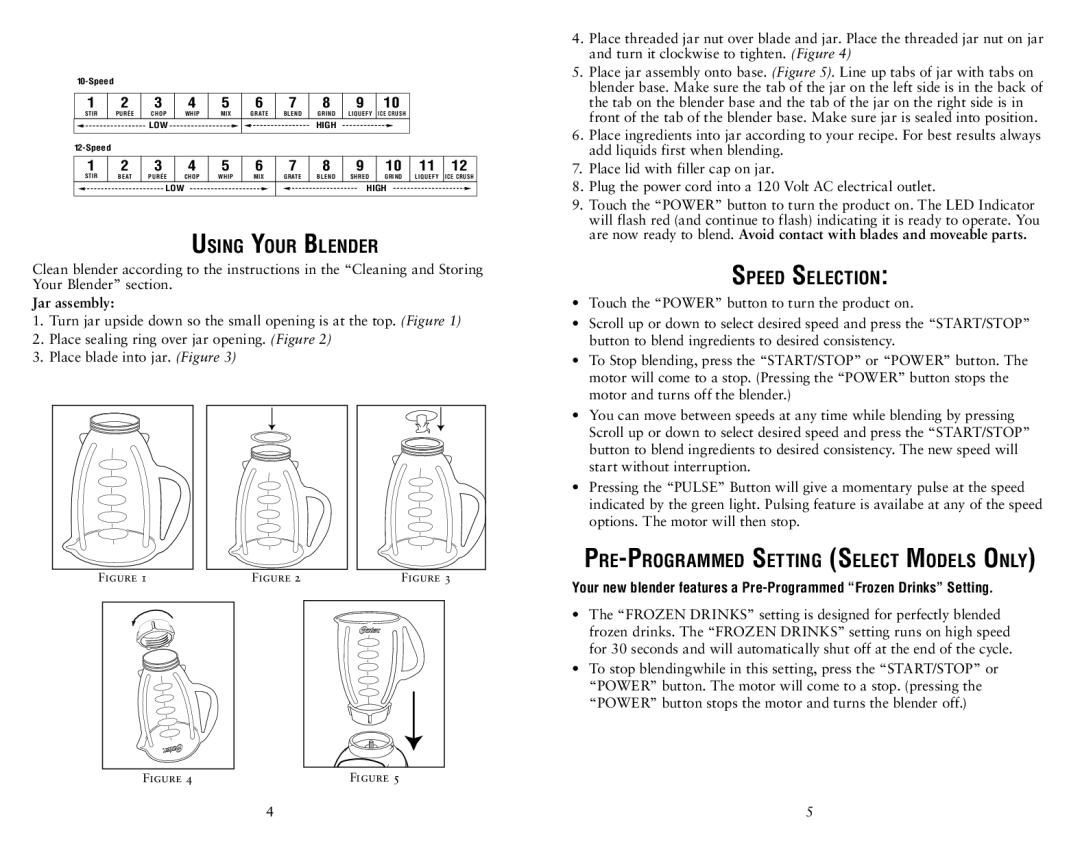
This model incorporates a patented, mounted blade technology that enhances the blending performance. The stainless-steel blades are engineered for durability, allowing them to easily cut through various ingredients. With the ability to blend and chop, users can create a variety of culinary delights, from creamy margaritas to finely chopped salsas.
The Oster Electronic Control Blender is not only powerful but also versatile. It features multiple speed settings, often including pre-programmed settings tailored for different tasks such as ice crushing or smoothie making. This ensures that users can achieve the desired consistency for their recipes with minimal effort. The electronic control panel is intuitive and easy to use, allowing for precise adjustments during blending.
Another noteworthy characteristic of this blender is its large capacity jar. Typically made from durable glass, the jar can hold up to 6 cups, making it ideal for preparing large batches of food. The design often includes measurement markings, aiding in accurate ingredient measurements. Additionally, the jar is typically dishwasher safe, simplifying post-blending cleanup.
Safety is also a priority with the Oster Electronic Control Blender, as it often comes with features such as a safety lock and a non-slip base. These elements help prevent accidents and ensure stability during operation, allowing users to blend with confidence.
Overall, the Oster Electronic Control Blender, model 153034-000-000, stands out in the market for its blend of power, versatility, and user-friendly features. Whether you are preparing a simple smoothie or a gourmet sauce, this blender provides the tools necessary to achieve professional results in the comfort of your own kitchen.