
SPR-060211-334, Panini Maker/Grill specifications
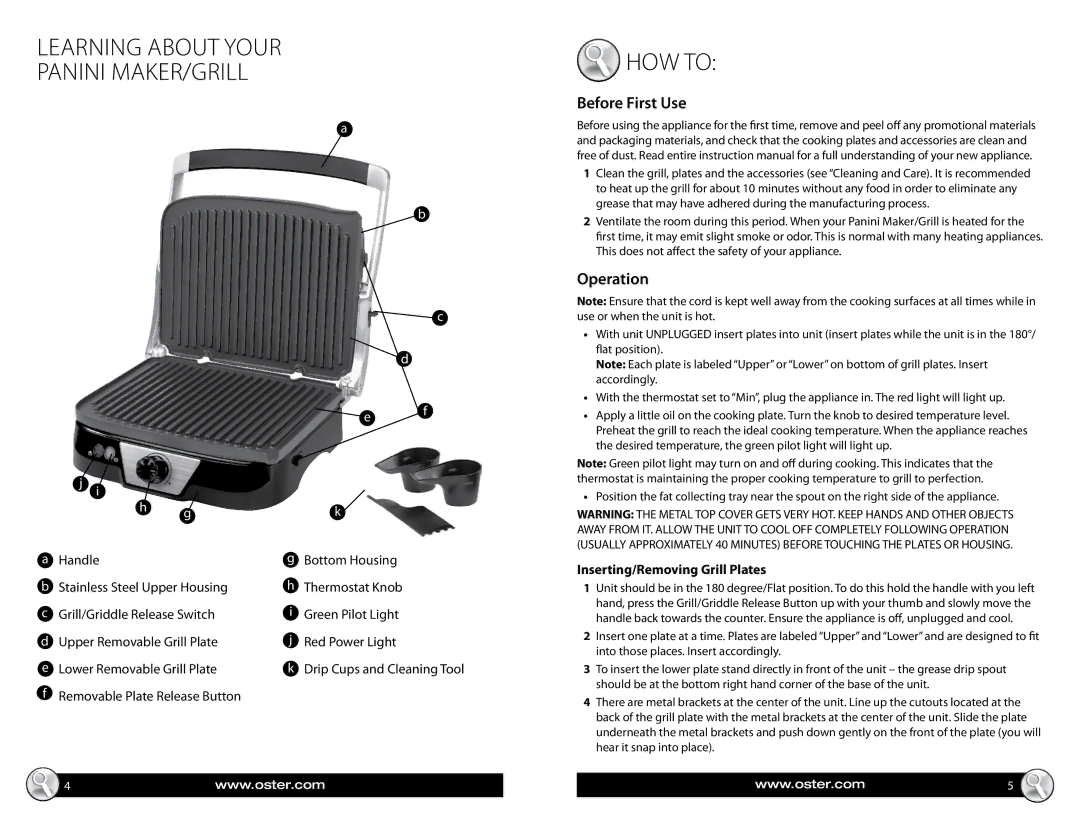
The Oster Panini Maker/Grill SPR-060211-334 is designed to fulfill the needs of panini lovers and grilling enthusiasts alike. This versatile kitchen appliance combines convenience with exceptional performance, allowing you to create delicious, restaurant-style sandwiches and grilled dishes right at home.One of the standout features of the Oster Panini Maker is its large cooking surface, which provides ample space to grill multiple sandwiches simultaneously. The non-stick grill plates ensure that food doesn’t stick, making cleaning up a breeze. This feature is particularly advantageous for those who love to experiment with different ingredients and types of bread.
Equipped with a powerful heating system, the SPR-060211-334 ensures even heat distribution across the grilling surface. This technology not only enhances cooking efficiency but also ensures that each sandwich is evenly toasted and heated to perfection. The adjustable temperature control allows users to customize their cooking experience, providing flexibility for various recipes and personal preferences.
Another notable characteristic of this panini maker is its floating lid design, which accommodates different thicknesses of sandwiches. Whether you’re grilling a thin ciabatta or a thick sandwich stuffed with your favorite ingredients, the lid adjusts effortlessly, ensuring even pressing and toasting.
The Oster Panini Maker is also perfect for more than just sandwiches. Users can grill vegetables, meats, and even make breakfast dishes like omelets or pancakes. This multifunctionality adds to its appeal, making it an indispensable appliance for any kitchen.
Safety and ease of use are critical with the SPR-060211-334 model. The cool-touch handle allows for safe operation while the locking hinge ensures that the lid stays in place during cooking. Additionally, the indicator lights signal when the unit is preheated and ready for use, simplifying the cooking process for even novice chefs.
In conclusion, the Oster Panini Maker/Grill SPR-060211-334 is a reliable and stylish addition to any kitchen. Its thoughtful design, impressive heating technology, and versatility make it a perfect choice for anyone looking to enhance their culinary creations. Whether you’re crafting a perfect panini or exploring new grilling techniques, this appliance delivers quality results that will impress family and friends.