Manuals
/
Outlaw Audio
/
Home Audio
/
Speaker
Outlaw Audio
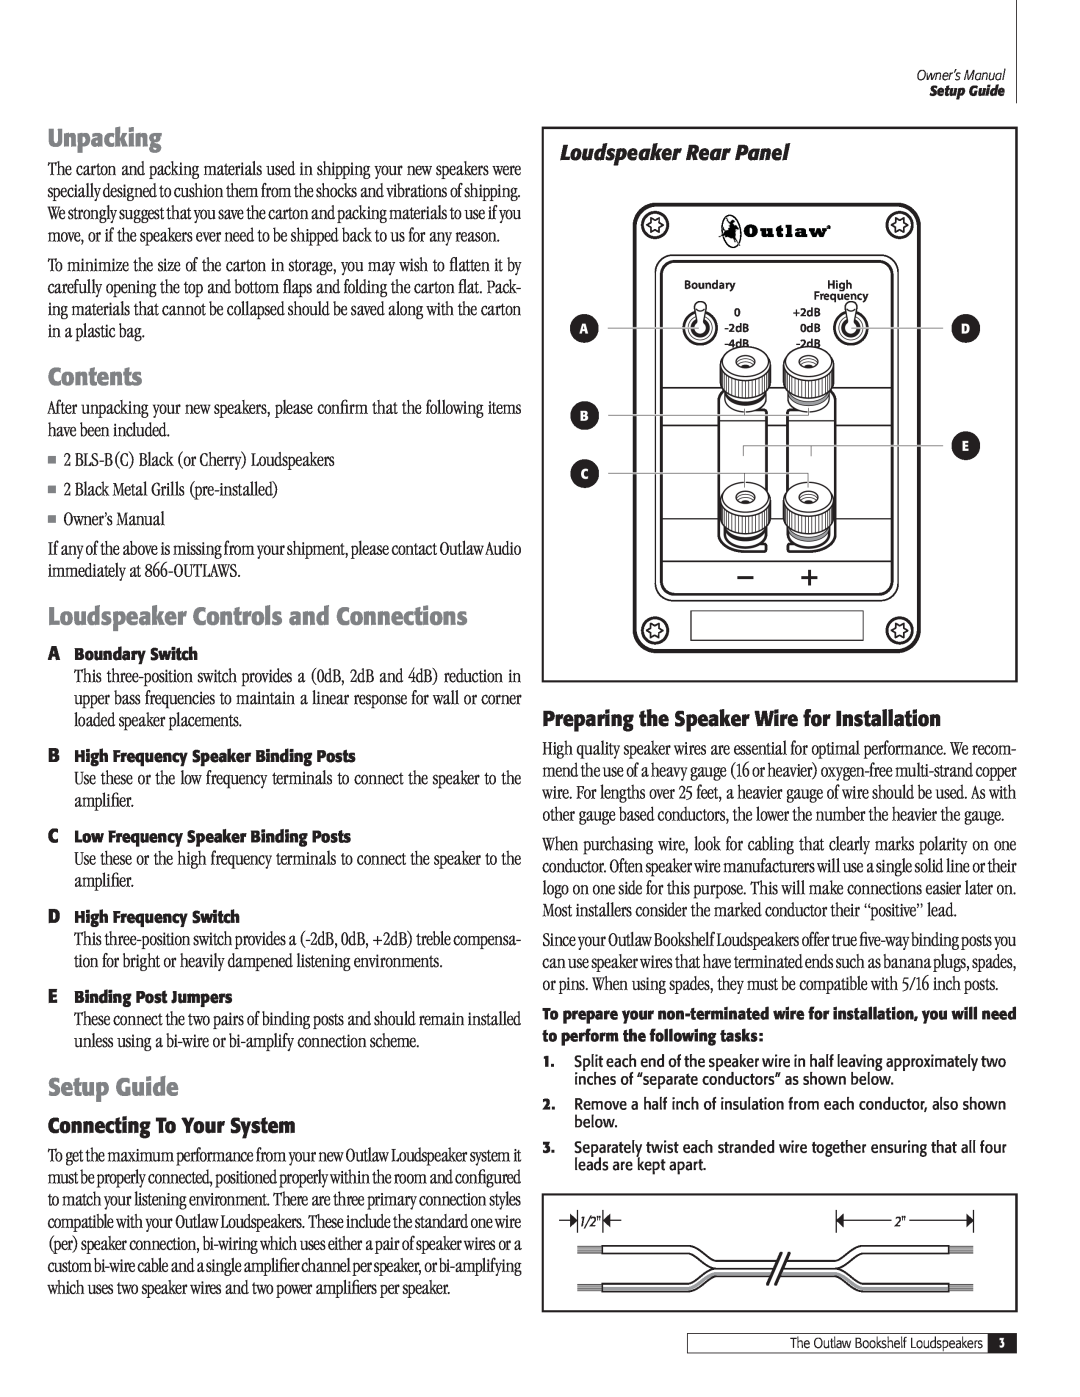
BLS-B(C) Unpacking, Contents, Loudspeaker Controls and Connections, Setup Guide
Models:
BLS-B(C)
1
3
8
8
Download
8 pages
53.15 Kb
1
2
3
4
5
6
7
8
Troubleshooting
Option 2 Bi-Wired Connection
Warranty
External System Adjustments
Page 3
Image 3
Page 2
Page 4
Page 3
Image 3
Page 2
Page 4
Contents
BLS-BC Black and Cherry
The Outlaw Bookshelf Loudspeakers
The Outlaw Bookshelf Loudspeakers BLS-BC Black and Cherry
Table of Contents
Preparing the Speaker Wire for Installation
Contents
Setup Guide
Connecting To Your System
Option Connecting to a system with single speaker wire
Option Connecting to a system in a bi-wire scheme
Option 1 Standard Connection
Option Connecting to a system in a bi-amplify scheme
Option 2 Bi-Wired Connection
Option 3 Bi-Amplified Connection
High Frequency Switch
Notes on Speaker Placement
External System Adjustments
Boundary Compensation Switch
Surround Sound Considerations
Troubleshooting Guide
Specifications
Volume Level
Outlaw Audio Limited Warranty
The Outlaw Audio 30-Day Satisfaction Guarantee
Top
Page
Image
Contents