English
Parts identification
| | |
| |
|
| | |
| | |
|
| |
| |
|
|
| |
| |
|
| |
|
|
| |
|
|
|
|
|
|
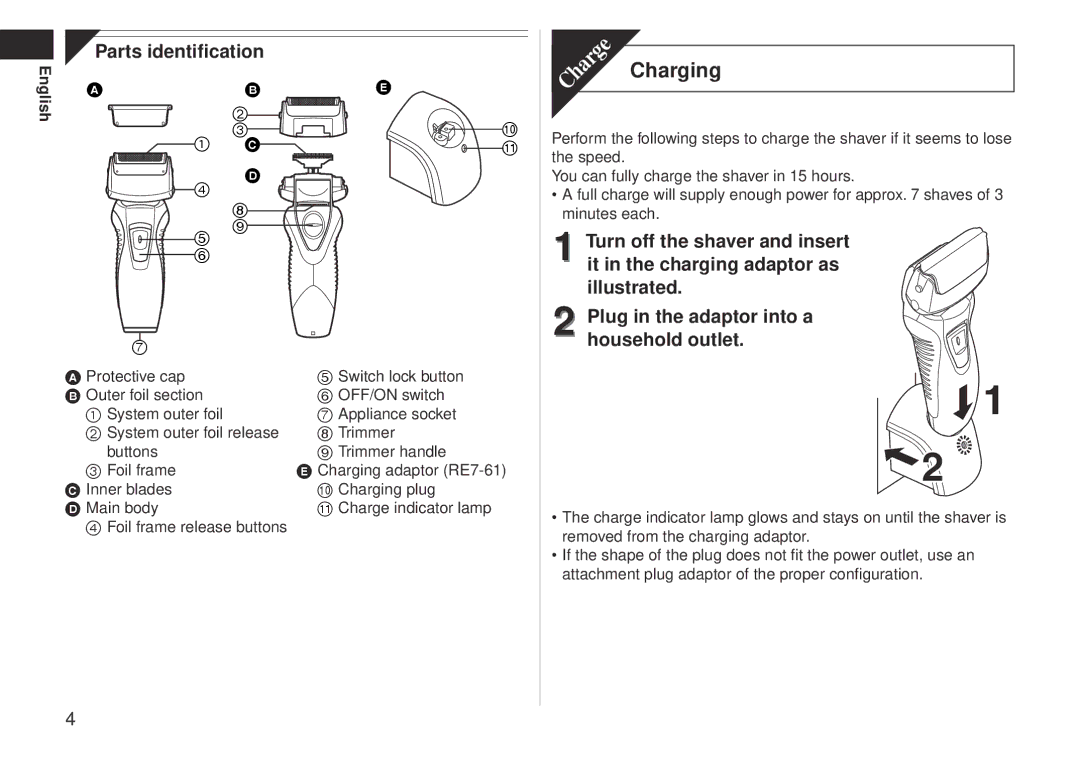
A Protective cap |
| 5 Switch lock button |
B Outer foil section |
| 6 OFF/ON switch |
1 System outer foil |
| 7 Appliance socket |
2 System outer foil release | 8 Trimmer | |
buttons |
| 9 Trimmer handle |
3 Foil frame |
| E Charging adaptor (RE7‑61) |
C Inner blades |
| : Charging plug |
D Main body |
| ; Charge indicator lamp |
4Foil frame release buttons
Charging
Perform the following steps to charge the shaver if it seems to lose the speed.
You can fully charge the shaver in 15 hours.
•A full charge will supply enough power for approx. 7 shaves of 3 minutes each.
1Turn off the shaver and insert it in the charging adaptor as illustrated.
2 Plug in the adaptor into a household outlet.
•The charge indicator lamp glows and stays on until the shaver is removed from the charging adaptor.
•If the shape of the plug does not fit the power outlet, use an attachment plug adaptor of the proper configuration.
