■HOW TO DISASSEMBLE THE MOTOR AND SWITCH.
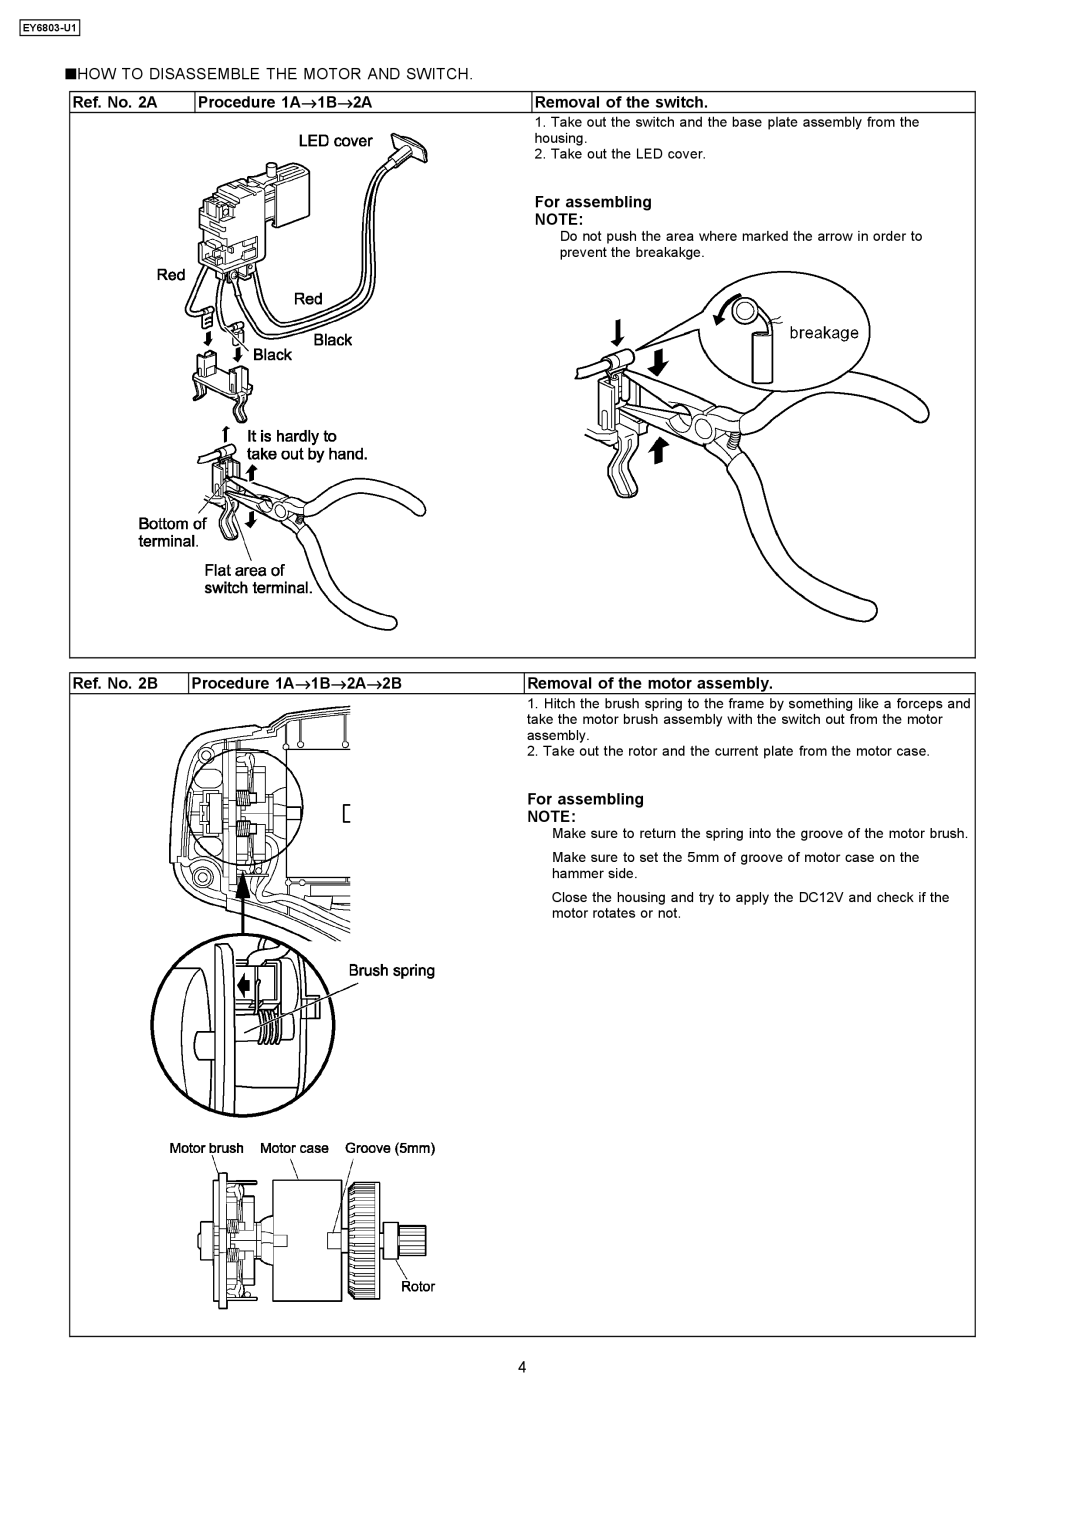
Ref. No. 2A | Procedure 1A→1B→2A | Removal of the switch. | |
|
| 1. | Take out the switch and the base plate assembly from the |
|
| housing. | |
|
| 2. | Take out the LED cover. |
For assembling
NOTE:
Do not push the area where marked the arrow in order to prevent the breakakge.
Ref. No. 2B | Procedure 1A→1B→2A→2B | Removal of the motor assembly. | |
|
| 1. | Hitch the brush spring to the frame by something like a forceps and |
|
| take the motor brush assembly with the switch out from the motor | |
|
| assembly. | |
|
| 2. | Take out the rotor and the current plate from the motor case. |
For assembling
NOTE:
Make sure to return the spring into the groove of the motor brush.
Make sure to set the 5mm of groove of motor case on the hammer side.
Close the housing and try to apply the DC12V and check if the motor rotates or not.
4
