|
|
| INSTALLATION INSTRUCTIONS PN366E |
|
| |||
7 |
|
|
|
|
| 8 |
|
|
|
|
|
|
|
|
| CWST |
|
|
|
|
|
|
|
| U/FTP | Drain Wire |
|
|
|
|
|
|
|
| |
| T568B |
|
| T568A |
|
|
| |
| Cable End 1 |
| Cable End 1 |
|
|
| ||
1 | 2 |
|
| 2 |
|
|
|
|
|
|
|
|
|
|
| ||
|
|
| 1 | A | B | 9 |
|
|
|
|
| 3 |
|
| |||
|
|
|
|
|
|
|
| |
|
|
|
|
|
| 10 | EGJT |
|
| Cable End 2 |
| Cable End 2 |
|
|
| ||
|
|
|
|
|
|
| ||
| 2 |
|
| 2 |
|
|
|
|
|
|
|
|
| 11 |
|
| |
|
|
| 1 |
|
|
|
| |
1 | A | B | A | B |
|
|
| |
|
| 3 |
|
| ||||
|
| 3 |
|
|
|
|
| |
|
|
|
|
|
|
| 12 |
|
|
|
|
|
|
|
|
| |
|
|
|
|
|
|
| KIT |
|
See note 4. |
|
|
|
|
|
| See note 5 | |
REMOVAL STEPS
1 |
2 |
3 |
Notes:
1.For specified performance, follow TIA/EIA
2.Jack Modules can terminate PVC or LSZH rated
3.Jack Modules may be
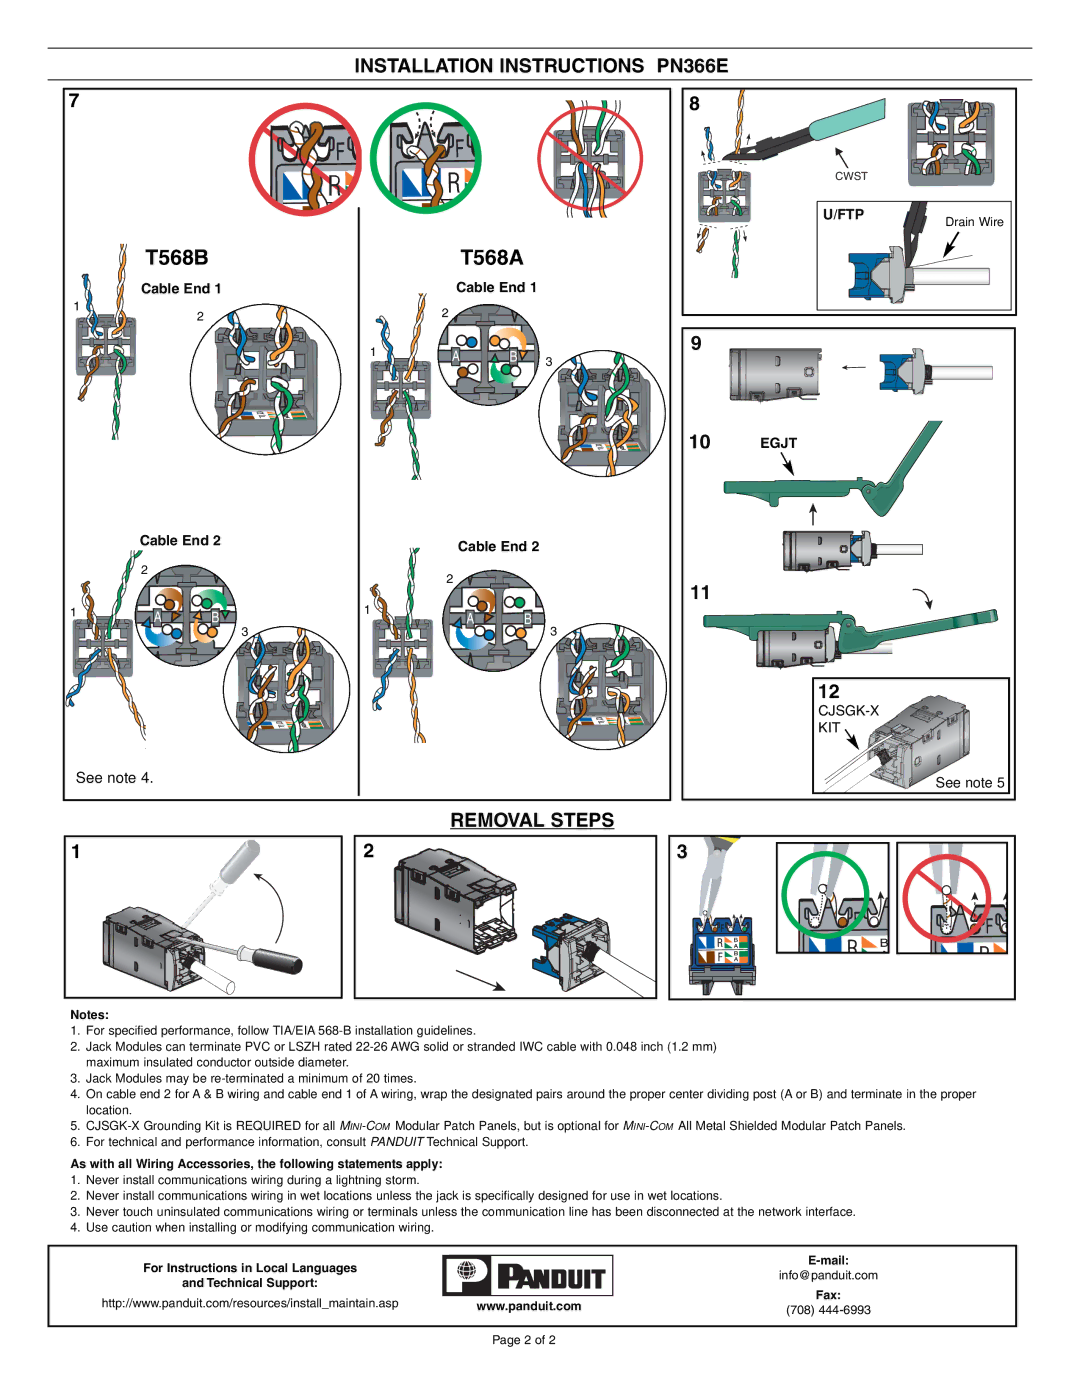
4.On cable end 2 for A & B wiring and cable end 1 of A wiring, wrap the designated pairs around the proper center dividing post (A or B) and terminate in the proper location.
5.
6.For technical and performance information, consult PANDUIT Technical Support.
As with all Wiring Accessories, the following statements apply:
1.Never install communications wiring during a lightning storm.
2.Never install communications wiring in wet locations unless the jack is specifically designed for use in wet locations.
3.Never touch uninsulated communications wiring or terminals unless the communication line has been disconnected at the network interface.
4.Use caution when installing or modifying communication wiring.
For Instructions in Local Languages
and Technical Support:
info@panduit.com
http://www.panduit.com/resources/install_maintain.asp |
| Fax: |
www.panduit.com | (708) | |
|
| |
|
|
|
|
|
|
| Page 2 of 2 |
|
