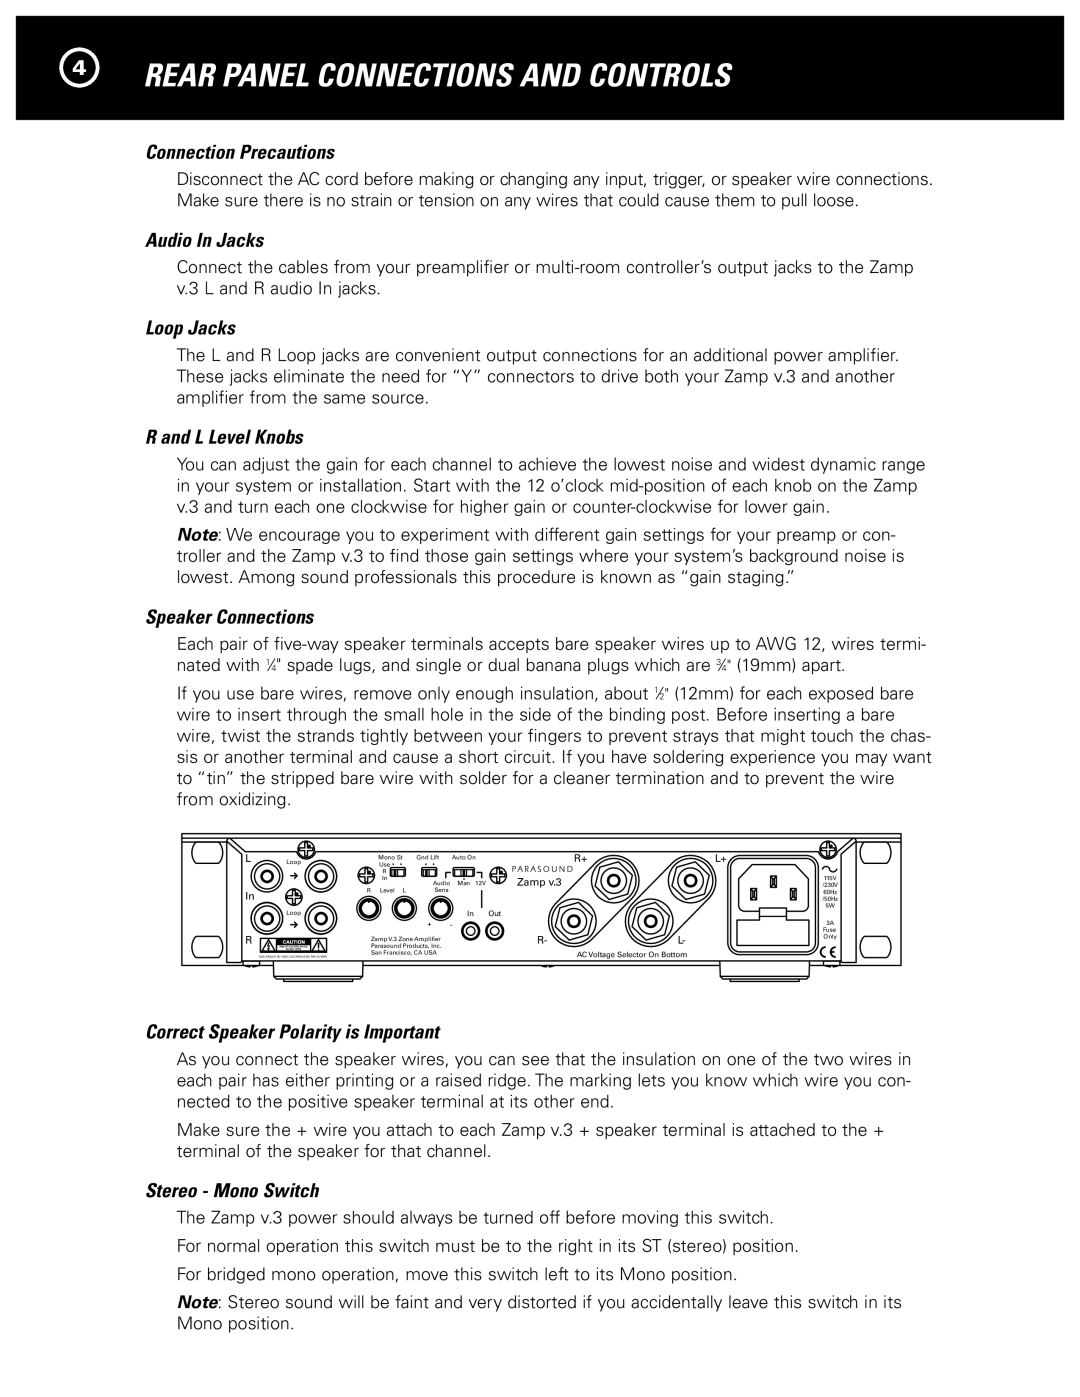
Zamp v.3 specifications
The Parasound Zamp v.3 is a compact yet powerful amplifier designed to deliver excellent audio performance in a variety of settings. Known for its high-quality construction and audiophile-grade sound, the Zamp v.3 is particularly appealing to those who seek a reliable amplifier for smaller spaces or as part of a multi-room audio system.One of the standout features of the Zamp v.3 is its robust power output. With 50 watts per channel into 8 ohms and 75 watts per channel into 4 ohms, this amplifier is capable of driving a wide range of speakers, making it a versatile choice for both home theaters and stereo setups. The unit's Class A/B operation ensures that the sound remains clean and dynamic, providing an immersive listening experience.
The Zamp v.3 also integrates advanced technological features that enhance its functionality. The amplifier is equipped with a high-current power supply that ensures efficient power delivery, reducing distortion even when pushed to higher volume levels. Its dual-transformer design further contributes to the amplifier's ability to deliver sustained sonic performance without sacrificing fidelity.
Additionally, the Zamp v.3 showcases a number of thoughtful design elements aimed at user convenience. It features both unbalanced RCA and balanced XLR inputs, allowing for easy integration into existing audio systems. The rear panel includes a switched AC outlet, making it easy to connect and power other devices, such as source components, without needing multiple outlets.
Another noteworthy characteristic of the Zamp v.3 is its compact size, which allows it to be easily placed on shelves or in tight spaces. Despite its smaller footprint, the amplifier maintains a rugged build quality that ensures durability and long-term reliability.
For added flexibility, the Zamp v.3 incorporates automatic turn-on/off circuitry, making it energy-efficient and user-friendly. This feature allows the amplifier to power down when not in use, reducing energy consumption and extending the lifespan of the unit.
In conclusion, the Parasound Zamp v.3 is an impressive amplifier that combines power, advanced technology, and user-friendly features. Its ability to deliver high-quality sound in a compact form makes it an attractive option for audiophiles and casual listeners alike. Whether used in a simple stereo setup or as part of a larger multi-room system, the Zamp v.3 stands out as a reliable choice that meets the demands of modern audio environments.