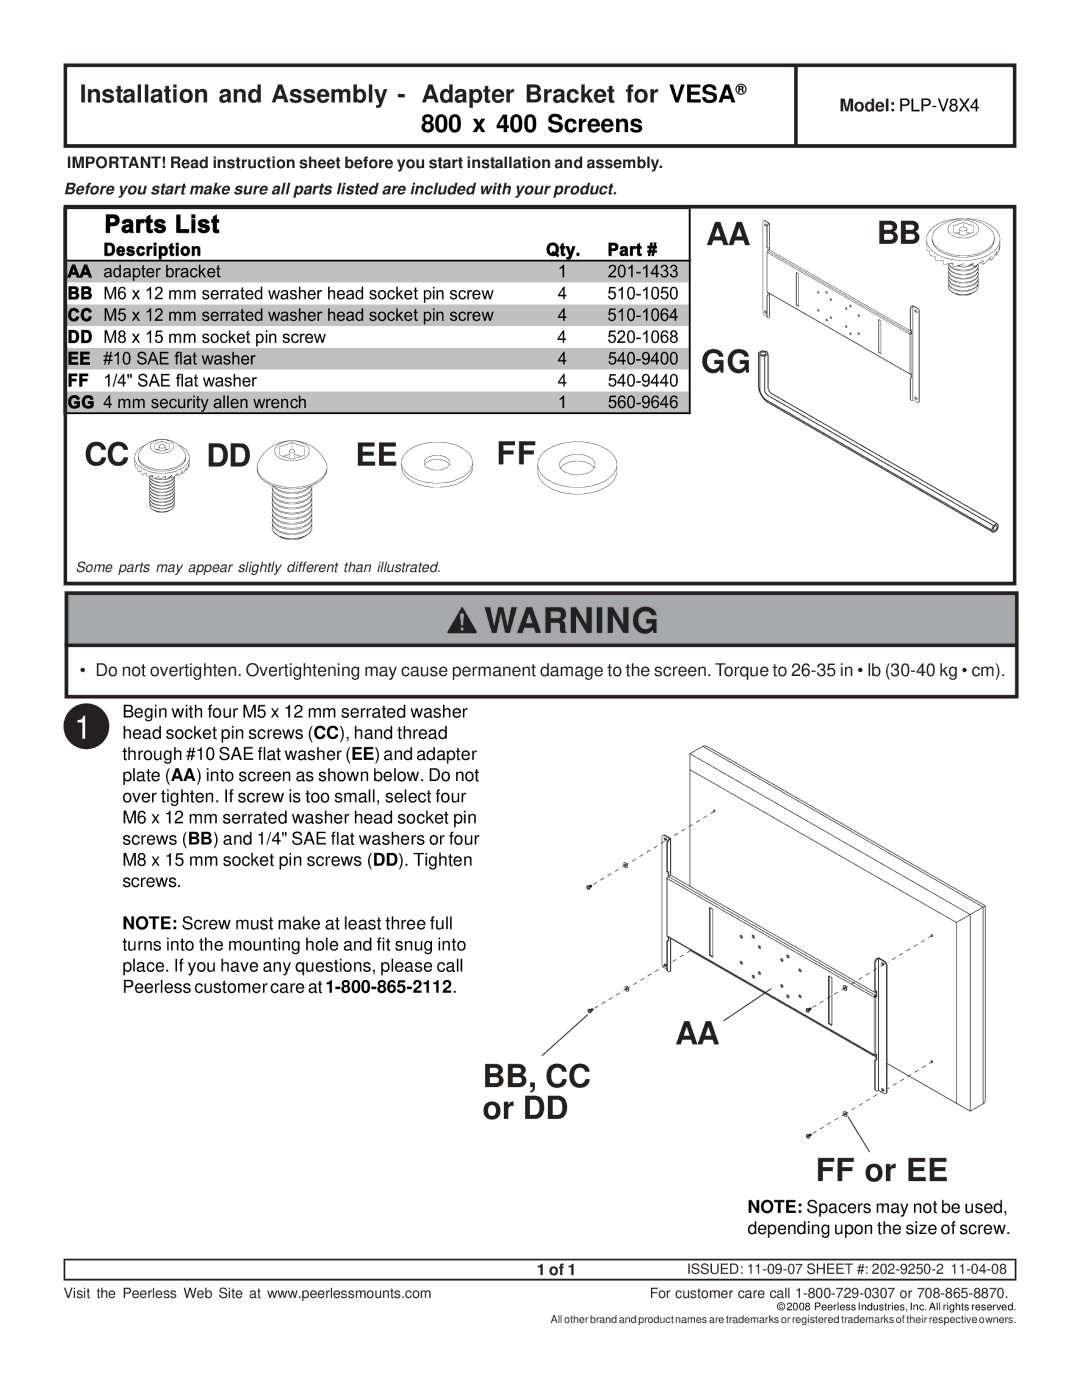
Installation and Assembly - Adapter Bracket for VESA® 800 x 400 Screens
Model: PLP-V8X4
IMPORTANT! Read instruction sheet before you start installation and assembly.
Before you start make sure all parts listed are included with your product.
Parts List
| Description | Qty. | Part # |
AA adapter bracket | 1 | ||
BB | M6 x 12 mm serrated washer head socket pin screw | 4 | |
CC | M5 x 12 mm serrated washer head socket pin screw | 4 | |
DD | M8 x 15 mm socket pin screw | 4 | |
EE | #10 SAE flat washer | 4 | |
FF | 1/4" SAE flat washer | 4 | |
GG | 4 mm security allen wrench | 1 | |
|
|
|
|
AA | BB |
GG |
|
CC DD
DD  EE
EE FF
FF
Some parts may appear slightly different than illustrated.
![]() WARNING
WARNING
• Do not overtighten. Overtightening may cause permanent damage to the screen. Torque to
1 | Begin with four M5 x 12 mm serrated washer |
head socket pin screws (CC), hand thread |
through #10 SAE flat washer (EE) and adapter plate (AA) into screen as shown below. Do not over tighten. If screw is too small, select four M6 x 12 mm serrated washer head socket pin screws (BB) and 1/4" SAE flat washers or four M8 x 15 mm socket pin screws (DD). Tighten screws.
NOTE: Screw must make at least three full turns into the mounting hole and fit snug into place. If you have any questions, please call Peerless customer care at
| AA |
BB, CC |
|
or DD |
|
| FF or EE |
| NOTE: Spacers may not be used, |
| depending upon the size of screw. |
1 of 1 | ISSUED: |
Visit the Peerless Web Site at www.peerlessmounts.com | For customer care call |
© 2008 Peerless Industries, Inc. All rights reserved. All other brand and product names are trademarks or registered trademarks of their respective owners.
