LENS SETUP AND FOCUS PROCEDURES

Video Drive Auto Iris Lens

When a video drive auto iris lens is used, the lens mode selector switch must be set to AIV. Switch the ESC and AGC OFF. Refer to the lens instructions and adjust the lens for the optimum picture (video output level of 1V peak-to-peak). Switch the AGC ON. To focus, fully open the iris by covering the lens with a suitable neutral density (ND*) filter. If the viewed scene is 6.5 feet (2 m) away or farther, set the lens focus to infinity (far). Use the back focus adjustment ring (refer to the Back Focus Adjustment section) and focus on the selected scene. Remove the ND filter and set the lens focus as required.

Direct Drive (DC) Auto Iris Lens

When a direct drive lens is used, the lens mode selector switch must be set to AID. Switch the ESC and AGC OFF. Use an appropriate screwdriver to turn the lens level potentiometer (refer to Figure 1) fully clockwise. Next, slowly adjust the potentiometer counterclockwise until the optimum picture is obtained (video output level of 1V peak-to-peak). Switch the AGC ON. To focus, fully open the iris by covering the lens with a suitable neutral density (ND*) filter. Select the scene to be viewed. If the viewed scene is 6.5 feet (2 m) away or farther, set the lens focus to infinity (far). Use the back focus adjustment ring (refer to the Back Focus Adjustment section) and focus on the selected scene. Remove the ND filter and set the lens focus as required.

Fixed Lens

Set the ESC switch and AGC switch to ON. To focus, set the lens focus to infinity and view a scene greater than

6.5feet (2 m) away. Focus the image with the back focus adjustment ring (refer to the Back Focus Adjustment section). Set the lens focus as required.

Manual Iris Lens

Set the ESC switch and AGC switch to ON. To focus, open the iris fully and set the lens focus to infinity. View a scene greater than 6.5 feet (2 m) away. Focus the image with the back focus adjustment ring (refer to the Back Focus Adjust- ment section). Adjust the lens focus and set the iris for the best picture quality. The largest aperture gives the best light sensitivity, the smallest aperture the greatest depth of field.

Zoom Lens

Set the lens focus to infinity (far) and fully open the iris by covering the lens with a suitable neutral density (ND*) filter. Zoom out to the widest field of vision and view a distant object. Adjust the back focus adjustment ring until the object is in focus (refer to the Back Focus Adjustment section). Next, zoom fully in and adjust the lens focus until the object is again focused. Repeat these steps until the full zoom range may be viewed with the minimum loss of focus.

7


AGC ON

4


4


3

ESC

3

OFF


7


AGC OFF

2


2


1


1


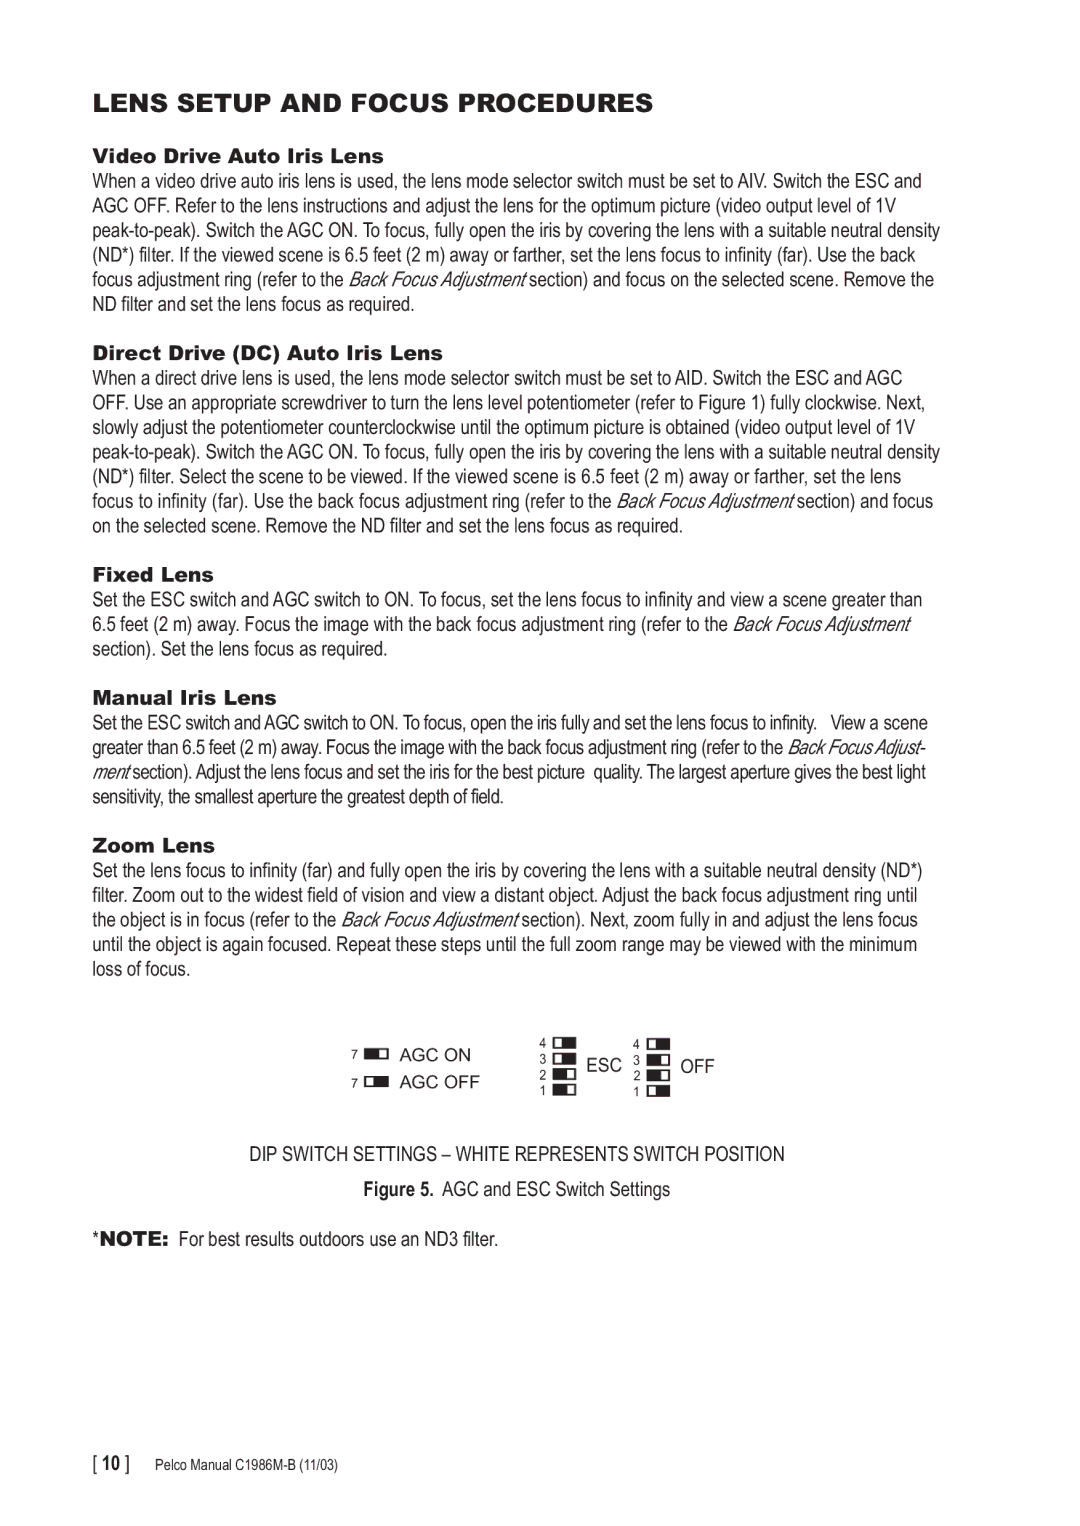
DIP SWITCH SETTINGS – WHITE REPRESENTS SWITCH POSITION

Figure 5. AGC and ESC Switch Settings

*NOTE: For best results outdoors use an ND3 filter.

[ 10 ] Pelco Manual C1986M-B (11/03)

Page 10
Image 10
Pelco CC3700H-2X, CC3700S-2X manual Lens Setup and Focus Procedures

CC3700S-2X, CC3700H-2X, CC3700H-2 specifications

Pelco's CC3700H-2, CC3700H-2X, and CC3700S-2X are sophisticated cameras that embody the cutting-edge of surveillance technology, designed to meet the varying needs of modern security applications. Each model features robust specifications that cater to both indoor and outdoor installations, making them versatile tools for enhancing safety and security.

The CC3700H-2 model is a high-definition fixed camera that supports 1080p resolution, ensuring that users receive crisp and clear imagery. It utilizes advanced imaging technology, including a 1/3" progressive scan CMOS sensor, which allows for better light sensitivity and reduced noise in low-light conditions. This model is equipped with a wide dynamic range (WDR), which balances brightness and contrast in challenging lighting situations, enabling it to capture details in both bright and dark areas simultaneously.

The CC3700H-2X is an enhanced version of the CC3700H-2, featuring the same image quality enhancements but with the addition of intelligent video analytics. This model includes functionalities such as motion detection, line crossing, and intrusion detection, providing users with actionable alerts and minimizing the need for constant monitoring. With its built-in analytics, the CC3700H-2X can help organizations streamline their surveillance efforts and improve response times.

Meanwhile, the CC3700S-2X represents a more specialized option, designed for installations requiring seamless integration with various Pelco systems. It offers dual-stream functionality, allowing users to stream high-definition video simultaneously to different destinations or applications. This ensures that the camera can serve both real-time monitoring and recording with optimal bandwidth management.

All three models are equipped with Pelco's Smart Compression technology, which effectively reduces the storage requirements without compromising video quality. They also feature IP66-rated weatherproof housing, ensuring durability against harsh environmental conditions while maintaining operational reliability.

In summary, the Pelco CC3700 series combines high-definition imaging, advanced analytics, and robust construction, making it an excellent choice for businesses and organizations looking to enhance their security systems. Whether opting for the standard model or one enhanced with analytics capabilities, users can expect dependable performance and superior image quality that precisely meets their surveillance needs.