INSTALLATION
1Mount the Enclosure
Determine the mounting location. Attach the enclosure as follows:
1.Remove the enclosure from the cradle by loosening the screw clamps on the stainless steel straps.
2.Attach the cradle to the mounting surface (mount, pan/tilt, etc.).
3.Center the enclosure on the cradle and secure it with the stainless steel straps.
2Connect Cooling Systems
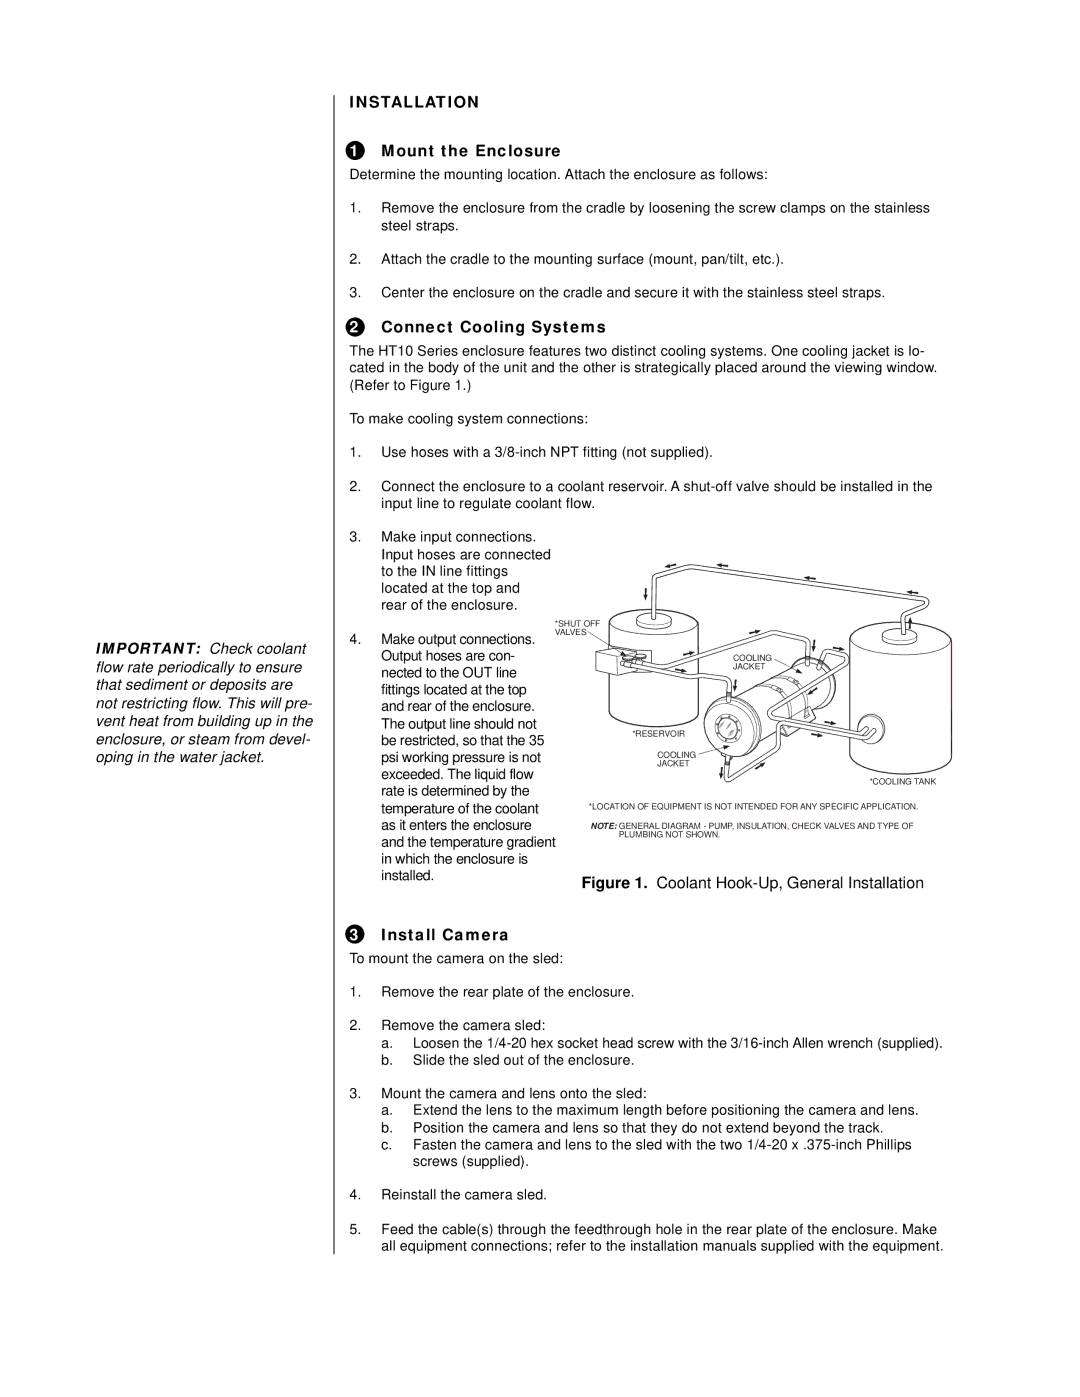
The HT10 Series enclosure features two distinct cooling systems. One cooling jacket is lo- cated in the body of the unit and the other is strategically placed around the viewing window. (Refer to Figure 1.)
To make cooling system connections:
1.Use hoses with a
2.Connect the enclosure to a coolant reservoir. A
IMPORTANT: Check coolant flow rate periodically to ensure that sediment or deposits are not restricting flow. This will pre- vent heat from building up in the enclosure, or steam from devel- oping in the water jacket.
3.Make input connections. Input hoses are connected to the IN line fittings located at the top and rear of the enclosure.
4.Make output connections. Output hoses are con- nected to the OUT line fittings located at the top and rear of the enclosure. The output line should not be restricted, so that the 35 psi working pressure is not exceeded. The liquid flow rate is determined by the temperature of the coolant as it enters the enclosure and the temperature gradient in which the enclosure is installed.
3Install Camera
To mount the camera on the sled:
COOLING
JACKET
*RESERVOIR
COOLING
JACKET
*COOLING TANK
*LOCATION OF EQUIPMENT IS NOT INTENDED FOR ANY SPECIFIC APPLICATION.
NOTE: GENERAL DIAGRAM - PUMP, INSULATION, CHECK VALVES AND TYPE OF PLUMBING NOT SHOWN.
Figure 1. Coolant Hook-Up, General Installation
1.Remove the rear plate of the enclosure.
2.Remove the camera sled:
a.Loosen the
b.Slide the sled out of the enclosure.
3.Mount the camera and lens onto the sled:
a.Extend the lens to the maximum length before positioning the camera and lens.
b.Position the camera and lens so that they do not extend beyond the track.
c.Fasten the camera and lens to the sled with the two
4.Reinstall the camera sled.
5.Feed the cable(s) through the feedthrough hole in the rear plate of the enclosure. Make all equipment connections; refer to the installation manuals supplied with the equipment.