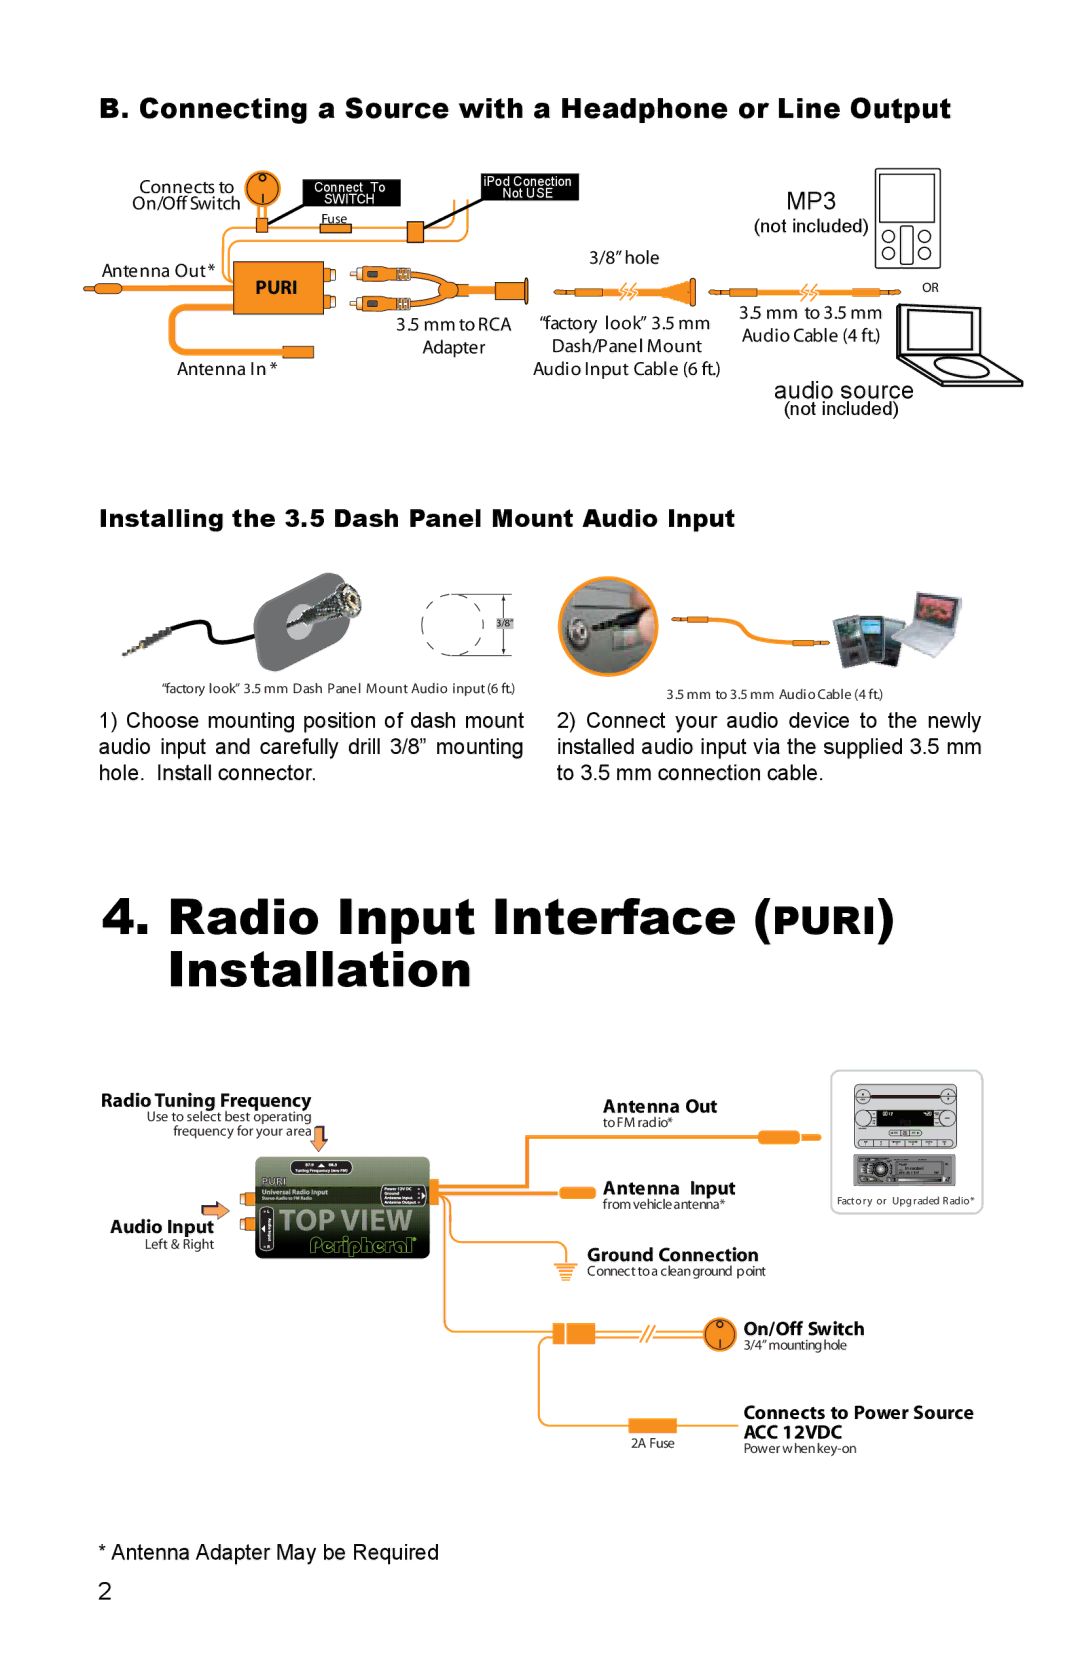
B. Connecting a Source with a Headphone or Line Output
Connects to | Connect To | iPod Conection | |
Not USE | |||
On/Off Switch | SWITCH |
|
|
| Fuse |
|
|
Antenna Out* |
|
| 3/8” hole |
|
|
| |
PURI |
|
|
|
|
| 3.5 mm to RCA | “factory look” 3.5 mm |
|
| Adapter | Dash/Panel Mount |
Antenna In * |
|
| Audio Input Cable (6 ft.) |
MP3
(not included)
OR
3.5mm to 3.5 mm Audio Cable (4 ft.)
audio source (not included)
Installing the 3.5 Dash Panel Mount Audio Input
3/8”
“factory look” 3.5 mm Dash Panel Mount Audio input (6 ft.)
3.5 mm to 3.5 mm Audio Cable (4 ft.)
1)Choose mounting position of dash mount audio input and carefully drill 3/8” mounting hole. Install connector.
2)Connect your audio device to the newly installed audio input via the supplied 3.5 mm to 3.5 mm connection cable.
4.Radio Input Interface (PURI) Installation
Radio Tuning Frequency | |
Use to select best operating | |
frequency for your area | |
Audio Input | TOP VIEW |
Left & Right |
|
Antenna Out toFM radio*
Antenna Input
from vehicle antenna* | Factory or Upgraded Radio* |
|
Ground Connection
Connect toa cleanground point
|
|
|
| On/Off Switch |
|
|
|
| |
|
|
|
| 3/4” mountinghole |
|
|
|
| Connects to Power Source |
|
|
|
| ACC 12VDC |
|
| 2A Fuse | ||
|
| Power | ||
|
|
|
| |
* Antenna Adapter May be Required
